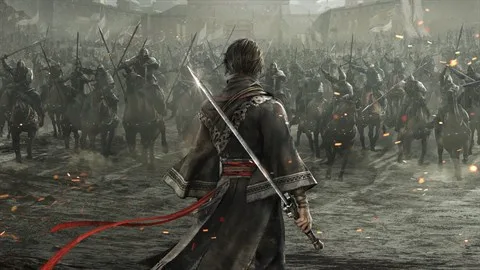
Welcome to Dynasty Warriors: Origins, the latest installment in the legendary action RPG series. Prepare to dive into the chaotic Three Kingdoms period, where you’ll engage in thrilling third-person combat, mastering weapon types and RPG progression as you carve your path through history. Whether you're a seasoned veteran or new to the Musou genre, Origins offers a rich story and intense battles.
This guide is your essential companion to conquering ancient China. We’ll walk you through everything from basic controls and understanding weapon stats to tackling pivotal missions like Hulao Gate and Guandu. Struggling to achieve Gold Medals or unlock all the Steam Achievements? We’ve got you covered with expert strategies to ensure you master every aspect of the game and emerge victorious.
Weapon attribute, Gem, Accessories, and items
Master Dynasty Warriors: Origins gear! Discover the best weapon attributes, essential gems (Vortex, Wellspring, Oblivion), and top accessories (Shells, Talons, Discs) for ultimate combat effectiveness.
This guide details the most effective weapon attributes, gems, accessories, and items for Dynasty Warriors: Origins, helping you optimize your loadout for various combat scenarios.
Weapon Forge Attributes
When forging weapons, aim for a combination of the following attributes, keeping in mind that a weapon can have a maximum of 6. Attributes 1-3 are generally useful for most weapons (except 3 on Lance). Attribute 4 (extended parry window) is highly recommended for consistent parrying. Attribute 5 (Strong attack damage or Charge Strong attack damage) is clutch for specific weapons like the Podao. Wushu damage (+10% Fortitude damage) and Assault damage (+10%) are beneficial, especially for weapons that struggle against multiple enemies. Weapon drop rate is essential for farming new weapons. Choose your attributes wisely based on the weapon type and your playstyle.
- 01. Dmg to officer + 10%
- 02. Dmg + 10%, def -5%
- 03. Bravery gain + 10%
- 04. Extends the input window for Parries/Perfect Evade
- 05. Strong attack dmg + 10% or Charge Strong attack dmg + 15%
- 06. Assault dmg + 10%
- 07. Wushu damage + 10% (Fortitude damage)
- 08. Charge time - 33%
- 09. Battle arts damage + 10%
- 10. Increase weapon drop rate
- 11. + 30% attack after a perfect evade (lasts ~5 secs)
Recommended Accessories and Gems
Gems can be swapped during stages to adapt to the situation.
- Vortex Gem: Ideal for small skirmishes and duels, especially with weapons that have easy air combos, due to its strong 40% extra damage.
- Wellspring Gem: Recommended for large armies. It heals you while you defeat thousands of peons, compensating for damage taken.
- Oblivion Gem: A good choice if you are skilled and don't need Wellspring's healing. It increases weapon range, leading to more enemies hit, thus boosting bravery and musou gauge.
For accessories, the Divine Turtle Shell is a good starting point, later replaced by the Chimera Shell for increased sturdiness. Other useful accessories include Iron Arm Guards for defense, Red Dragon's Talon (increases musou gauge accumulation), Dragon Spleen (Lance only), Disc of Huanglong (reduces Bravery requirement for Battle Arts), and Lion Fang (+15% base attack).
The Red Dragon Talon is available in Chapter 5. The Disc of Huanglong, unlocked by achieving level 3 peace in all provinces, is a permanent end-game accessory. A common end-game setup is Disc of Huanglong + Chimera Shell for most weapons, offering a significant offensive boost and survivability.
Recommended Items
Items can significantly reduce game difficulty, especially in Ultimate Challenge missions. You have 3 additional item slots besides meat buns. Prioritize items that increase damage output for timed challenges.
- General Use: Strength Potion, Stamina Potion/Pills/Powder. A common setup is 2x Stamina consumables + Strength Potion.
- Timing-Restrictive Challenges: Stamina Potion, Treatise of Tactics, and Musou Bond/Panacea. You can even use both Musou Bond and Panacea, omitting the Stamina Potion.
Mix and match items to find what best suits your needs.
Glossary
Understand Dynasty Warriors: Origins combat with this glossary covering terms like N, S, Launch, Battle Arts, and Super Armor.
Terms Explained:
- N: Normal attacks.
- S: Strong attack.
- Nx: Refers to using the normal attack string 'x' number of times. For example, Nx5 means performing a normal attack 5 times consecutively.
- Launch: Use a move that knocks the enemy into the air.
- B+S: Hold Block + Strong attack.
- E+S: Evade (or dodge) then perform a Strong attack.
- PA: Parry.
- PE: Perfect Evade.
- BA: Battle Arts.
- Ultimate/Finisher BA (Battle Arts): These are high cost, high damage Battle Arts, typically the last ones unlocked in a weapon's ranking tree.
- AoE (Area of Effect): A move that can hit multiple targets within a specific area.
- Super Armor: After enemy officers recover from your combo, they enter a Super Armor state where they will not take fortitude damage during their attacks. You must make them vulnerable again with a parry (PA) or counter, or wait for them to finish their attack animation.
Basic combat mechanics
Learn the core combat mechanics of Dynasty Warriors: Origins, including parries, evades, battle arts, officer attack patterns, and managing enemy morale and fortitude.
Dynasty Warriors: Origins features significantly enhanced combat systems compared to its predecessors, incorporating parries, evades, perfect evades, and blocks, alongside special moves known as battle arts. This elevates the gameplay to feel more like a dedicated action game while retaining the signature 1 vs 1000 style. The game also offers 10 unique weapons, each with distinct playstyles, encouraging diverse combos and battle art setups to maintain freshness.
Soldiers and Officers:
Peons/soldiers are the numerous, less threatening enemies that serve as a resource to charge your Bravery and Musou gauges. Prioritize engaging officers while using peons for replenishment. While most soldiers are non-threatening, specialized units like Chariots and Cavalry can be disruptive. Be aware of Orange power attacks from soldiers in large groups; these cannot be blocked and must be countered with special attacks (like Palm Strike or Power Shot) or evaded. Successfully countering these interrupts the enemy, creating an opening for an invulnerable Assault attack (Strong attack button).
Officer Attack Patterns and Skills:
Officers act as mini-bosses with varied attack patterns. Key indicators include:
- White Aura: Indicates attacks with super armor, making officers immune to staggers from normal attacks and most battle arts. These attacks can be blocked, parried, evaded, or perfectly evaded.
- Glowing Orange Aura: Denotes dangerous attacks that cannot be blocked or parried. These must be evaded or countered with specific Sp. battle arts or certain strong attack combos.
- Red Attacks: These can only be evaded or interrupted by Musou attacks or very specific battle arts. Evading is generally the safest option.
- Musou Rage: Named officers can enter a Musou rage, unleashing a massive area-of-effect attack. This can be stopped by depleting their Fortitude, or by evading or running out of its considerable range.
Officer Fortitude and Morale:
Fortitude is represented by a shield icon above an officer's health bar. Depleting it forces officers into a kneeling state, allowing for a powerful Assault attack. Some weapons excel at breaking Fortitude, making it a viable strategy. Enemy officers can be in a high or low morale state. High morale increases their stats and adds Red Fortitude. Morale can be lowered by fulfilling Grand Tactic requirements during large army combat or by using your own Tactics. Low morale significantly reduces enemy stats and Fortitude, making them easier to defeat.
Combat Basics:
When encountering officers, adopt a defensive stance initially, using evade, block, parry, or counters. Once an officer finishes an attack sequence or is parried/countered, they enter a vulnerable state where your attacks can stagger them, combo them, and deal Fortitude damage. This vulnerable window is temporary.
- Normal Recovery: Officers recovering normally have a quick recovery time. A single Nx1 attack is often sufficient to initiate their vulnerable state.
- After Parry: The vulnerable window is longer after a successful parry, often negating the need for an initial Nx1 poke.
- After Counter: Enemies are downed for an extended period after a counter, allowing for longer combos.
The duration of combos and the enemy's recovery speed vary based on the situation. Enemies also enter a recovery phase where they will not take additional Fortitude damage from normal and strong attacks and cannot be launched.
Tactics
Learn how to effectively use Tactics in Dynasty Warriors: Origins, including unlocking new abilities, maximizing their effects, and strategies for tough encounters like Lu Bu.
Tactics are a powerful new mechanic in Dynasty Warriors: Origins, offering significant advantages if used correctly. While they have long cooldowns, items can reduce this. New Tactics are unlocked as you progress and increase your bodyguard count, which can be further expanded through Ultimate Challenges.
Many Tactics have an additional benefit called Dramatic Success, triggered under specific conditions or, in some cases, simply by using the Tactic (like Battle Roar). Tactics can also interrupt enemy attacks, which is make-or-break for staggering powerful foes like Lu Bu out of his dangerous Red attacks.
Useful Tactics:
- Ceaseless Fury: Effective against Lu Bu at Xia Pi to interrupt his Red Attacks, such as his grab.
- Stone Throw (29): Deals 3 Fortitude damage and unlocks at 29 guards. Excellent for destroying enemy Fortitude and remains useful for a long time.
- Cavalry Charge (auto): The first Tactic that lowers enemy morale. To achieve its Dramatic Success, it must hit an officer near the end of their charge, so use it from a distance.
- Battle Roar (38): The second Tactic to lower enemy morale, though its effect is short-lived. Use it until you unlock more advanced Tactics.
- Catapult Barrage (44) and Chariot Charge (47): These are the strongest Tactics available and should be equipped as soon as they are unlocked.
- Volley/Fire Volley/Charge: Decent until better Tactics are available. Their Dramatic Success is highly map-dependent, so don't focus on triggering it.
Other Tactics are suitable as backups or for specific situations, such as Order to Defend/Protect.
Personal Setup Example:
- Stone Throw (later replaced by Catapult Barrage)
- Battle Roar (later replaced by Chariot Charge)
- Cavalry Charge
- Charge and Ceaseless Fury (specifically for Lu Bu)
How to maximize their effects:
Tactics that reduce enemy morale or courage are the most effective. For timed Ultimate Challenges, use Treatise of Tactics at the start of the stage so your Tactics are ready by the time you face the boss. First, use Tactics to lower enemy morale, then unleash your strongest battle arts, activate Musou Rage, and continue combos. After this, use a Panacea, redeploy Tactics, and repeat the process.
Note: If using Musou Bond instead of Panacea, deploy Tactics before switching to your partner, as you cannot use Tactics after switching.
With the right items and Tactics, most Ultimate Challenges can be overcome. An exception is the fight against Lu Bu at Xia Pi, where items are disallowed, but Tactics can still be used. Refer to the Lu Bu section for more details.
Similar guides you might like






100% Human-Written. Community Verified. Learn how Ludo.guide verifies content