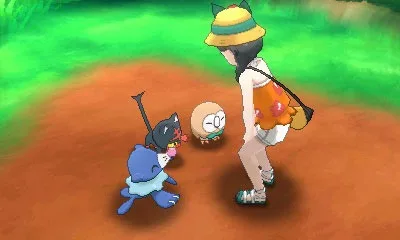
Welcome to Alola! In Pokémon Ultra Sun and Ultra Moon, you'll embark on an epic RPG adventure across a vibrant region, mastering battle mechanics and uncovering secrets. This is your chance to become a true Pokémon Master as you navigate the islands and challenge your rivals.
This guide is here to help you conquer every aspect of your journey. We'll cover everything from the basics of controlling your character and preparing for your adventure to navigating the main walkthrough. Whether you're aiming to catch 'em all or just want to ensure you don't miss any crucial steps, we've got you covered.
Main Walkthrough
Your essential guide to Pokémon Ultra Sun and Ultra Moon! Get step-by-step instructions and tips for the main walkthrough, covering everything you need to know to progress.
Hey there! Welcome to the main walkthrough for Pokémon Ultra Sun and Ultra Moon. This guide is designed to help you through the game, assuming you've got a handle on the basics like healing and catching Pokémon. Think of me as your experienced friend guiding you through Alola.
A couple of quick notes before we dive in: This guide uses internal hyperlinks – if you see something in blue, click it for more info and hit Backspace to return here. I played the Moon version with Rowlet as my starter, so some Sun version or different starter details might be a bit sparse, but the core info should be solid. Also, we'll use '$' for currency. One more thing: the camera can be a bit wild, so when I say 'east' or 'west,' I mean relative to where the camera is looking, as if it were always facing north. Let's get started!
This section covers the core progression of your adventure. We'll be moving through the islands, facing challenges, and uncovering the story of Alola.
- 1Beginning Your Journey on Melemele Island: You'll start your adventure in your house in Hau'oli City. After the initial scenes and meeting your Mom, head outside. Your first task is to meet your rival, Hau, and Professor Kukui. Follow the on-screen prompts to head towards Iki Town.
- 2The First Trial: Upon arriving in Iki Town, you'll participate in your first Pokémon battle. This is a great chance to get a feel for combat. After the battle, you'll receive your starter Pokémon and the Z-Ring.
- 3Route 2 and Verdant Cavern: From Iki Town, you'll head south onto Route 2. Your goal here is to reach Verdant Cavern for your first official Island Trial. You'll encounter wild Pokémon and trainers along the way, so be sure to level up your team.
- 4The Grand Trial: After completing the trials on each island, you'll face a Grand Trial. These are tougher battles against the Island Kahunas. Prepare your team well for these!
- 5Journeying Through Alola: The walkthrough will guide you through each island – Melemele, Akala, Ula'ula, and Poni – detailing the main story beats, important trainer battles, and key locations.
- Always keep a balanced team with different types to handle various opponents.
- Don't forget to explore! There are often hidden items and side quests that can help you out.
- Talk to NPCs – they often give hints or useful items.
- Pay attention to the move descriptions and Pokémon stats to make strategic decisions in battle.
Completing the main walkthrough will allow you to experience the full story of Pokémon Ultra Sun and Ultra Moon, unlock post-game content, and become the Champion of the Alola region!
Controls
Navigate the world of Pokémon Ultra Sun and Ultra Moon with ease! This guide breaks down every control for overworld, menus, bag, Poke Ride, and Poke Finder.
Alright, let's get you up to speed on how to actually play Pokémon Ultra Sun and Ultra Moon! It might seem like a lot at first, but once you know what button does what, you'll be zipping around Alola like a pro. We'll cover the main ways you'll be interacting with the game: when you're just walking around, when you're digging through menus, and when you're using special features like Poke Ride.
Here's a breakdown of the controls for each situation:
Overworld Controls
| Control | Function |
| A | Use/Interact |
| B | Cancel/Hold and use Circle Pad to run |
| X | Opens/Closes Main Menu |
| Y | Opens Poke Ride Menu |
| Start | No Use |
| Select | No Use |
| Up | Ride a Pokemon Registered to this button (use the Poke Ride menu to do so) |
| Down | Ride a Pokemon Registered to this button (use the Poke Ride menu to do so) |
| Left | Ride a Pokemon Registered to this button (use the Poke Ride menu to do so) |
| Right | Ride a Pokemon Registered to this button (use the Poke Ride menu to do so) |
| Circle Pad | Move character |
| L | No Use |
| R | Open Poke Finder (where applicable) |
| Touch Screen | Select pressed option |
Main Menu Controls
When you press X to open the Main Menu, you'll see a few different options. Here's how to navigate them:
| Control | Function |
| A | Select |
| B | Cancel |
| X | Opens/Closes Main Menu |
| Y | No Use |
| Start | No Use |
| Select | No Use |
| Up | Move up through options |
| Down | Move down through options |
| Left | Move left through options |
| Right | Move right through options |
| Circle Pad | Acts as a substitute for the Up, Down, Left and Right buttons. |
| L | No Use |
| R | No Use |
| Touch Screen | Select pressed option |
Pokemon Menu Options
This is where you'll manage your party. It's pretty straightforward:
| Control | Function |
| A | Select |
| B | Cancel |
| X | Enable moving items (shortcut) |
| Y | Enable moving Pokemon (shortcut) |
| Start | No Use |
| Select | No Use |
| Up | Move up through options |
| Down | Move down through options |
| Left | Move left through options |
| Right | Move right through options |
| Circle Pad | Acts as a substitute for the Up, Down, Left and Right buttons. |
| L | No Use |
| R | No Use |
| Touch Screen | Select pressed option/Pokemon |
Bag Menu Controls
Got a lot of items? The Bag menu is your best friend. Here’s how to sort through it:
| Control | Function |
| A | Select |
| B | Cancel |
| X | Enable sorting of items (shortcut) |
| Y | Enable moving of item (shortcut) |
| Start | No Use |
| Select | No Use |
| Up | Move up through options |
| Down | Move down through options |
| Left | Move left through options |
| Right | Move right through options |
| Circle Pad | Acts as a substitute for the Up, Down, Left and Right buttons. |
| L | No Use |
| R | No Use |
| Touch Screen | Select pressed option |
Poke Ride Menu
Need to get around faster or reach new areas? Poke Ride is key. Here’s how to use it:
| Control | Function |
| A | Select Pokemon (or Unselect Pokemon if currently riding the selected Pokemon) |
| B | Cancel |
| X | Provide explanation of each Poke Ride option |
| Y | Select Pokemon (or Unselect Pokemon if currently riding the selected Pokemon) |
| Start | No Use |
| Select | No Use |
| Up | Move up through options |
| Down | Move down through options |
| Left | No Use |
| Right | No Use |
| Circle Pad | Acts as a substitute for the Up and Down buttons. |
| L | No Use |
| R | No Use |
| Touch Screen | Select pressed option/Pokemon |
Poke Finder Controls
Want to capture some great moments? The Poke Finder lets you snap pics of your Pokémon buddies. Here’s how to get the shot:
| Control | Function |
| A | Take photo |
| B | Cancel |
| X | No Use |
| Y | No Use |
| Start | No Use |
| Select | No Use |
| Up | No Use |
| Down | No Use |
| Left | No Use |
| Right | No Use |
| Circle Pad | Move camera around |
| L | No Use |
| R | Take photo |
| Touch Screen | Select pressed option |
| Moving 3DS | Move camera around (as per the way you move the 3DS) |
That covers all the essential controls you'll need to get around Alola and manage your Pokémon. Don't worry if you forget a few; you can always check back here or experiment in-game. Happy adventuring!
Controls (2)
Navigate every screen with ease! This guide details all button controls and shortcuts for Overworld, Menus, Bag, Poke Ride, and Poke Finder in Pokémon Ultra Sun and Ultra Moon.
This guide details the controls for various screens within Pokémon Ultra Sun and Ultra Moon, including shortcuts for efficient gameplay.
| Control | Function |
|---|---|
| A | Use/Interact |
| B | Cancel/Hold and use Circle Pad to run |
| X | Opens/Closes Main Menu |
| Y | Opens Poke Ride Menu |
| Start | No Use |
| Select | No Use |
| Up | Ride a Pokemon Registered to this button (use the Poke Ride menu to do so) |
| Down | Ride a Pokemon Registered to this button (use the Poke Ride menu to do so) |
| Left | Ride a Pokemon Registered to this button (use the Poke Ride menu to do so) |
| Right | Ride a Pokemon Registered to this button (use the Poke Ride menu to do so) |
| Circle Pad | Move character |
| L | No Use |
| R | Open Poke Finder (where applicable) |
| Touch Screen | Select pressed option |
Main Menu Controls
| Control | Function |
|---|---|
| A | Select |
| B | Cancel |
| X | Opens/Closes Main Menu |
| Y | No Use |
| Start | No Use |
| Select | No Use |
| Up | Move up through options |
| Down | Move down through options |
| Left | Move left through options |
| Right | Move right through options |
| Circle Pad | Acts as a substitute for the Up, Down, Left and Right buttons. |
| L | No Use |
| R | No Use |
| Touch Screen | Select pressed option |
Pokemon Menu Options
| Control | Function |
|---|---|
| A | Select |
| B | Cancel |
| X | Enable moving items (shortcut) |
| Y | Enable moving Pokemon (shortcut) |
| Start | No Use |
| Select | No Use |
| Up | Move up through options |
| Down | Move down through options |
| Left | Move left through options |
| Right | Move right through options |
| Circle Pad | Acts as a substitute for the Up, Down, Left and Right buttons. |
| L | No Use |
| R | No Use |
| Touch Screen | Select pressed option/Pokemon |
Bag Menu Controls
| Control | Function |
|---|---|
| A | Select |
| B | Cancel |
| X | Enable sorting of items (shortcut) |
| Y | Enable moving of item (shortcut) |
| Start | No Use |
| Select | No Use |
| Up | Move up through options |
| Down | Move down through options |
| Left | Move left through options |
| Right | Move right through options |
| Circle Pad | Acts as a substitute for the Up, Down, Left and Right buttons. |
| L | No Use |
| R | No Use |
| Touch Screen | Select pressed option |
Poke Ride Menu
| Control | Function |
|---|---|
| A | Select Pokemon (or Unselect Pokemon if currently riding the selected Pokemon) |
| B | Cancel |
| X | Provide explanation of each Poke Ride option |
| Y | Select Pokemon (or Unselect Pokemon if currently riding the selected Pokemon) |
| Start | No Use |
| Select | No Use |
| Up | Move up through options |
| Down | Move down through options |
| Left | No Use |
| Right | No Use |
| Circle Pad | Acts as a substitute for the Up and Down buttons. |
| L | No Use |
| R | No Use |
| Touch Screen | Select pressed option/Pokemon |
Poke Finder Controls
| Control | Function |
|---|---|
| A | Take photo |
| B | Cancel |
| X | No Use |
| Y | No Use |
| Start | No Use |
| Select | No Use |
| Up | No Use |
| Down | No Use |
| Left | No Use |
| Right | No Use |
| Circle Pad | Move camera around |
| L | No Use |
| R | Take photo |
| Touch Screen | Select pressed option |
| Moving 3DS | Move camera around (as per the way you move the 3DS) |
Preparing For Your Adventure
Learn how to start your adventure in Pokémon Ultra Sun and Ultra Moon, including language selection, character customization, and introductory cutscenes.
- 1Upon loading Pokémon Ultra Sun and Ultra Moon, select your preferred language.
- 2Professor Kukui will video call you and ask introductory questions.
- 3Choose your character's appearance, referred to as your 'passport photo'.
- 4Enter your character's name.
- 5Witness an introductory cutscene.
- 6Experience a time skip.
- 7Gain control of your character in the Alola region.
- Don't worry if you don't understand everything immediately; explanations will follow.
Similar guides you might like






100% Human-Written. Community Verified. Learn how Ludo.guide verifies content