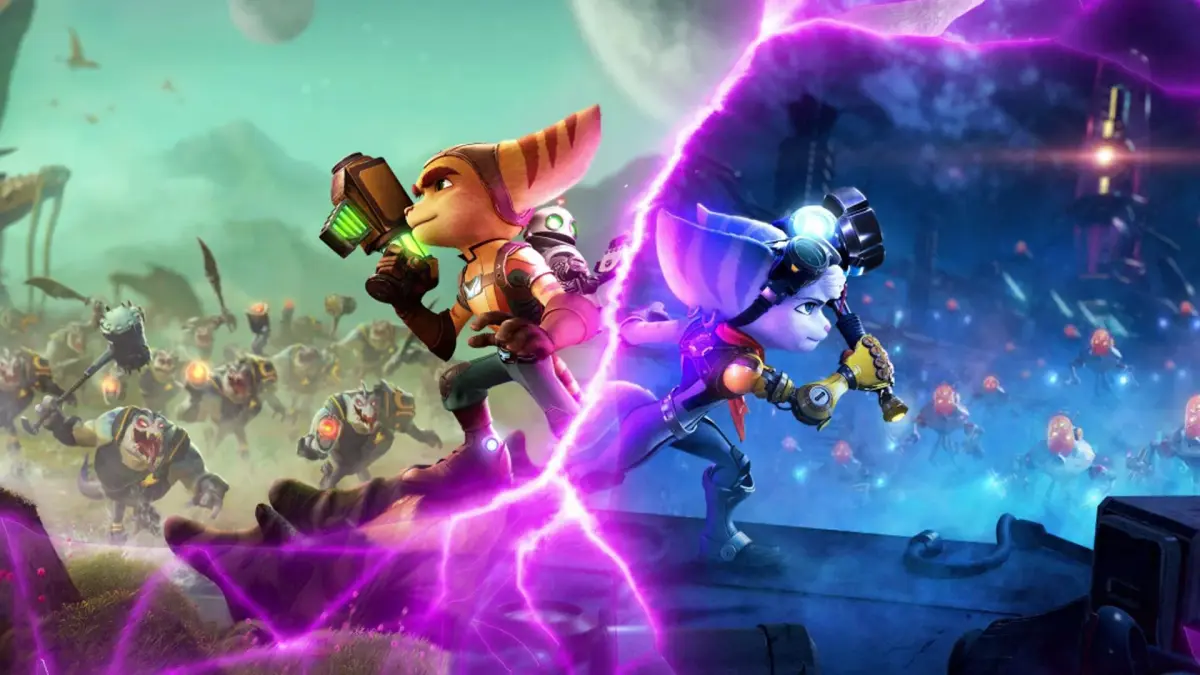
Jump into an epic interdimensional adventure with Ratchet & Clank: Rift Apart, a single-player RPG from Insomniac Games. You'll master an arsenal of weapons and navigate the multiverse to thwart Dr. Nefarious's latest scheme, exploring vibrant worlds and engaging in fast-paced third-person combat. This PlayStation 5 exclusive is perfect for players who love action-packed adventures with a touch of humor and incredible visuals.
This guide will help you conquer every challenge Rift Apart throws your way. We'll cover detailed mission walkthroughs, from Corson V's Megalopolis to other mysterious dimensions. You'll find strategies for intense combat encounters, tips for mastering every weapon in your arsenal, and guidance to help you achieve all your Steam Achievements.
Corson V - Megalopolis
Follow this Ratchet & Clank: Rift Apart walkthrough for Corson V to complete the 'Grab Your Wrench,' 'Travel to the Front of the Parade,' 'Take Out the Dropship,' 'Pursue Dr. Nefarious,' and 'Find Dr. Nefarious' objectives.
- 1After the opening sequence, proceed down the red carpet to a circular platform to grab your wrench.
- 2Board the first float, smash crates for bolts, and cross the bridge to see a hologram.
- 3Continue through the parade, smash crates, and use the jump button (X/A) followed by the slam button (Square/X) on a ground button to advance.
- 4Proceed to the next platform, which transports you to a new section. Clear the way for the next float.
- 5Board the Kerwan float, grab the available weapon, and use it to defeat fake troops. Break open the ammo crate to your right if needed.
- 6Defeat the two incoming parade crashers, then board the next platform to reach another float.
- 7After landing on the float, you'll automatically transition to a grind rail. Jump over two balloon obstacles.
- 8At the end of the grind rail, Ratchet will activate the Magneboots. Defeat the Goon and proceed to the end of the platform.
- 9Press L1 to latch onto the bottom of Skid's platform.
- 10Bounce on the Big Al balloon to trigger an event and land on another float.
- 11Defeat the dispatched robo dogs and proceed up the hill. Defeat the Goon at the top.
- 12Board the ship and defeat the Goon at the other end, using explosive barrels for assistance if necessary.
- 13Walk to the plank, jump, and glide to the next float.
- 14Defeat the Goons on the current float and any that emerge from the ship. Your weapon may upgrade during this encounter.
- 15Deal with the remaining Goons and then the Robodogs.
- 16Jump to the area where the Goons were to face a dropship.
- 17Use barricades for cover while attacking the dropship. Jump over its fire to avoid damage. Continue until the dropship is destroyed.
- 18Head to the platform to proceed to the next float, triggering a cutscene.
- 19After the cutscene, board the grind rail and jump left or right to avoid electrified sections.
- 20After the grind rail, defeat any Goons and slam the button to advance.
- 21Press Triangle/Y to open Mrs. Zurkon's shop. Purchase either the Shatterbomb or The Enforcer. Hold X to purchase or refill ammo/health. Press Square for a weapon preview.
- 22Proceed to find Dr. Nefarious. Defeat the Goons that drop in, including the one on the ramp near the train.
- 23Wait for the train to move completely before crossing the tracks to the building on the other side.
- 24Exit the building to encounter fleeing citizens.
- The guide is based on Rebel Agent difficulty.
- Weapons shown as unlocked on a planet may not be available at the start of that planet.
- Bouncing on the Big Al balloon is part of a trophy objective.
- Use explosive barrels on the ship to damage the Goon.
- Strafing between barricades and jumping over the dropship's fire are key to defeating it.
- New weapons available at Mrs. Zurkon's shop: Shatterbomb or The Enforcer.
- Progression to the next part of the story.
Corson V - Nefarious City
Follow our complete walkthrough for Corson V in Ratchet & Clank: Rift Apart, guiding you through Nefarious City to find Clank, locate Club Nefarious, and master the Phantom Dash.
- 1After regaining control of Ratchet, head left towards a set of stairs. Smash crates for bolts along the path.
- 2Continue until you encounter two robots and a path to the left. Exit this area to find an elevator ahead and to the right.
- 3Take the elevator up. At the top, use the bolt crank to open the door.
- 4Exit the door and head right, near a yellow robot. Drop down and move slightly left to a circular platform. Jump and hold X/A to glide down to the Marketplace.
- 5Upon landing, approach Ms. Zurkon's shop for a cutscene.
- 6After the cutscene, your new objective is to find Club Nefarious. Look left from Ms. Zurkon's shop towards a sign in the distance.
- 7Head in that direction, down a flight of stairs, following the sign to the right. Take the ramp to reach Club Nefarious.
- 8Enter the club and proceed to find the Phantom. A cutscene will trigger, revealing the Phantom's identity.
- 9After the cutscene, follow the Phantom and Nefarious Troopers. Use the swingshot to jump gaps and continue following.
- 10Reach a circular platform, bounce up to the next area, and defeat any Nefarious Troopers.
- 11Follow the Phantom again, jump down, and defeat more Troopers on ground level and higher areas.
- 12Use the gap the Phantom used to reach the higher area and clear out any remaining Troopers.
- 13Head left to a bolt crank, turn it to use another bounce platform, and wall jump to the next area.
- 14Catch up to the Phantom, follow him down, and defeat more Nefarious Troopers. Be prepared for reinforcements from above.
- 15Cross the bridge, defeat the Trooper on the other side, and meet the Phantom. A cutscene will trigger, granting you the Phantom Dash ability.
- 16To use the Phantom Dash through doors, get close, jump, and press Circle.
- 17Head through the door, turn right, and follow the path to another doorway.
- 18Use the Phantom Dash to traverse gaps. After the first two gaps, you'll encounter a wall platform with an arrow.
- 19Jump near the wall platform and press Circle/B to traverse across it.
- 20Continue traversing wall platforms, jumping and using Phantom Dash to reach subsequent platforms.
- 21Head right, use a bounce platform to reach higher ground, jump over a gap, and join the Phantom on an elevator.
- 22After the elevator cutscene, head right and use the swingshot to cross a large gap.
- 23On the other side, sneak up on and take out a Nefarious Trooper to your right.
- 24Continue in that direction to find a wall platform to cross to the next area.
- 25Use the wall platform to your right to cross to the next area, making a couple of jumps.
Collectibles:
- Spybots: 1
- Gold Bolts: 3
- Armor Pieces: 1
- CraggierBears: 1
New Weapons:
- Mr. Fungi
- Negatron Collider
Trophy/Achievement:
- Rift Apart (10 Points): Get Separated in Nefarious City
Controls
Get a grip on every button and move in Ratchet & Clank: Rift Apart! This guide breaks down default controls for PS5 and PC, covering movement, combat, and special abilities.
Alright, let's get you up to speed on how to actually *play* Ratchet & Clank: Rift Apart. Knowing your buttons is key, whether you're on PlayStation or PC. We'll go through the default setup so you can start blasting and dashing like a pro.
| Basic Controls [Default] | Function | |
| Control | Function | |
| PlayStation | PC | |
| Touchpad | Windows | Map |
| Options | Menu | Options |
| Left Analog | Left Thumbstick | Move Ratchet / Rivet |
| Right Analog | Right Thumbstick | Move Camera |
| L1 | Left Bumper | Rift Tether / Swingshot |
| L2 | Left Trigger | Aim |
| L3 | Click Left Thumbstick | Sprint |
| R1 | Right Bumper | Hoverboot |
| R2 | Right Trigger | Fire |
| R3 | Click Right Thumbstick | Objective |
| D-Pad [Up] | Shortcut 1 | |
| D-Pad [Left] | Shortcut 2 | |
| D-Pad [Right] | Shortcut 3 | |
| D-Pad [Down] | Shortcut 4 | |
| X | A | Jump |
| Square | X | Melee |
| Triangle | Y | Weapon Select (Hold) / Last Weapon (Tap) |
| Circle | B | Phantom Dash |
There are a few other handy moves you'll want to get the hang of:
| Other Controls | ||
| Control | Function | |
| PlayStation | PC | |
| X, Square | A, X | Melee Slam |
| L2 + Square | Left Trigger + X | Melee Throw |
| X (Hold) | A (Hold) | Glide |
| R1 | Right Bumper | Mount Boost |
| R1 (Hold) | Right Bumper (Hold) | Hoverboot |
| L1 | Left Bumper | Flight Brake |
| L2 or R2 | Left Trigger or Right Trigger | Hoverboot Pump |
| R2 | Right Trigger | Sphere Throw / Recall |
Mastering these controls will make navigating the various dimensions and taking down enemies a breeze. Don't worry if it takes a little practice; you'll be chaining combos and pulling off epic moves in no time!
Scarstu Debris Field - Zurkie's
Complete guide to Scarstu Debris Field in Ratchet & Clank: Rift Apart, covering Zurkie's, Arena challenges like Welcoming Committee and Monsieur Francois, and collectible locations.
- 1Upon landing at Zurkie's, head forward and down the ramps. Take a left at the second ramp, then another left at the ramp leading upward.
- 2At the bottom of the upward ramp, look right to see another ramp. Along this path, you'll encounter Ms. Zurkon. Speaking with her earns the Lightning Rod weapon for purchase.
- 3Continue up the ramp, passing a pocket dimension. Enter the pocket dimension and follow the path to Zurkie's reception.
- 4To the left of Zurkie's reception, you'll find a Craiggerbear.
- 5Grab the Craiggerbear, turn right, and enter the club. Head to the bar where Zurkie is located.
- 6Turn right down the stairs and then head up the stairs on the other side. A cutscene will trigger.
- 7After the cutscene, approach the arena terminal in front of you to access the arena challenges.
- 8Select the Bronze Cup, which contains up to five challenges. Start with the first challenge, 'Welcoming Committee', by holding X.
Bronze Cup Challenge: Welcoming Committee
- This challenge involves five waves of enemies. The first two waves consist of pirates from Pierre's crew.
- Wave three introduces Cutlassies instead of pirates.
- The fourth and final waves are a combination of pirates and Cutlassies.
- Successfully completing this challenge earns the 'Victory!' trophy/achievement for completing a Battleplex Challenge and awards Robot Pirate Boots (Armor Piece).
Bronze Cup Challenge: Monsieur Francois
- You will fight Pierre's stand-in, Francois. Watch out for his bomb and stomp attacks.
- During the fight, be aware of flame vents and the Cutlassies that appear periodically.
- When Cutlassies appear, focus on dealing with them while also damaging Francois.
- As the fight progresses and Cutlassies appear more frequently, Francois will use his stomp attack more often, increasing the difficulty.
- Prioritize defense and deal damage to Francois whenever possible.
- Completing this challenge rewards a Signal Booster.
- Keep an eye out for Ms. Zurkon to earn the Lightning Rod weapon.
- Collect the Craiggerbear near Zurkie's reception.
- In the 'Welcoming Committee' challenge, focus on defensive play and prioritize targets.
- In the 'Monsieur Francois' challenge, manage the Cutlassies while dodging Francois's attacks and environmental hazards.
Collectibles:
- Craiggerbear: 1 (Located near Zurkie's reception)
- Gold Bolts: 2
- Armor Pieces: 3 (Robot Pirate Boots are awarded from 'Welcoming Committee')
- Spybots: 0
Similar guides you might like



100% Human-Written. Community Verified. Learn how Ludo.guide verifies content