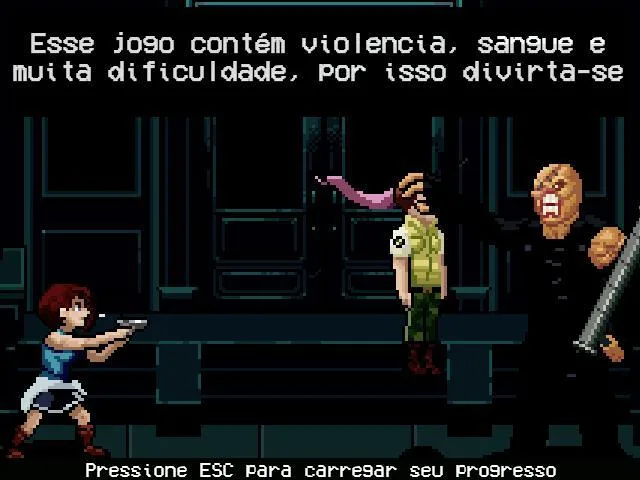
Resident Evil 3 (Remake) plunges you into the zombie-infested streets of Raccoon City as Jill Valentine, a former S.T.A.R.S. member fighting for survival against a city overrun by a viral plague and the relentless pursuit of a terrifying bio-weapon. This action-oriented survival horror experience challenges you to navigate treacherous environments, manage scarce resources, and outsmart relentless pursuers in a desperate escape.
This guide is your essential companion for conquering Raccoon City. We'll help you track down every hidden collectible, including all Charlie Dolls and Files, secure every weapon and upgrade, and master challenging boss encounters. Plus, we've got tips to help you snag all the trophies, including those tied to the game's multiple difficulty settings and specific challenges.
Tips
Resident Evil 3 (Remake) tips on time management, health, and trophies. Learn how to combine herbs and manage your playthrough.
General Tips:
- Shoot crates with yellow tape for Handgun Ammo, Assault Rifle Ammo, or Green/Red Herbs.
- Use environmental hazards like explosive barrels and electrical generators to your advantage against enemies.
- Zombies may pretend to be dead; shoot them again with your handgun after you think they are defeated to confirm they are dead.
- The knife is not a useful combat tool; store it in the Item Box to save inventory space.
Time Management:
- Playthroughs are timed, so jog constantly. You jog faster at full health.
- The clock stops during cutscenes (non-interactive story moments) and radio conversations. You can move during these times but cannot interact with objects.
- If you die, reload from the main menu instead of continuing to reset the clock.
Health Management:
- Health is color-coded: Green (above 67%), Amber (30%-67%), Red (30% or below). Red health means you are one hit from death.
- A single Green Herb restores 33% health.
- Combine herbs for better healing: Green + Red fully restores health, as does Green + Green + Green.
- You switch control between Jill and Carlos four times. Each character starts with full health upon regaining control. Key points where health resets include when Carlos reaches the S.T.A.R.S. Office, after Jill's Stage 2 Nemesis fight, and when Carlos survives the hospital siege.
Trophies:
- For trophies, start with an Assisted difficulty playthrough to unlock collectible trophies (Bookworm, Goodbye, Charlie!, RE: Master of Unlocking, Kendo's Armory) and item management trophies (Minimalist, I Might Need These Later!).
- Not using healing items (Minimalist) helps with inventory management when you cannot use the Item Box.
- Clearing collectibles first makes the Sprinter trophy easier.
- The Sensational Work! trophy (S-rank) limits you to five manual saves. However, checkpointing (automatic save points) on difficulties below Inferno allows you to avoid manual saves.
- Assisted/Standard difficulty walkthroughs suggest manual saves for kill farming to prepare for harder difficulties.
- To get the Platinum trophy, you must complete playthroughs on Hardcore, Nightmare, and Inferno difficulties.
Tips (2)
Resident Evil 3 (Remake) tips on time management, health, zombies, and trophies. Learn how to combine herbs and manage your inventory.
- 1Shoot crates taped with yellow tape for Handgun Ammo, Assault Rifle Ammo, or Green / Red Herbs.
- 2Use environmental hazards: explosive barrels for area damage and electrical generators to stun enemies.
- 3Be cautious of zombies that may be pretending to be dead; shoot them again with your handgun to confirm they are deceased.
- 4The knife is not a useful secondary weapon; store it in the Item Box to free up inventory space.
- 5Always jog to save time, as you move faster at full health.
- 6Heal when necessary, as your movement speed decreases when injured.
- 7The in-game clock stops during cutscenes (non-interactive story sequences) and radio conversations, but you can still move during these times.
- 8If you die, reload from the main menu instead of continuing to avoid the clock not resetting.
- 9Health is color-coded: green (above 67%), amber (30%-67%), and red (30% or below).
- 10A single Green Herb restores 33% of your health.
- 11Combine herbs for better healing: G+R fully restores health, as does G+G+G.
- 12You switch control between Jill and Carlos four times; each character starts with full health upon regaining control.
- 13You can ignore low health when Carlos reaches the S.T.A.R.S. Office, after Jill fights Stage 2 Nemesis, and when Carlos survives the hospital siege.
- 14For trophies, play on Assisted difficulty first to unlock collectible trophies (Bookworm, Goodbye, Charlie!, RE: Master of Unlocking, Kendo's Armory) and item management trophies (Minimalist, I Might Need These Later!).
- 15Not using healing items (I Might Need These Later!) helps with inventory management when you cannot use the Item Box (Minimalist).
- 16Completing collectible and item management trophies makes the Sprinter trophy easier.
- 17The Sensational Work! trophy (S-rank) limits you to five manual saves, but generous checkpointing (automatic save points) on difficulties below Inferno allow for fewer manual saves.
- 18Assisted/Standard difficulty walkthroughs suggest manual saves for kill farming to prepare for harder difficulties.
- 19To earn the Platinum trophy, you must complete playthroughs on Hardcore, Nightmare, and Inferno difficulties.
- Keep an eye on your minimap (the small circular map in the bottom-left corner of your screen) (a small map usually in the corner of the HUD (heads-up display — the on-screen icons showing health, ammo and the minimap) - Heads-Up Display) for crates and environmental hazards.
- When unsure if a zombie is dead, switch to your handgun and shoot it again.
- Store the knife in your Item Box to save inventory space.
- Always jog to conserve time.
- Combine Green and Red Herbs (G+R) or three Green Herbs (G+G+G) to fully restore your health.
- Deploy character switch points to manage health without using healing items.
- Consider playing on Assisted difficulty first for easier trophy acquisition.
- The game offers generous checkpointing on difficulties below Inferno, reducing the need for manual saves.
Walkthrough (Nightmare / Inferno)
Master Nightmare and Inferno difficulties in Resident Evil 3 (Remake) with our detailed walkthrough. Learn enemy and item placements, shop recommendations, and survival strategies.
- 1After making any purchases, select New Game and your chosen difficulty.
- 2After the opening scenes, make your way to the bathroom and look in the mirror.
- 3After Jill wakes up, head to the bathroom again and turn on the light. Make your way back to the living room, turn on the light and answer your phone to have Nemesis break through the wall.
- 4Escape the apartment: Run down the corridor. Jill will duck into another apartment and push a heavy shelf down in front of the door. Go to the living room and climb through the open window.
- 5Go down the fire escape and climb through another open window. As you make your way through the apartment, Nemesis will crash through the ceiling. After Jill has escaped his clutches, make your way down the burning corridor towards the fire exit for another brief scene.
- 6Go down two flights of stairs and approach the ladder. At this point, Nemesis will catch up with Jill again, throwing her through the nearby door. Keep running from Nemesis and when you get through the door at the end, the ceiling will collapse on top of him.
- 7Get out of town: Make your way down to the end of the alley to meet Brad Vickers. Follow Brad and when you can, press L3 to start running. When the zombies break through the fence, run over to Brad, keeping to the left to avoid getting chewed. It is possible that you will be grabbed regardless, which results in Jill's death.
- 8When you head into Bar Jack, Brad will get bitten by one of the zombies trying to follow you inside. He will tell Jill to get herself to safety while he makes a heroic last stand. Make your way through the alley where Jill will automatically grab the pistol from the dead cop.
- 9Afterwards, a zombie will come around the corner. Run away from it and duck under the sign that falls in your path. There will be a zombie standing in front of the gate that you have to get through and another one climbing out of a nearby bus. Wait for the first to lunge towards you and dodge past it. If it's not a perfect dodge you will get chewed and may die. Go through the gate and head through the door at the end into a warehouse. Ignore Dario Rosso as he shuts himself inside the container but pick up the Handgun Ammo (x7) on your way out.
- 10Go to the rooftop parking lot: Crawl under the broken fence and cross the road to a parking lot. As you approach the elevator, two zombies, one walking and one crawling, will burst through the door. Turn around and run. Put a long distance between you and shoot the zombie in the body to take it down. If you don't manage to fell it, be prepared to make a perfect dodge. You can avoid the crawling one fairly easily. If you do get bitten, it's not that important so long as you manage to get in the lift - you will be (relatively) safe shortly. Take comfort that you've just got past one of the most difficult sections of the game.
- 11Take the elevator up to the roof. Run towards the rescue helicopter only for it to be shot down. At this point, Nemesis will make another appearance. Jill will jump in a nearby car. Press X three times to start the engine. Once the engine is started, hold the R2 button to accelerate and keep holding it.
- 12Jill will drive the car into Nemesis and off the roof. During the subsequent scene, Carlos Oliveira will fire a rocket at Nemesis, knocking him down. Afterwards, he will lead Jill to temporary safety in the Redstone Street subway station.
- 13Go with Carlos: Start following Carlos through the door that he forces open. For the time being, you are not able to get past Carlos and must wait for him to open a door ahead of you regardless, so don't bother trying to force your way past him. Follow Carlos into the railway carriage for a scene.
- 14Get above ground: Afterwards, leave the carriage and head up the steps. Continue up the next flight of stairs. You will find various goodies on some crates, Green Herb (x2), the .44 AE Lightning Hawk and a Hip Pouch.
- 15Head through the gate to the Safe Room. Open up the Item Box where you'll find any items you purchased waiting for you. Assuming you bought a Rocket Launcher, you can get rid of your Handgun and Survival Knife and store the herbs for later. If you bought Hip Pouches, you will find them on the crate next to the Item Box.
- 16Reactivate power: (Section incomplete in source text)
- On Nightmare and Inferno, pretty much any attack will take you into the red zone unless you are carrying Iron Defense Coins.
- For Inferno difficulty, the number of healing items is reduced. If a herb or healing spray mentioned in the text is not present, this is because of the higher difficulty.
- Without checkpointing on Inferno, it is much more punishing. The start of the game before you are able to retrieve shop items is very difficult and the final boss is an obnoxious difficulty spike.
- An S-Rank requires five manual saves or less, meaning you'll have to pick your save slots very carefully. You only have four saves to play with if you want to hold one for the final boss.
- Any death will take you back to your last manual save.
- Unless you're an elite gamer who is able to perfectly dodge every attack, you will want the following items from the shop: Infinite Rocket Launcher, Assault Coin (x2), Hip Pouch (x2), Iron Defense Coin (x2), Recovery Coin (x2), S.T.A.R.S. Field Combat Manual.
- These shop items require a total of 102400P. You should be able to afford most of these without farming kills, as you must have beaten Hardcore difficulty to access Nightmare, and Nightmare to access Inferno. For reference, 143000P was earned by the time of playing Nightmare difficulty.
Walkthrough (Hardcore)
Resident Evil 3 (Remake) Hardcore walkthrough: buy the Infinite Rocket Launcher for 62400P and other shop items to prepare for Nemesis.
- 1After making your purchases, select New Game / Hardcore difficulty.
- 2After the opening scenes, make your way to the bathroom and look in the mirror.
- 3After Jill wakes up, head to the bathroom again and turn on the light.
- 4Make your way back to the living room, turn on the light and answer your phone to have Nemesis break through the wall.
- 5Escape the apartment: After the scene, run down the corridor. Jill will duck into another apartment and push a heavy shelf down in front of the door. Go to the living room and climb through the open window.
- 6Go down the fire escape and climb through another open window.
- 7As you make your way through the apartment, Nemesis will crash through the ceiling. After Jill has escaped his clutches, make your way down the burning corridor towards the fire exit for another brief scene.
- 8Go down two flights of stairs and approach the ladder. At this point, Nemesis will catch up with Jill again, throwing her through the nearby door.
- 9Keep running from Nemesis and when you get through the door at the end, the ceiling will collapse on top of him.
- 10Get out of town: Make your way down to the end of the alley to meet Brad Vickers.
- 11Follow Brad and when you can, press L3 (the left analog stick) to start running.
- 12When the zombies break through the fence, run over to Brad, keeping to the left to avoid getting chewed.
- 13When you head into Bar Jack, Brad will get bitten by one of the zombies trying to follow you inside. He will tell Jill to get herself to safety while he makes a heroic last stand.
- 14Make your way through the alley where Jill will automatically grab the pistol from the dead cop.
- 15Afterwards, a zombie will come around the corner. Run away from it, duck under the sign that falls in your path and turn left into the next alley.
- 16Head through the door at the end into a warehouse. Ignore Dario Rosso as he shuts himself inside the container but pick up the Handgun Ammo (x7) on your way out.
- 17Go to the rooftop parking lot: Crawl under the broken fence and cross the road to a parking lot.
- 18As you approach the elevator, two zombies, one walking and one crawling, will burst through the door.
- 19Take the elevator up to the roof.
- 20Run towards the rescue helicopter only for it to be shot down. At this point, Nemesis will make another appearance. Jill will jump in a nearby car.
- 21Press X three times to start the engine. Once the engine is started, hold the R2 button to accelerate and keep holding it.
- 22Jill will drive the car into Nemesis and off the roof. During the subsequent scene, Carlos Oliveira will fire a rocket at Nemesis, knocking him down. Afterwards, he leads Jill to temporary safety in the Redstone Street subway station.
- 23Go with Carlos: Start following Carlos through the door that he forces open.
- 24Follow Carlos into the railway carriage for a scene.
- 25Get above ground: Afterwards, leave the carriage and head up the steps.
- 26Continue up the next flight of stairs. You will find various goodies on some crates, Green Herb (x2) and Gunpowder (x2).
- 27Head through the gate to the Safe Room.
- 28Open up the Item Box where you'll find any items you purchased waiting for you.
- 29Reactivate power at the substation: Head through the half-open shutter to the Raccoon City Streets.
- 30A zombie immediately appears in your gunsights so blow it into kingdom come.
- 31Head down the alley that the zombie emerged from and turn right.
- 32Continue into the next alley where there's a zombie on the ground feeding. While you take it out, another will emerge closer to you so switch targets.
- 33After eliminating them, head through the gate at the end to emerge in another street.
- 34Jog to the end of the street to have Carlos update your objectives. The alley that you need to go down is blocked by flames so turn around to see the zombies breaking down the fence. There are three of them.
- The Infinite Rocket Launcher costs 62400P.
- Farming 17000P for 80 MAG kills takes a few minutes.
- You will need at least 70400P for the Infinite Rocket Launcher and two Assault Coins.
- The Assault Coins are to bring Nemesis down.
- If you have points left over, buy Hip Pouches (x2), Iron Defense Coins (x2), Recovery Coins (x2), and the S.T.A.R.S. Field Combat Manual.
- Buying the Lock Pick and Bolt Cutters can help greatly in achieving S-Rank by reducing the need to backtrack.
- After Nemesis breaks through the wall, run down the corridor and Jill will automatically duck into another apartment and push a heavy shelf down.
- When escaping the apartment, go to the living room and climb through the open window.
- Go down the fire escape and climb through another open window.
- After Nemesis crashes through the ceiling, make your way down the burning corridor towards the fire exit.
- Go down two flights of stairs and approach the ladder. Nemesis will catch up and throw Jill through a door. Keep running.
- When escaping the apartment building, run down to the end of the alley to meet Brad Vickers.
- Follow Brad and press L3 to start running when prompted.
- When zombies break through the fence, run to Brad, keeping to the left.
- In Bar Jack, Brad will get bitten. Make your way through the alley to automatically grab the pistol.
- When the zombie comes around the corner, run away, duck under the falling sign, and turn left.
- Head through the door into the warehouse. Ignore Dario Rosso and pick up the Handgun Ammo (x7).
- Crawl under the broken fence and cross the road to the parking lot.
- Evade the two zombies near the elevator as a bite will take you to the amber zone (a state of critical health). If shooting, aim for body shots.
- Take the elevator to the roof.
- When Nemesis appears on the roof, Jill will jump into a car. Press X three times to start the engine, then hold R2 to accelerate.
- Drive the car into Nemesis and off the roof.
- Follow Carlos through the door he forces open. Do not try to force your way past him.
- After leaving the railway carriage, head up the steps.
- Collect the Green Herb (x2) and Gunpowder (x2) from the crates.
- Store the Handgun and Survival Knife if you bought the Rocket Launcher.
- If you bought Hip Pouches, they will be on the crate next to the Item Box.
- Head through the shutter to the Raccoon City Streets.
- Head down the alley the first zombie emerged from and turn right.
- In the next alley, take out the feeding zombie, then switch targets to the one that emerges closer to you.
- Head through the gate to another street.
- When Carlos updates your objectives, turn around to see three zombies breaking down a fence. Take them out from a decent distance from any explosive hazards.
- Infinite Rocket Launcher (62400P)
- Assault Coin (x2) (included in 70400P total)
- Hip Pouch (x2) (optional purchase)
- Iron Defense Coin (x2) (optional purchase)
- Recovery Coin (x2) (optional purchase)
- S.T.A.R.S. Field Combat Manual (optional purchase)
- Lock Pick (optional purchase)
- Bolt Cutters (optional purchase)
- Handgun Ammo (x7)
- Green Herb (x2)
- Gunpowder (x2)
Similar guides you might like






100% Human-Written. Community Verified. Learn how Ludo.guide verifies content