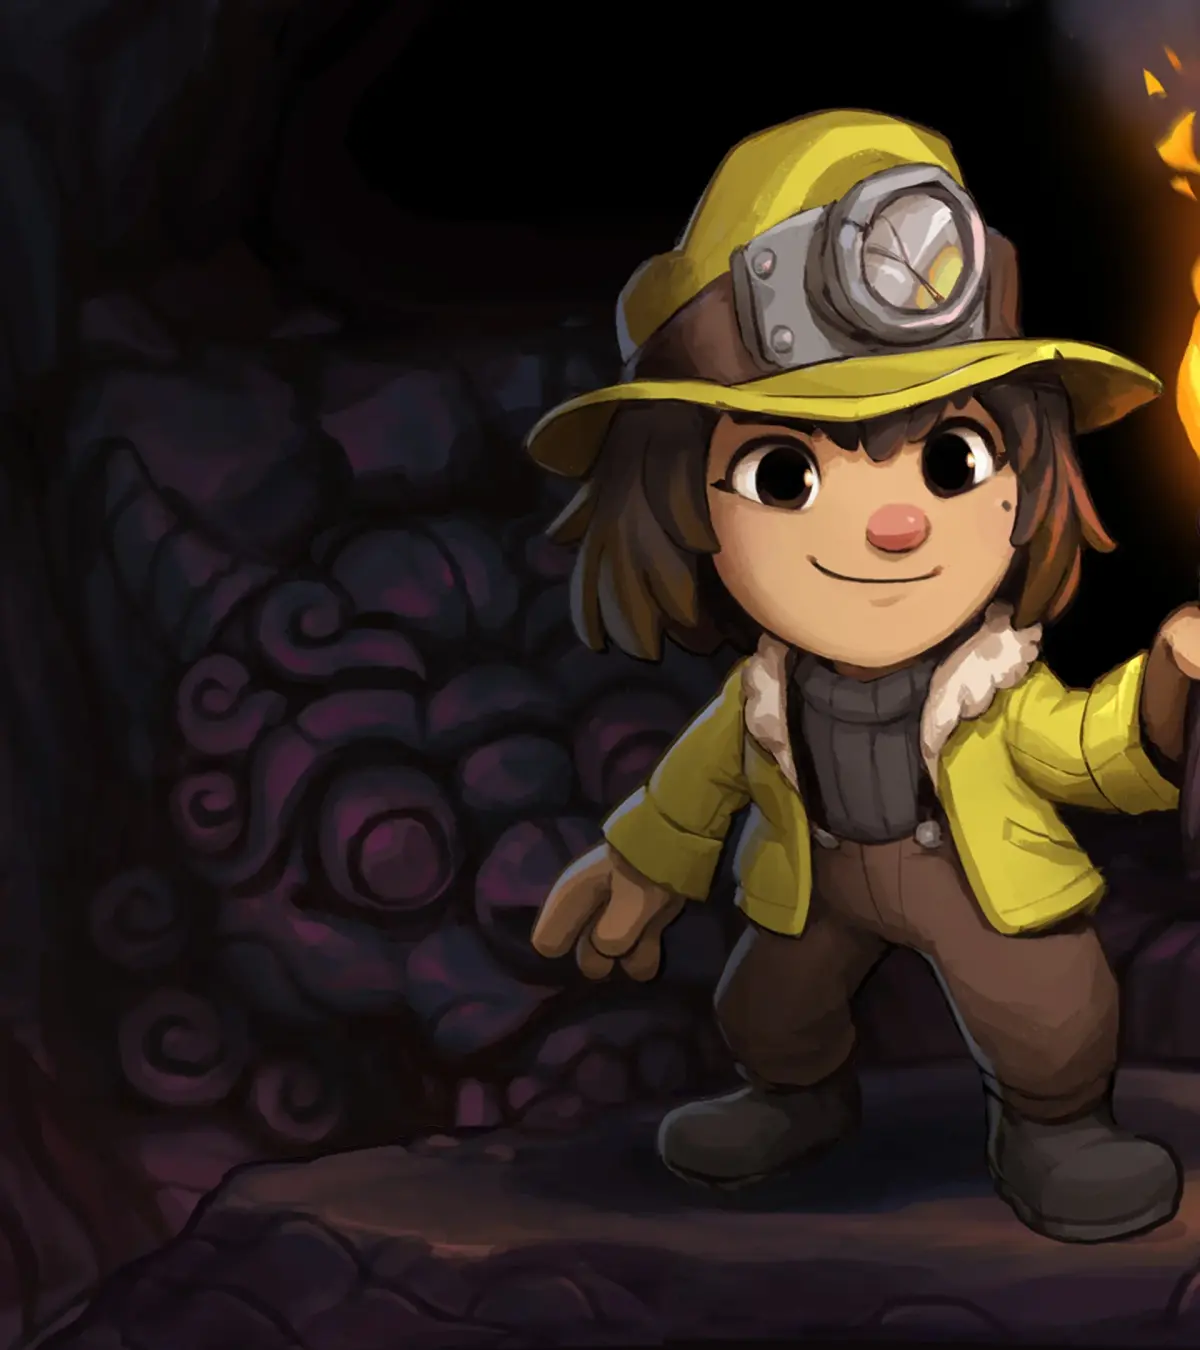
Spelunky 2 is a challenging 2D platformer where you delve into procedurally generated caves, alien worlds, and even the moons of Jupiter. Each run is a fresh expedition, filled with deadly traps, unpredictable enemies, and hidden secrets. You'll need to master precise movement, manage your limited resources, and learn enemy patterns to survive the treacherous environments and overcome tough boss battles.
This guide is here to help you conquer every expedition. We'll cover everything from basic survival tips for the Dwelling to advanced strategies for reaching the game's many endings. If you're struggling with specific bosses like the Magma Man, finding hidden items, or aiming to unlock all the Steam Achievements, you've come to the right place.
How to Play
Master Spelunky 2 controls: learn to jump, whip, throw bombs, and grab ledges with this essential tutorial guide.
- 1Enter doors by pressing R1 (or L1 if preferred).
- 2Jump with X; hold for higher jumps. Jump height is slightly more than one tile, allowing you to grab ledges.
- 3Hang off ledges by jumping into them. Press X to jump from a hanging position onto the ledge, or press down and X to drop off.
- 4Crouch by holding down on the left analog stick. Crawling off a ledge automatically puts you into a hanging position but drops carried items.
- 5Run/walk with R2 (or R1 if preferred). You may also set "movement default" to walk. Frequent pressing and releasing of the run button is key for precision platforming.
- 6Whip with Square. The whip swings backward first, damaging enemies in a short arc behind and above you, then swings forward. You can jump and run while whipping. The whip acts as both a weapon and shield, knocking back many threats.
- 7Pick up objects by crouching and pressing Square. Throw them by pressing Square again. Dropping an object while crouching places it half a tile in front of you. Holding up throws it diagonally upwards. Running or jumping imparts momentum. Hanging off a ledge causes it to fall straight down.
- 8Push sliding blocks by walking into them. These appear as grey squares initially.
- 9Jump through wooden platforms from below by crouching and pressing the jump button.
- 10Run across 1-tile wide gaps without falling.
- 11Break breakable objects like chests (containing gems) and wooden crates (dropping random items like ropes or bombs) with standard attacks or by holding up and pressing Square to open them.
- 12Throw Bombs with Circle. You start each run with 4 Bombs. Bombs create an explosion with a radius of approximately 2 tiles.
- 13Throw Ropes with Triangle. Throwing a Rope while facing a ledge and crouching makes it hang from the ledge. Otherwise, it throws straight upward.
- 14Traverse ladders, ropes, and other climbing devices by holding up or down. You can whip and throw objects from this position. Press jump to dismount.
- 15Swim upward in water by pressing the jump button; there is no breathing system.
- 16Press the touchpad to open the journal when encountering new people, places, enemies, traps, or items for a picture and description.
- Holding up or down on the analog stick lets you see further in that direction, useful for spotting traps and judging fall damage. Fall damage occurs if you land on the bottom edge of the screen or lower. Avoid fall damage by landing on an enemy or grabbing a ledge/climbable object mid-fall.
- Time your jumps to avoid hitting your head on low ceilings when running off ledges. A quick turn-around jump is possible if another ledge is one tile above.
- Avoid crouch-walking off ledges; instead, walk off and immediately flip around to grab the ledge.
- Doors that are two tiles high are level exits; doors one tile high are backroom doors.
- Doors provide invincibility frames upon entering. Backroom doors offer a few moments of invincibility on the other side. You can attack and return through a door without being hit. Doors can be entered from one full tile width away.
- Your feet can be used as a weapon by jumping on enemies. Hanging off ledges, ropes, or standing on wooden platforms also positions you to damage creatures below.
- Enemies, NPCs, and yourself can enter stun states, protecting them from immediate attacks but not from thrown objects. Blood indicates damage. Wiggling signals an impending wake-up. The whip causes a longer stun than other attacks.
- All entities have a brief moment of invincibility after taking a hit.
- Ropes deal 1 damage and stun when thrown into an enemy.
- Bombs travel further than other thrown objects due to their round shape. You can reposition a Bomb by whipping it or picking it up. Dropping a bomb from your hands does not send it as far as throwing it.
World 1: Dwelling
Spelunky 2 World 1 Dwelling items list including Rope Pile, Bomb Bag, Paste, Spectacles, Udjat Eye, and weapons like the Shotgun.
- 1Dwelling is the name of World 1 in Spelunky 2, also known as "the Mines" due to its resemblance to the first game's World 1.
- 2Despite being the first world, Dwelling can be very dangerous, potentially more so than later zones, so expect to die frequently.
- 3Wooden crates can contain items, though they more commonly hold Bombs or Ropes.
- 4You may find useful items by bombing dirt blocks.
- 5Many items can be found randomly in shops.
Items:
- Rope Pile - Contains 3 ropes.
- Bomb Bag - A brown bag containing 3 bombs. It will explode if damaged.
- Bomb Box - A green box containing 12 bombs. It will explode if damaged.
- Paste - A white bottle that turns your bombs into sticky Bombs, which adhere to enemies or walls. Sticky Bombs can still be picked up and thrown like regular Bombs.
- Spectacles - Improves vision in dark levels, allowing you to see gems and items locked within walls.
- Udjat Eye - Allows you to see gems and items locked in walls, and is part of the secret ending.
- Compass - Displays a red arrow on the screen pointing towards the exit.
- Four-Leaf Clover - Extends the current level timer by five minutes, delaying the Ghost's appearance. It is not useful if the Ghost has already arrived.
- Skeleton Key - A permanent key that unlocks any locked door.
- Parachute - Automatically slows your fall if you fall far enough to sustain fall damage. It has one use only. To dismount, press up or down and the jump button.
- Climbing Gloves - Allows you to cling to and move up walls. You must hold the control stick in the direction of the wall to cling to it. Accidental wall grabs can occur. Skipping this item is recommended if you find the controls awkward. Grabbing the bottom of a wall two tiles above you is possible.
- Pitcher's Mitt - Changes your throwing arc to a straight line for all Bombs and thrown objects.
- Spring Shoes - Upgrades your jump to go one tile higher, and jumping on enemies will send you higher.
- Spike Shoes - Jumping on enemies deals 3 damage. This can damage armored enemies and is effective against them. Prolonged airtime increases damage.
- Kapala - A skull cup that fills with blood droplets when you walk over them. 8 blood droplets grant +1 HP. It is obtained through sacrifices at the Altar to Kali.
- Camera - Stuns enemies in a defined area in front of you and kills Bats instantly. It is the only item that can stun the ghost. It also illuminates dark levels and backrooms and can trigger Arrow Traps.
- Mattock - A pickaxe that can dig through dirt and stone. It hits the block in front and then the block below it. You can hit one tile further ahead by moving forward on a ledge, or hit tiles above ground level by pressing jump and attack simultaneously. It is destroyed after approximately 55 uses.
- Machete - Deals 2 damage and has an attack arc similar to the whip but with less back coverage.
- Boomerang - A thrown weapon that deals 1 damage but can hit enemies multiple times per throw. It is the only ranged weapon that can travel diagonally and does not cause knockback when thrown.
- Shotgun - Fires 12 pellets in a random spread, dealing 4 HP damage per shot. It has considerable kickback that pushes you back, which can propel you an extra tile upward when fired while jumping.
- Freeze Ray - Fires a short-range blue laser that freezes enemies. Flying enemies shatter upon hitting the ground, while grounded enemies need to be hit again to shatter. It is effective against most enemies and bosses, with a range of five tiles. Its knockback effect can be used to jump one tile higher.
- Webgun - Fires webs that can stop some enemies but do not damage them. Webs can be used to stick Bombs to walls and can be climbed. Webs disappear after five seconds.
- Crossbow - Fires arrows in a straight line. It comes with a blue invincible arrow that can be reloaded by walking over it. The blue arrow can also serve as a platform if it hits a wall. If the blue arrow is lost, normal arrows can be loaded but will break. It has no knockback.
- Plasma Cannon - Fires an explosive projectile with knockback that sends you back four or five tiles. The explosion deals 10 HP damage, similar to a Bomb.
- Dwelling is often more difficult than later zones; do not be discouraged by frequent deaths.
- Wooden crates may contain useful items, but Bombs and Ropes are more common.
- Bombing dirt blocks can sometimes yield useful items.
- The Climbing Gloves can be awkward to use and may be undesirable for some players.
- The Shotgun's kickback can be used to gain extra height when jumping.
- The Freeze Ray's knockback can also be used to gain extra height.
World 2: Volcana
Spelunky 2 Volcana guide covering new enemies like Rock Dogs, Magmars, and Imps, plus items like Vlad's Cape and the Crown.
- 1Volcana is considered one of the least dangerous worlds due to predictable and avoidable threats.
- 2Chains function as ladders, and grey iron blocks are push blocks.
- 3It is recommended not to wear any of the four backpacks due to the high risk of fire damage. You can use down and the door button to unequip a backpack in risky situations.
- 4The Freeze Ray is highly effective in this zone.
New Items:
- Hou Yi's Bow: Obtainable from the Moon Challenge. Functionally the same as the Crossbow.
- Crown: Used in reaching the secret ending.
- Vlad's Cape: Red cape worn only by Vlad in Vlad's Castle. This allows you to double jump in addition to gliding. This can be combined with a mount for a triple jump. This also combines with the Spring Shoes for a bigger double jump. Vlad's Cape also doubles the amount of blood from enemies.
New Enemies:
- Rock Dog (4 HP): The prevalent mount in this area. They spit a fireball when in range and move erratically. Commit to either passing this enemy by completely or perfectly timing a jump onto it from above. If you jump on it and it darts into a lava pit, it will die instantly, granting you one free jump to escape. Once tamed, it is fire immune and can burn everything. Its fire immunity does not prevent backpacks from exploding.
- Magmar: Periodically emerges from bubbles on lava pools, jumping in a random direction. Be vigilant for lava bubbles and Magmars falling from above. It lives for about six seconds before dissolving, jumping once or twice. It deals 1 HP fire damage. Regular attacks won't damage it, but the whip can reverse it while jumping. The Freeze Ray kills it.
- Imp (1 HP): Carries a glowing cauldron and tries to drop it on you. When destroyed, the cauldron becomes a Magmar. The cauldron ignites Bombs instantly on contact.
- Fire Bug (1 HP): Climbs up and down chains, periodically emitting flames (2 damage). You are safe to land on its head. Whip it from any direction between flames. This enemy is immune to fire damage. If knocked off its chain, it can walk and fly.
- Lavamander (10 HP): Found in large lava pools. When you get close, it pops its head up, signaling you to get away. The next time it pops up, it pushes a wave of lava. After waiting longer, it launches a massive wave of lava up to 5 tiles high. It is invulnerable to everything except crushing attacks. If the lava is drained around it, it becomes vulnerable to regular attacks.
- Robot: Shovel bots patrol side to side. Do not hit from the front or back. It deals 1 damage on contact, and all projectiles are reflected. Jumping on it from above activates self-destruct mode, causing it to drive forward and explode. Do not send this robot toward lava.
- Leprechaun (4 HP): Attempts to stun you and steal your gold. If grabbed, quickly throw a Rope to stun him. If defeated, he drops a Four-Leaf Clover. Picking up his Four-Leaf Clover displays a rainbow on the level, beneath which you can dig for a pot of gold.
- Vampire (6 HP): Found in undead levels and Vlad's Castle. Jumps erratically and flies. Drops a Cape when killed.
- Vlad (10 HP): Found only in Vlad's Castle. Can teleport 4-8 tiles when taking damage. If you are in this range, he can telefrag you. Drops Vlad's Cape when killed.
New Traps:
- Lava: Kills instantly on contact. Stay above it. Taking any damage locks controls briefly. Watch for Magmars and Lavamanders. Ropes burn on contact with lava, but can be thrown and climbed fast enough to cross. The Freeze Ray can destroy lava, one droplet at a time.
- Conveyor Belts: Movement is faster with the belt and slower against it. Often positioned to drop items into lava. You can hang off the edge, but it will drop you after a second.
- Falling Platform: Touching it sets it off. Don't get caught underneath. Deals 2 damage and stun if hit. Riding it down prevents fall damage, and you can jump from it as it falls. Some rooms have two over lava, preventing backtracking.
- Spikeball: Activates when you pass below it. Crushes one block below it, up to the maximum depth. Deals 2 damage and stun on its bottom side.
- Avoid wearing backpacks in Volcana due to fire damage risks.
- The Freeze Ray is effective against Magmars and lava.
- Taming a Rock Dog can be useful for its fire immunity and attacks.
- Be cautious of Robots reflecting projectiles and their self-destruct mode near lava.
- Leprechauns drop a Four-Leaf Clover, leading to a pot of gold.
- Vampires and Vlad drop Capes, which grant double jump and gliding abilities.
World 2: Jungle
Navigate Spelunky 2's Jungle world with this guide covering new items like the Metal Shield, traps like Spear Traps, and enemies like the Queen Bee.
The Jungle in Spelunky 2 presents a claustrophobic environment with narrow passages and surrounding thorns, a stark contrast to the Dwelling. Ladders here are vines, and trees function similarly to Climbing Gloves, allowing you to grab their sides. Leafy tiles, which can be ignited by a Torch or Power Pack (but not Bombs), offer shortcuts and alternate entry points.
New Items
- Wooden Shield: Carried by Tikimen, this shield pushes items and offers frontal protection, reflecting projectiles but having limited durability. It can be destroyed by pushing gold into walls.
- Metal Shield: An indestructible shield that pushes and crushes enemies and items. It reflects projectiles but must be set down to avoid crushing valuables or explosive objects like Bomb Bags.
- Royal Jelly: A rare item granting an immediate +6 HP.
- Hedjet: A secret item from the Black Market, equivalent to the Crown, significantly improving night vision and used to reach the secret ending.
New Traps
- Thorny Vines: Tiles outlined with thorns that deal 1 damage on contact. Spike Shoes or Spring Boots allow safe walking on them, but touching the sides or bottom can still cause damage. Cave Turkeys are immune to thorns.
- Spear Trap: A single-tile trap that stabs in all four directions simultaneously when you are in range. It deals 4 damage and causes stun.
- Bear Trap: Snaps shut instantly on anything passing over it, causing instant death to characters or destruction to dropped items. It is difficult to see but stands out with white and gold. It can be disarmed with a whip from a distance and thrown to reset.
New Enemies
- Mosquito: 1 HP, small flying enemy.
- Hang Spider: 1 HP, harmless unless knocked off its web, where it behaves like a standard Spider.
- Giant Spider: 10 HP. It moves erratically, making head-on confrontation difficult. Throwing a bomb into its web or setting a Bear Trap beneath it are safer strategies. It drops Paste and a gem.
- Monkey: 1 HP. They jump towards you, can stun, steal items, and ignite bombs. Dispatch them from above or throw a Rope if grabbed. They also target Cavemen and Tiki Men.
- Tiki Man: 3 HP. Similar to Cavemen, but if equipped with a Boomerang or Torch, they throw it. If equipped with a Wooden Shield, they can reflect Shotgun pellets.
- Witch Doctor: 3 HP. Attacks include an undodgeable spell (1 damage and stun) and a homing skull that can inflict the Cursed status effect. Bombing the area may be preferable to risking a curse.
- Mantrap: 3 HP. A carnivorous plant that eats you on contact. Spike Shoes do not work. Whip or throw an item to stun it before moving past.
- Bee: 1 HP. Erratic flying enemy. Staying above them or luring them into narrow passages is recommended.
- Queen Bee: 10 HP. Deals 2 damage per hit and drops Royal Jelly when killed.
Clearing the Jungle
The Golden Idol room in the Jungle features Spear Traps surrounding the Idol. Steady movement across the traps is required to collect it. The Golden Idol in World 2 is worth $10000.
Parsley, Parsnip, and Parmesan are three sisters found trapped in backrooms on levels 2-2, 2-3, and 2-4. Pushing the block away and speaking to them rescues them. They can later be found in the upper right of 3-1 with a gift.
The Moon Challenge
The Moon Challenge can appear on levels 2-2 or 2-3.
"You hear an incessant buzzing..."
This indicates a Bee level. A honeycomb room filled with Bees will appear. Staying above the Bees or using a Shotgun are the safest methods. Thrown weapons can get caught in honey. A sprinting whip attack is effective in narrow passages. A backroom entrance within the honeycomb leads to more Bees and a Queen Bee, which drops a Royal Jelly (+6 HP). An item crate is often found here as well.
Similar guides you might like



100% Human-Written. Community Verified. Learn how Ludo.guide verifies content