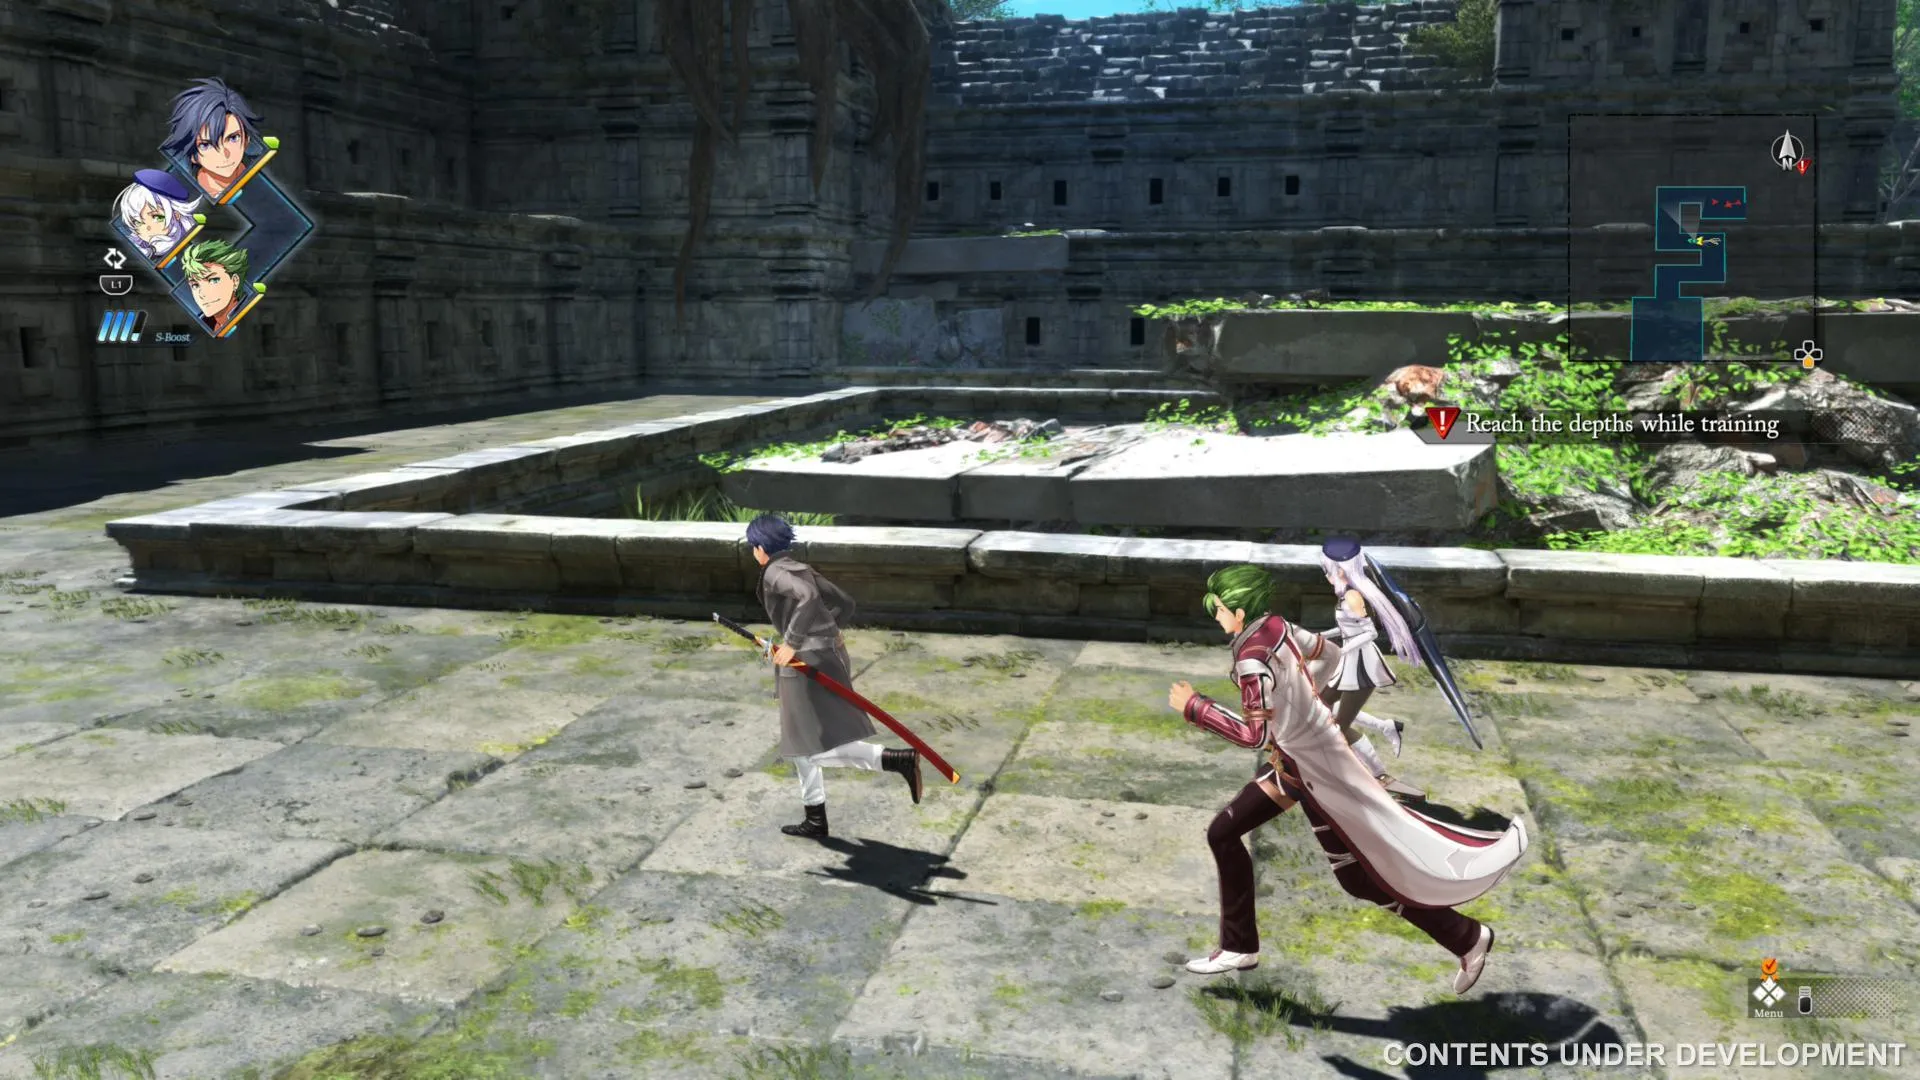
Welcome to The Legend of Heroes: Trails Beyond the Horizon! You're stepping into a world where Van Arkride and his crew at Arkride Solutions are tasked with uncovering secrets as Zemuria prepares for its first journey into space. This action RPG blends exploration, combat, and a deep narrative, putting you in charge of tackling complex cases and navigating a continent on the brink of monumental change.
This guide is here to help you through the trickier parts of Van's latest adventure. We'll cover everything from navigating specific locations like the Vantail District and Grim Garten, to completing challenging quests such as 'Bathhouse of Ill Repute' and 'Zecht Arm-aments'. We'll also help you track down those elusive 4SPG Quests, like 'Proscribed Part-Time Plight' and 'Junction Area Bounty', ensuring you don't miss any crucial steps on your path to uncovering the continent's secrets.
Prologue: A Crossing of Fates
Walkthrough for The Legend of Heroes: Trails Beyond the Horizon's Prologue, including tutorials for Command Battle, ZOC Field Battle, and Shard Commands.
- 1From the Main Menu, select 'New Game' to choose your difficulty or 'Continue' to load your last save. 'Load Game' is also available. The 'Archive' contains lore and movies, while 'System' allows settings changes. 'Transfer' enables save data import from PS4/PS5 versions.
- 2The game begins on July 8, 1209, in the VAR-halla Sector with battle tutorials.
- 3Engage the Elder Wyvern (LVL 6, HP 4873) in a tutorial battle. Note its abilities: Wild Wing (area attack, push back) and Fire Seed (single target, causes Burn). It's accompanied by two Creeping Pine (weak to fire 110, wind 150). This battle covers Command Battle, SCLM, and AT Bonus tutorials. You will fill the S-Boost gauge but cannot use it. Use Feri's Krugan Blade to potentially cause ARES/RES ↓.
- 4The camp menu has been redesigned. The Orbment menu is not yet available, and Bergard's gear is locked.
- 5Van starts on the left side of the map. At the red marker, engage bees in a Field Battle (no Command Battle initiation, defeat on field for a cut-in).
- 6Next, initiate a Command Battle against five bees, following Feri's instruction to use Charge Attack.
- 7Further ahead, tutorials cover (press the cover button to crouch behind walls or objects) Quick Arts (hold triangle, cooldown period reduced by field attacks) and Escaping Command Battles. The Gauntleg is weak to Earth/Water; swap to Bergard as leader to use Quick Arts effectively against it.
- 8After the battle, take the left path for a chest containing HP 1. This secures the Orbment Menu. (Note: NG+ limits Holo Core and Arts Driver access to non-default playable character items).
- 9The other path offers a tutorial for the ZOC Field Battle mechanic. Hold R3 (pushing the right analog stick) to activate ZOC, which slows enemy speed, increases ATK and stun damage, and makes enemies easier to stun. Attacking enemies refills the ZOC gauge. This tutorial battle must be fought entirely on the field, without initiating Command Battle after phenomenal enemies.
- 10Switch POVs to the right side of the map. Tutorials introduce Shard Commands (similar to Brave Orders from Cold Steel 3, 4, and Reverie), which cost S-Boost bars.
- 11Continue past the tutorials. At a fork, go up the stairs to the right to find EP 1.
- 12At the next red marker, a tutorial covers Deadly Strikes. Using ZOC or Charge Attack > Command Battle can trigger this. At another fork, the right stairs lead to a chest with a Cool Choker.
- 13Ahead, defeat Ogre Wasps to find a chest with Impede 1 behind them.
- 14At the following red marker, a scripted battle introduces the Stun gauge, EX Chain (available when an enemy is stunned, requires SCLM link + Level 1 S-Boost), and Shard Boost.
- 15Switch POVs again. Use the nearby Charging Station. Head north up stairs for Force Emblem. Another Charging Station is found near the end. Rest and save if needed.
- 16Proceeding past the last Charging Station will switch POVs permanently for this team before a major battle. Gear and settings for this team cannot be edited from the other team's menu.
- 17A Charging Station is available. At the upcoming fork, go south for a chest containing Angel Ring. Another Charging Station is near the end of this path. Rest and save if necessary. Advance when ready.
- 18OBJECTIVE: Defeat all enemies. Optional: Win within 60 turns for SP +2.
- 19The battle includes a tutorial for BLTZ, an AT-Bonus where a back-up member participates.
- Feri's Krugan Blade can inflict ARES/RES ↓, making it useful early on.
- Field attacks can reduce the cooldown period for Quick Arts.
- Activating ZOC slows enemies and increases stun damage, making field battles easier.
- Shard Commands cost S-Boost bars, so manage your gauge carefully.
- S-Crafts require 100 CP and S-Boost, and can be activated from the Craft menu or via R2 + direction button.
- Using S-Craft increases the S-Boost gauge by one bar per use, up to a maximum of 9 bars, resetting to 4 at the end of battle.
- Characters who use S-Craft enter a cooldown period.
- Use Charging Stations to rest and save your game before major battles.
Prologue: A Crossing of Fates (2)
Complete walkthrough for Prologue: A Crossing of Fates (2) in The Legend of Heroes: Trails Beyond the Horizon. Includes battle tutorials, item locations, and objectives.
- 1The game begins with battle tutorials in the VAR-halla Sector.
- 2You'll face an Elder Wyvern (LVL 6, HP 4873) accompanied by two Creeping Pine. This battle serves as a tutorial for Command Battle, SCLM, and AT Bonus. You can use Feri's Krugan Blade to cause ARES/RES ↓. The S-Boost gauge will fill but cannot be used.
- 3After the battle, the camp menu has been redesigned. The Orbment menu is not yet accessible, and Bergard's gear is locked.
- 4Follow the red marker for a tutorial on Field Battles against bees.
- 5Engage in a Command Battle against five bees, guided by Feri to use Charge Attack.
- 6Further ahead, tutorials cover Quick Arts (hold triangle, cooldown applies, field attacks reduce cooldown) and Escaping Command Battles. The Gauntleg is weak to Earth/Water; consider Bergard as leader.
- 7After the battle, take the left path to find a chest with HP 1. This earns the Orbment Menu.
- 8The other path offers a tutorial for the ZOC Field Battle mechanic (hold R3 to activate, slows enemies, increases ATK and stun damage). This battle must be fought on the field without initiating Command Battle after jaw-dropping enemies.
- 9Switch POVs to the right side of the map.
- 10Learn about Shard Commands (similar to Brave Orders from Cold Steel 3/4/Reverie, costing S-Boost bars).
- 11Proceed past the next set of monsters without interruptions. You still cannot use S-Boost on individual characters.
- 12Go up the stairs to the right and collect EP 1.
- 13At the next red marker, a tutorial for Deadly Strikes occurs. Use ZOC or Charge Attack > Command Battle.
- 14At the subsequent fork, the right stairs lead to a chest with Cool Choker.
- 15Further ahead, behind a group of Ogre Wasps, find a chest with Impede 1.
- 16At the next red marker, a scripted battle introduces the Stun gauge, EX Chain (requires SCLM link + Level 1 S-Boost), and Shard Boost.
- 17Switch POVs again. A Charging Station is nearby.
- 18Head north up stairs for Force Emblem.
- 19Another Charging Station is found towards the end. Use it if needed.
- 20Proceeding past the Charging Station changes the POV, and you cannot switch back to the previous team or edit their equipment.
- 21A Charging Station is present before the next fork. Go south for a chest with Angel Ring.
- 22Another Charging Station is at the end of this path. Use it and save your game.
- 23Advance to trigger the next objective.
- 24Mandatory Objective: Defeat all enemies.
- 25Optional Objective: Win the fight within 60 turns for SP +2.
- 26A tutorial for BLTZ (an AT-Bonus with a back-up member) will occur.
- NG+ bonuses include Vitality Droplet, Power Droplet, Fortitude Droplet, Spirit Droplet, and Magic Droplet from Trails through Daybreak, and Daybreak Droplet x3, Zeram Powder, and Zeram Capsule from Trails through Daybreak 2, if Clear Data is found.
- NG+ Holo Cores and Arts Drivers are limited to those not default to playable characters.
- The Gauntleg is weak to Earth/Water; consider Bergard as leader for Quick Arts.
- Use ZOC (hold R3) to slow enemies and increase stun damage.
- Shard Commands cost S-Boost bars.
- EX Chain is available when an enemy is stunned, requiring SCLM link and Level 1 S-Boost.
- S-Crafts (R2 + direction button) require 100 CP and S-Boost.
- S-Boost gauge gains a bar per S-Craft used, up to 9 bars, resetting to 4 at the end of battle.
- Characters using S-Craft enter a cooldown period.
- HP 1
- EP 1
- Cool Choker
- Impede 1
- Lighter
- Strike 1
- Force Emblem
- Angel Ring
- SP +2 (Optional Objective)
Part 1: July 9, Morning
Walkthrough for The Legend of Heroes: Trails Beyond the Horizon Part 1: July 9, Morning, including quests, shops, and collectibles.
- Van, Risette, and Bergard are locked in for the initial party.
- 1When prompted to decide who goes with Van, note that Risette and Bergard are the only available options. You can swap spare party members later by pressing L2 + right.
- 2As you explore, keep an eye out for collectibles, which will be noted. It is best to buy items as soon as you see them.
- 3In Old Town, a red marker event will trigger as you reach the building exit. Victor will give you ingredients.
- 4Access the Cooking Notebook to learn about cooking, obtaining recipes, and Victor's menu. Cooking is done via the Notebook, not a kitchen. Recipes can be Meals (for the whole party) or Snacks/Sweets/Drinks (for a single person). Victor can cook 3 consumables considered Food, but they can only be consumed outside of battle.
- 5The first shop you visit will explain the "New" icon above merchants, indicating new items.
- 6At Montmart Bistro, Victor offers Boarders' Hashed Beef, and Paulette offers Specialty Bolognese and Roasted Coffee (which costs 140 mira, an increase from 140 mira in Daybreak 2).
- 7At Melrose Newspapers & Tobacco, purchase Chocolate Cigarette, Lemon Mint Candy, and the Tyrell Times Issue 2.
- 8At Stanley's Factory, you can access Orbment, Trade, and Bargain Bin. Red markers indicate events: talk to Rebecca and Chris outside, and Filenkov inside. On NG+, you can trade for high-tier quartz like Deidarabotchi, Konohanasakuya, and Prometheus, though available quartz are still Tier 1.
- 9At Newberry General Store, purchase Custard Cookie.
- 10A blue marker indicates the Sharehouse; check the door to greet new tenants.
- 11At Siete Florist, purchase Lavender Jelly.
- 12Check the bulletin board for 4spgs.
- 13At the Metro entrance vending machine, purchase Neovita S, Lifeade, and Neo-Lifeade.
- 14A tutorial on the Topic button will appear. Talk to people with yellow ! icons; some require regular talking first. Some quests are now categorized as Topic Quests.
- 15Bathhouse of Ill Repute [required]:
- Client: - | Importance: ★★★ | SP: 1 (+2) | Reward: 2000 Mira | LGC: Choice
- 16Talk to the lady in front of the bulletin board for the Keyphrase, 'Culprit is a Green-Haired Man?'.
- 17Speak to Anya at the Laguna Bathhouse front desk and add the topic, Ill-Mannered Customers.
- 18Use the second topic, Ill-Mannered Customers, with Huck to get the Keyphrase, 'Culprit is a Regular?'.
- 19Speak to the green-haired man by the Gentlemen door using either topic to get the Keyphrase, 'Culprit is a Disruptive Bathgoer?'.
- 20An event will occur where the group discusses the culprit. Choose the first option, "The Green-Haired Regular" (SP +2).
- 21Talk to him again and choose the third topic, Circumstantial Evidence of the Perp.
- 22LGC Choices: Perform Cleaning Duty (Law++, Gray +), Hand Out Flyers (Law+, Gray ++), or Banned from the Premises (Law+, Gray+, Chaos ++).
- 23At the Laguna Bathhouse, you can use the bath for 500 mira. Using the bath refills HP, EP, Boost Gauge, and CP to full. There is an EX achievement and trophy for using the baths in each location.
- 24In Station Street, tutorial pages cover (press the cover button to crouch behind walls or objects) Connection Events and Gifts. You can view all Connection Events in one playthrough after unlocking Grim Garten's Sanctum in the Intermission.
- 25A green marker indicates the bulletin board.
- 26At Primo's Tacos, purchase Junk Food Tacos, Grape Juice, and Blueberry Juice.
- 27At Orbal Cafe Iota:
- Sales Counter (Isla): Purchase LotusPods for 500 mira (for Agnès).
- 28Workshop Counter (Carl): Access plug-ins.
- 29Cafe Counter (Ilhan): Purchase Supreme Mango Latte.
- 30A red marker event will occur at the Bracer Guild.
- 31At Weston Department Store:
- Holden Foods: Purchase Ored Pickles.
- 32Jardin Boutique: Van and Feri are the only party members not equipped with the Rigid Coat (RES +62, ARES +30) and Rigid Spikes (ARES +8, SPD +4, MOV +2).
- 33Gun Shop Thunders: A red marker event will trigger a tutorial on weapons. Speak to the owner a second time to get a mention about Rosalie, which unlocks another Topic Quest. New weapons for Van and Feri are available, along with "new" sub parts (though you may have duplicates). An accessory, Gunner's Belt, can be exchanged for Tyrant Belt.
- 34Vending machine: Purchase Sweetened Canned Coffee and Apple Cider.
- 35Milty's Ice Cream Stand: Purchase Rich Pistachio Ice Cream and Refreshing Lemon Gelato.
- 36Proscribed Part-Time Plight:
- Client: Colt | Importance: ★★ | SP: 3 | Reward: 3000 Mira | LGC: GC
- 37Find the client near the underground entrance and accept the request. Get the topic "People Forced into Illegal Gigs".
- 38Location: Seiden District, Maserati Hotel - Undergr
- Always buy items as soon as you see them, especially collectibles.
- Pay attention to the "New" icon above merchants for newly stocked items.
- Deploy the Cooking Notebook for buffs and status recovery outside of battle.
- The bathhouse refills all gauges and stats, making it a valuable resource.
- Topic Quests offer additional SP and rewards.
- SP, Mira, LGC points, and various items depending on quest completion and choices made.
Rean Route 1: An Invitation to Basel
Complete walkthrough for Rean Route 1 in The Legend of Heroes: Trails Beyond the Horizon, covering Basel exploration, quests, shops, and events.
We're finally back in Basel! Let's get exploring.
Artisanal District:
- Grim Portal: red marker in the north side of the map, across from the Rare Metal Mine
- Giscard Factory: event on entry. Orbment: tier 2 quartz available, new plugins available. Item Shop: Multitool Knife (500 mira, for Fie), Mechanic's Goggles (accessory exchange for Master Goggle). Trade: trade up to tier 3 quartz.
- The Quarry Tavern & Inn: Soul Chef: Hamburger Steak (500 mira), Blissful Kirschtorte, Stone-Baked Hamburger Steak. Optional event in the corner with Lila.
- Air Tram Vending Machine: Ginger Lemonade
- Bracer Guild: event on entry. Check the bulletin board.
Holo Core Head Scratcher (Quest)
Client: Associate Prof. Athena | Importance: ★★ | SP: 2 (+2) | Reward: 6000 Mira | LGC: L+
Find the client at The Quarry Tavern & Inn, accept her request. Get holo core _Pocel ver1.20_ _β_. Follow the instructions to set it on Rean. Talk to the following people with the topic button: Giscard Factory (Giscard and co.), New Town (Air Tram - Researcher), New Town (Echelon Cinema - ticket counter shopkeep). Report to Athena; you will be given choices, choose all three to get SP +2. Get Alter Pocel.
New Town:
- Willy's Roaming Cafe: Soul Chef: Coffee (500 mira), Willy's Latte, Willy's Café Jelly
- Verne Store: Basel Tech Review, July Issue (100 mira), Mist Hairdryer (500 mira, for Altina)
- Verne Arms: Soul Chef: Food Provisions (500 mira), new weapons and gear
- Echelon Cinema: Optional event to watch a movie for 1000 mira (5 people), and buy the brochure (100 mira). You can watch two movies.
- Cerise Drug: Soul Chef: Health Foods (500 mira), Cerise Chips, Dark-Blue Musk (500 mira, for Crow)
- Check the bulletin board.
- Space Merch Shop: Rocket Charm (accessory exchange for Planet Ring)
- Maximum Energy: Maximum Energy DX
- Grim Portal: behind the stairs to the east for Verne HQ
- Basel Motor Pavilion: event on entry
- Verne HQ: red marker event with Latoya Hamilton and Verne CEO
Orbal Microwaves Fever (Quest)
Client: Manager Radad | Importance: ★★ | SP: 2 (+2) | Reward: 6000 Mira | LGC: LG+
Find the client at Verne Store and accept his request. Head to Artisanal District and talk to the Artisan near the Chapel with the Topic. Then go to Verne HQ and talk to the receptionist. Option #2: "Modifying a Different Product" (SP +1). Head to Artisanal District, and talk to Jason outside the Bracer Guild with the new Topic. Option #3: "Repurposing Micowaves into Weapons" (SP +1). Save at this point if you want. Fast Travel > First option will lead to a fight against seven men with guns.
Auge Canyon
- Ignore the fork going west, continue on the main path. First chest has Teara Balm, EP Charge II, Curia Balm, S-Tablet.
- Next chest has All Sepith x150. You cannot take the map exit to Liberl Kingdom, so take the available fork going down.
- There's a chest with Military Watch.
- Take the next fork going north for Breath.
- Continuing east brings us back to the entrance, so go south instead.
- Cross two bridges and take the north fork going downhill for a chest with Heat Brooch.
- Head south until you reach another fork, take the west path for Silver Ring.
- Chest near the Charging Station has Celestial Balm.
- Fishing spots: Rockeater (BHC), Kasagin (BHC), Cangiru (BHC), Pearlglass (BHC), Red Perch (BHC). You can buy all the baits from Epstein Workshop.
- Charging Station: new subparts available. Might want to equip Yellow and Red Pendulums.
Auge Canyon Bounty (Quest)
Client: Bracer Guild | Importance: ★★★ | SP: 3 | Reward: 6000 Mira | LGC: LG+
Target: Jerim Kaizam | LVL: 24 | HP: 84758 | EXP: 805
Elemental Efficacy: Earth 120, Water 180, Fire 80, Wind 40, Time -, Space -, Mirage -
Notes: Extreme Jelly (whole field/wide area target around self, causes Mute and Seal), Crystal Cluster (whole field, STR ↓), Oxidant Vapor (Single target, All Cancel, Freeze).
Get Fortune for completion.
- Head inside the building for an Orbal Locked chest with Ivy Frost (SP +1). (NG+: All Sepith x300)
Grim Garten: Third Domain A - The Unmoored Gardens
Floor Boss: Zana Razba
LVL: 21 | HP: 51908 | EXP: 539
Elemental Efficacy: Earth 180, Water 80, Fire 40, Wind 120, Time 40, Space 200, Mirage 80
Notes: Spider Pride (heals 5190 HP, STR/ATS/ADF/SPD/MOV ↑ for 4 turns), Gooey Bullet (SPD ↓), Blood Breath (straight line, causes STAT DOWN for 2 turns), Ground Drum (whole field attack, causes Freeze). Accompanied by six Lag Venenousa (weak: earth 150, wind 110, mirage 160).
Wipe the minions in one go with Fie's S-Craft. Start off with Earth Guard, Refreshing Veil and Altina's Remedy Song (optional). Out of the team, only Rean's S-Craft can remove the boss's self-buff. The boss isn't difficult if you've been defeating monsters on Auge Canyon and in the Domain. Your levels are probably higher than the boss at this point.
With all the mandatory stuff done, don't forget to do the side things like movies (you can watch 2!), Connection Events and requests. For the events you can choose two out of three between Crow & Towa, Altina, or Fie's (100 CP to each character, 30 CP for each).
Similar guides you might like




100% Human-Written. Community Verified. Learn how Ludo.guide verifies content