Welcome to Valkyrie Profile 2: Silmeria, a PlayStation 2 exclusive from Tri-Ace that blends intricate storytelling with deep, celestial combat. As the Valkyrie Silmeria, you'll recruit fallen warriors, known as Einherjar, to aid you in your quest. The game challenges you to master its unique battle mechanics and navigate a complex narrative across multiple chapters.
This guide is here to help you conquer every aspect of Silmeria's journey. We'll cover everything from understanding the core battle system and character recruitment to providing walkthroughs for key locations and detailing strategies for challenging boss encounters. Whether you're aiming to collect every item, achieve all possible endings, or simply understand the game's mechanics, this guide has you covered.
-------------------------------- Aka Kouli/Ice --------------------------------
Find Aka Kouli/Ice in Valkyrie Profile 2: Silmeria. This section is part of the Full Walkthrough.
- 1Navigate through the Full Walkthrough section of the guide.
- 2Progress through the chapters and optional areas as outlined.
- 3The specific location of Aka Kouli/Ice will be detailed within the relevant chapter or optional section of the walkthrough.
- Refer to the Table of Contents for the exact chapter and section detailing Aka Kouli/Ice.
- Follow the step-by-step instructions provided in the Full Walkthrough for optimal progression.
----------------------------- <Full Walkthrough> ------------------------------
Full walkthrough for Valkyrie Profile 2: Silmeria, Chapter 1: The One That Defied God. Includes item locations, enemy details, and strategic tips for progression.
- 1Solde:
- Upon gaining control of Alicia, return to the Assembly Hall and check the right corner for a Port Wine.
- 2Exit and go left. Enter the nearest Villager House and check the left box for a Soldier's Secret Herb.
- 3Continue left to find the Weapon Armor Shop. To the left of the shop, a path leads north. Further left are the Inn (save point) and the town entrance/exit.
- 4Head north, then right to find a cat. You'll need Seafood Meat for it later.
- 5Near the cat is another Villager House. To the left of this house is a path to the Church and another Villager House at the far left.
- 6Inside the far left Villager House, examine the left end to find and read the first part of the tri-Ace Poem. This is important for a reward in Chapter 6 (the Tri Emblem).
- 7Exit Solde to the World Map.
- Proceed right for a scene. The game will explain combat controls.
- Combat Controls:
- Left Stick: Move
- L3 (Left Stick Press): Charge AP Gauge
- D-Pad Right/Left: Change Leader
- Approach Enemy + Square/X: Attack
- Attack again: Break Mode (increases with parts broken and Break Up skill)
- R1: Dash (Short, Medium, Long press for range)
- Yellow End of Field: Escape (fails if AP is lost)
- Extend Gauge: Earn Bonus Magic Crystals and EXP based on lights filled.
- D-Pad Up/Down: Change Group
- Right Stick: Camera Movement
- Select: Menu (Item, Magic, Weapon Change)
- L1: Camera Adjust
- L2: Target Mode
- R2: Toggle Radar
- R3: Toggle Camera
- After the battle explanation, continue forward. Use Circle to Slash/Examine, Square to shoot Photon, X to Jump.
- Shoot a spirit with Square, then use it to jump to the right. Shoot again and switch places with the crystal.
- Collect 400 OTH nearby.
- Proceed inward to find your first Einferia, Mithra (100% map completion). Save your game.
- Do not go right yet. Go left and shoot towards the NW to reach higher ground.
- Collect a Skull Vessel and a Union Plum. This achieves 100% map and treasure completion for this area.
- Enter the cave.
- The tri-Ace Poem in Solde is high-stakes for obtaining the Tri Emblem in Chapter 6.
- Pay attention to the combat explanation; understanding Break Mode and AP management is key to efficient fighting.
- The percentage for Break Mode carries over between battles, so building it up before a boss fight is advantageous.
- Experiment with different leaders and groups using the D-Pad to find effective combat strategies.
- Tri Emblem (obtained in Chapter 6 by reading the tri-Ace Poem in Solde).
around it and you shouldn't have much trouble with it.
Navigate Dipan Castle in Valkyrie Profile 2: Silmeria. Find items like Crest Estoc and learn how to defeat the Chaos Ooze boss.
- 1In Dipan, head left from the guarded path. The Inn and a save point are to the left of the Bar. Further left are the Weapon Armor Shop and a Villager House.
- 2In the Villager House to the left of the Weapon Armor Shop, read the 2nd part of the tri-Ace Poem at the right end.
- 3Head north to a Villager House and check the left for a Union Plum.
- 4Go right to the Church and more Villager Houses. Continue right to speak with guards, then backtrack to the start and go right then up to enter the castle.
- 5Inside Dipan Castle, go south. Go right for Leather Boots. Backtrack and go left for a save point.
- 6The left path leads to a Dwarf's Sacred Herb and a Union Plum.
- 7Go south for a battle, then right and south at the end. Go left, ignoring the further left path, and go south.
- 8Go left and shoot NW to make a crystal. Shoot again to switch places with it. Check nearby for 700 OTH.
- 9Repeat the crystal switching to move further up. Jump and shoot NW to reach an enemy.
- 10Go left to another area. Go left and get the Cross Bow. Above this box is another.
- 11Shoot the crystal on top of the box with the Cross Bow. Jump up NW to get the Double Search.
- 12Backtrack and go right. Destroy the red object to unseal the barrier.
- 13Use an enemy to get up to items above. Position Alicia and shoot NE to make a photon bounce to an enemy. Repeat to get up.
- 14Get 1200 OTH. Shoot NW and repeat to get up.
- 15Stand on the red object and jump left to get the Flare Gem.
- 16Destroy the object and go down to the right.
- 17Get the Crest Estoc. This completes 100% for Treasure. Save your game and go right for the boss fight.
Boss: Chaos Ooze
- Race: Giant, Plant, UnHoly
- Level: 8
- HP: 1200
- EXP: 9000
- OTH: 1260
- ATK: 40
- MAG: 20
- HIT: 10
- AVD: 18
- RDM: 5
- RST: 10
- Weight: 100
- Absorb Attribute: None
- Gender: Male
- Basic Evasion: 8
- Basic Guard: 1
- Counter Rate: 100
- Attribute Resist: Minus 20 Flame, 80 Thunder/Earth, 20 Darkness
- Abnormal Resist: Paralyze(20), Silence/Poison/Death/Confuse/Petrify/Transfer (100), Freeze/Stun(50)
- Re-Fightable: No
- Equip Alicia with the Crest Estoc for decent Soul Crush damage.
- Skills like Iron Fist, Hard Body, or Regeneration Heal are recommended.
- Ensure you have Gold&Silver Flower's Dew or equip Poison Check to cure Poison status, as the Chaos Ooze can inflict it.
- If aiming for Break Mode, break parts of side enemies before the boss.
- Dash to the Chaos Ooze's back to attack, but avoid getting too close due to its wide close-range attack.
- Beware of its Log On attack, which can use Wash Out and potentially Poison you.
- If it uses Regeneration after you take out its tentacles, be cautious as it can be deadly at close range.
- Heal the entire party when necessary, not just one character.
- Focus on destroying the tentacles, as the boss can use Regeneration to revive them.
- It is unlikely to get all item drops.
- After meeting Ahly, check where you met her for the Hunting Sword Hilde. This MUST be done before exiting Dipan Castle. Hunting Sword Hilde also enables Decisive Tech/Soul Crush.
- Train Lezard to Level 45 before the end of Chapter 4 if you want two decent accessories later.
- 100% Treasure completion in Dipan Castle.
- Items: Leather Boots, Dwarf's Sacred Herb, Union Plum, 700 OTH, Cross Bow, Double Search, 1200 OTH, Flare Gem, Crest Estoc.
- Potential drops from Chaos Ooze.
from its parts in one try, so gather as many as you can.
A guide to completing maps and gathering essential items in Valkyrie Profile 2: Silmeria, covering Kythena Plains, Coriander, and Serdberg Mountain Ruins.
This section details how to achieve 100% map completion and gather specific items and materials in various locations. It's recommended to gather as many necessary parts as you can in one go.
- 1Kythena Plains: Head right for a scene (100% map completion). Backtrack for a scene with Ahly. Check Ahly's previous location for the Hunting Sword Hilde. Continue backtracking; Lezard will join the party.
- 2Kythena Plains - Item Gathering: Enemies drop specific materials: Flying Fish drop Seafood Meat (30% tail), Giant Bat drop Bone-Attached Meat (30% body), and Dire Wolf drop Bone-Attached Meat (30% tail). Collect at least 15 of each.
- 3Kythena Plains - Cat Feeding: Return to Solde and feed the cat: 1x Seafood Meat for Hunted Rat, 5x for Tail Broken Lizard, 10x for Misfortune Blue Bird, 15x for Cat's Poop. Sell these materials at the Solde shop. Reach 8000 Regulars' Point (80,000 OTH purchase) to buy the Cat's Ring.
- 4Lost Forest & Coriander: Go west from Kythena Plains to Lost Forest, then backtrack west to exit. Kythena Plains will appear on the World Map. Head west to reach 100% map completion. Exit and go to Coriander.
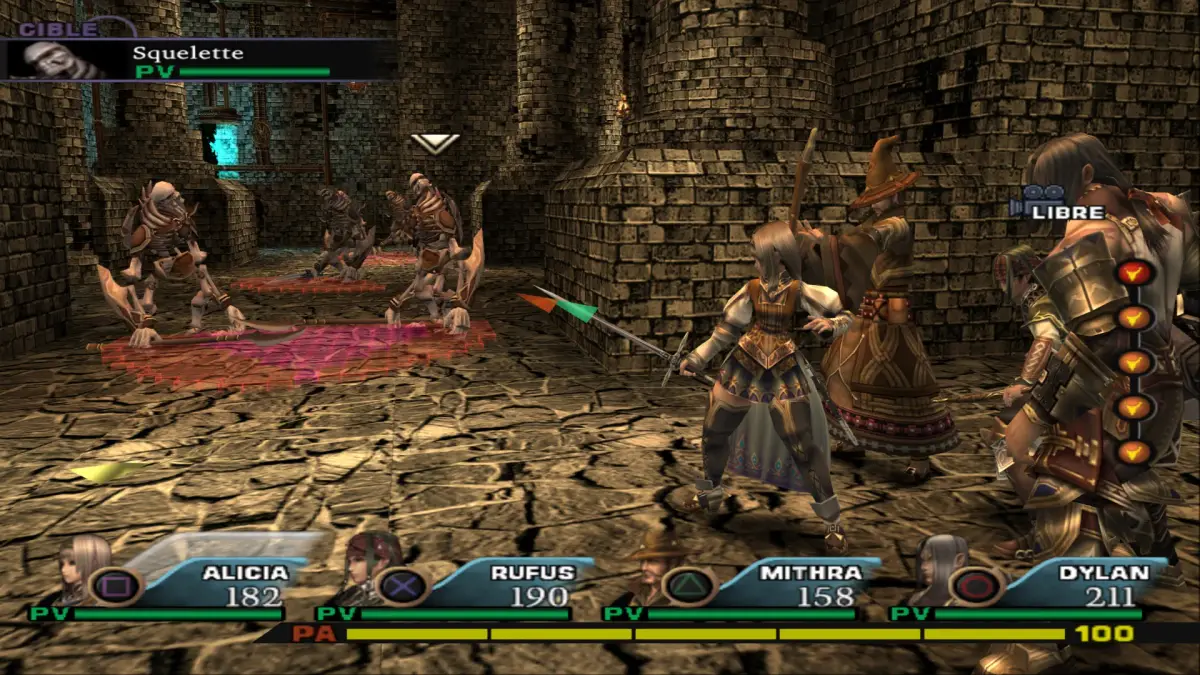
- 5Coriander - Item Gathering: Enemies drop materials: Skeleton drops Bone Waste (20% leg/arm), Skeleton Army drops Bone Waste (20% leg/arm). Collect at least 15 Bone Waste.
- 6Coriander - Chicken Feeding: Feed the chicken in Coriander: 1x Bone Waste for Chick's Bait, 5x for Vegetable Waste, 10x for Packed In Shell Bait, 15x for Bird's Poop. Sell these materials to the General Merchant. Reach 8000 Regulars' Point (80,000 OTH purchase) to buy the Bird's Ring.
- 7Coriander - Exploration: Speak with the Adventurer for Insect Thorn and Blue Soul Flame. Find an Earth Gem in the first Villager House. Near the second Villager House is a chicken; you can feed it Bone Waste. Exit east if you've spoken to the girl.
- 8Serdberg Mountain Ruins - Navigation: Head right and up. Use two crystals to reach higher platforms. Jump onto the lower crystal, then the top crystal to reach Big Rump. Go east for Might Potion, 2500 OTH, and Dwarf's Sacred Herb (beware of traps in the middle and right chests). Backtrack and go south.
- 9Serdberg Mountain Ruins - Sealed Stone & Allies: Go left for a scene and the Sealed Stone Misty Commandment. Use an enemy to jump right, then south. Slash at the end of the path to find 3400 OTH, Ice Gem, and a Prime Elixir (beware of exploding chests). A sword here can grant an Einferia. Push a globe to the left and right to raise stairs. Save your game and go south.
- 10Serdberg Mountain Ruins - More Items & Allies: Leone and Aluze join. Use an enemy to jump right. Use a globe to fall on cracked ground to reveal the Falchion and Sealed Stone Masochistic Commandment. Freeze the globe with Photon, position yourself on the cracked ground, and shoot the globe to make it fall. Move right to the next area.
- 11Serdberg Mountain Ruins - Final Items: To the right, use a globe and cracked ground to access more items. Freeze the globe, position yourself on the cracked ground, jump, and shoot the globe to make it fall. You can repeatedly fight the Crusty Golem by escaping before defeating it.
- Gather at least 15 Seafood Meat from Flying Fish for the cat in Solde.
- Gather at least 15 Bone-Attached Meat from Giant Bats and Dire Wolves.
- Gather at least 15 Bone Waste from Skeletons and Skeleton Armies for the chicken in Coriander.
- Train Leone and Aluze to Level 40 before the end of Chapter 3 for powerful weapons.
- Be aware of traps in chests in Serdberg Mountain Ruins.
- The Crusty Golem in Serdberg Mountain Ruins can be farmed for experience/drops by escaping before defeating it.
Similar guides you might like






100% Human-Written. Community Verified. Learn how Ludo.guide verifies content