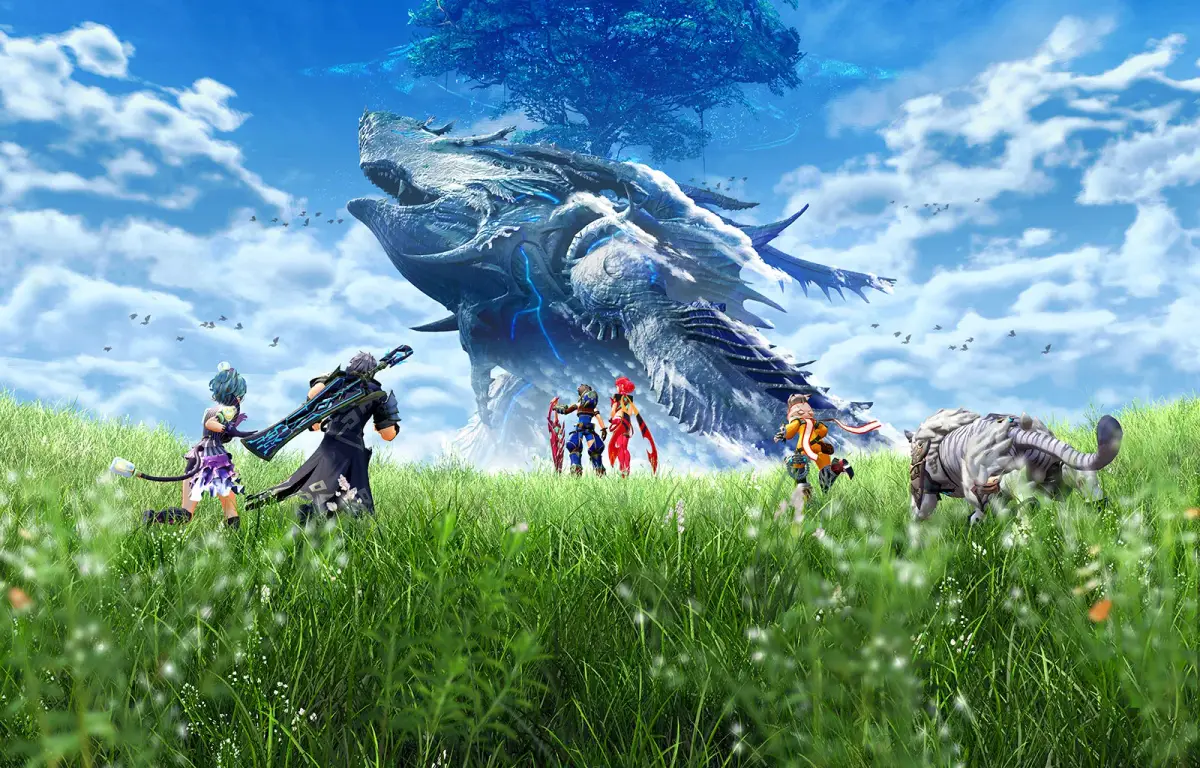
Welcome to Alrest, Driver! Xenoblade Chronicles 2 is a massive open-world RPG where you'll explore a world of titans, awaken powerful Blades, and battle your way through a sprawling story. You'll spend your time mastering a deep combat system, managing your party of Drivers and Blades, and uncovering the secrets of the Titans.
This guide is here to help you conquer every challenge Xenoblade Chronicles 2 throws your way. We'll cover a full story walkthrough, detailed strategies for every side-mission, and help you find every Blade and collectible scattered across the world. Whether you're trying to optimize your blade combinations or just trying to find that one elusive item, we've got you covered.
Introduction/Version History
Dive into the version history of the Xenoblade Chronicles 2 guide. See what content was added in each update, from combat systems to Rare Blades and quests.
Hey there! So, you're diving into Xenoblade Chronicles 2, huh? Awesome choice! This game is HUGE, seriously. We're talking 60-80 hours just for the main story, and that's if you're really focused. If you want to see all the cool optional stuff, you'll be in for even more time. Because it's so massive and some of the side content can be a bit tricky to track down, this guide is here to help you navigate the main story as smoothly as possible. We'll also sprinkle in bits of optional content so you don't miss out on anything!
If you happen to spot any errors in the guide – maybe a factual slip-up, or even just a typo – please don't hesitate to shoot me a PM or email HeroponTotoro at gmail dot com. If you can include a screenshot or a link to back up your correction, that would be super helpful!
Version History
Check this out at how this guide has grown over time:
- v 1.0
- The Combat System guide is all wrapped up and included.
- We've completed the Affinity Charts for all Rare Blades, though a few early requirements might still be a bit fuzzy.
- All Blade Quests are done!
- Every Heart-to-Heart is detailed.
- Item lists for collectibles, weapon chips, pouch items, and deeds are in. We'll keep adding more detail to these as we go.
- v 0.90
- The main story walkthrough is officially complete. Woohoo!
- All side quests are documented and finished, though we might add some minor tweaks down the line.
- Rare Blade Affinity Charts are mostly done, just a few early requirements missing.
- We've added more Blade Quests and Heart-to-Hearts.
- v 0.50
- The main story walkthrough is complete up through the end of chapter 5.
- Most Rare Blade affinity charts are as complete as they can be by chapter 5, excluding those you haven't acquired yet.
- Some Blade Quests and Heart-to-Hearts have been documented as far as you can get them at this point in the game.
- All side quests available up to chapter 5 are listed with their starting points. Most are complete, except for 'Into the Open Sky' and 'Uncover the Truth' which need further story progression.
Copyright Notice: This guide is for your personal use only and shouldn't be shared publicly without permission. Thanks for respecting that!
Story Walkthrough
Follow our detailed Xenoblade Chronicles 2 story walkthrough to navigate the main quests, overcome boss battles, and progress through the game's epic narrative.
This section of the guide is all about moving through the main story of Xenoblade Chronicles 2. We'll focus on where you need to go, what actions you need to take, and how to tackle those tricky boss battles. We won't be going into detail on cutscenes – you'll be watching those as they happen! If you happen to skip one, don't worry, you can rewatch them later from the Events Theater. We'll mention story beats as we go, but there are no spoiler warnings here. Just don't read ahead in the guide, and you'll be fine!
While this walkthrough sticks to the main story, we might point out some helpful side quests or treasure troves if they can give you an edge or make things easier.
Ready to dive in? Let's get started with Chapter 1: Encounters!
Combat System
Learn the core mechanics of Xenoblade Chronicles 2's combat system, including initiating battles, understanding enemy weaknesses, managing aggro, auto-attacking, Arts, and Special attacks.
The combat in Xenoblade Chronicles 2 can seem daunting at first, but as you learn to use the mechanics, it can become much easier to lean on. How easy or difficult this game is largely depends on your understanding of the battle systems, and how well you lean on the tools available to you, so it is very worth your time to practice.
Most battle mechanics are presented to you inside the game through the tutorial system, but seeing as this can sometimes be overwhelming, and you cannot currently review tutorials in-game, you might miss things, and even forget some of the basics. As such, this section will endeavor to explain the systems as clearly as possible. No spoilers will be included in this section, so you will not need to worry about that either.
Initiating Battle
A lot of enemies are aggressive and will target you regardless of if you want to fight or not, but there are quite a few docile enemies that you may wish/need to battle that won't. Also, if you are eight or more levels higher than a monster, they will ignore you, even if they would have fought you before. The one exception to this rule is Unique Monsters, who will target you no matter what level you are, or if their species is generally docile. To initiate battle yourself, you can target an enemy with the R button. If you would like to change targets, hold down the R button and then press Y to switch to the left or A to switch to the right; this works both in and out of battle. After targeting an enemy, press the A button to take out your weapon, and the battle will begin if you are in range for your weapon to land a hit. Another way to start a battle is to target an enemy and press the down button to toss a rock and lure an enemy toward you from a distance, and/or in a group of enemies if you would only like to face off against the one. Be warned, however, that some enemies will not come alone and will always alert others around it. If you would like to stop targeting an enemy, you can hold R and press B to sheathe your weapon; this works in battle as well, however you will need to flee the area as well, but the battle will end once you are out of range of the monster. If you change targets, and would like the rest of your party to do the same, press the left button to have them focus on the same target.
Battle Information
When in battle, the enemy's information will be displayed at the top of the screen. The name of the enemy you are targeting is displayed. On the left side of the bar is the enemy's level, which will give a rough indication of its relative difficulty. On the right side, you will see an icon indicating its _weakness_. This icon is often misunderstood to be the enemy's element, not weakness. Each element is opposed by another, and they are weak to each other. Attacks and Specials of the weakness will do extra damage to the enemy, whereas attacks of the same element will do less damage.
- Fire <-> Water
- Wind <-> Ice
- Earth <-> Electric
- Light <-> Dark
Aggro
When in battle, the enemies will only target one party member at time. Whom is being targeted is indicated by a red ring encircling the party member. On this ring are yellow indicators showing you which direction they are in relation to you. Certain Drivers are more capable of surviving with Aggro than others, and this is largely determined by equipped Blades and accessories. Certain Arts and accessories also allow you to either increase or decrease the amount of Aggro you are receiving.
Auto Attacking
Auto attacks are at the core of the battle system. You need not press a button to attack, you merely need to stand still. If you move around the battlefield, you will stop attacking. As you attack, you will notice that the attacks always come in sets of three, with each hit becoming more powerful than the last. (some weapons do attack more the three times in a series. However, while more hits may land, for all intents and purposes, these still only count as three main attacks)
Arts
Arts are very important to battle. The auto-attacks may be your default method of attack, but Arts will be your main way of dealing damage. Your available arts are located on the lower right corner of your screen. Arts will recharge with each auto-attack you land, and each art requires a certain number of hits to activate. (how many attacks are required to recharge each art can be found in the Enhance Arts menu) To use the art, press the button corresponding to each art. (X tor the top, Y for the left, and B for the bottom) Each weapon has it's own set of Arts that can be used, and these usually vary from Driver to Diver. (i.e. Rex has access to different Arts when using Twin Rings than Nia does) By unlocking specific skills for your Drivers, you will be able to use an Art assigned to a specific button at the start of the battle.
Attack Cancelling
If you use an Art at the precise moment that your auto-attack finishes, you will perform an auto-attack cancel, which will increase the power of your Art. If you succeed, you will see visual cue in the form of a white circle. Each stage of the auto-attack sequence will boost the power even more, so using an Art as you land your final hit in the sequence will be boosted by more than the first attack. Each driver has a skill that can be unlocked that will allow them to cancel an Art into another Art, making it easier to land stronger hits. Attack cancelling can be tricky to learn, but learning how to do it properly will increase the amount of damage you do in battle, making fights much easier. There are certain accessories that can increase the window of opportunity for cancelling if you need the help in learning the timing.
Specials
The icon on the right, beside your Arts, is your Special. Specials are charged by using your Arts in battle. The Special can be charged quicker if you succeed at attack cancelling into the A
Chapter 1: Encounters
Follow this Xenoblade Chronicles 2 walkthrough for Chapter 1: Encounters, covering the initial battle, navigating Argentum Trade Guild, and completing the 'Big Job Preparations' quest.
The game begins by immediately thrusting you into combat. To initiate a battle, press the A button. Once in battle, stand still to build up your Arts. After landing six hits, your first Art will be charged. Using this Art is not mandatory but will expedite the fight. After the battle, you will sail to port.
Upon arriving at Argentum Trade Guild, proceed to the Central Exchange. Use the compass or map to navigate there, as it's located at the center of the ship. Speak with Melolo to advance the story. After the conversation, move a short distance away from the Central Exchange to trigger the next scene. You will be summoned to Chairman Bana's office, located upstairs. After this, you will receive 100,000G. Return to Goldmouth Return Port to report to Gramps. Upon completing this, you will receive your first quest, "Big Job Preparations." Setting it as your active quest will enable the compass to guide you through its steps.
- 1Big Job Preparations
- Reward: 40 EXP, 0 SP, x3 Braised Cloud Sea Shark, x1 Silver Cylinder, x3 Normal Cylinder
- 2Objectives:
- 1. Buy an Abyss Vest at Shynini's Accessories (5,000G).
- 32. Talk to Melolo at the Central Exchange.
- 43. Speak with Max the courier (underneath Bana's office).
- 54. Speak with Rurui, who is waiting on the Salvage Deck.
- 65. Salvage at the Salvage Point on the Salvage Deck.
- 76. Report back to Rurui on the Salvage Deck.
- 87. Head to the third floor and buy food supplies at Fishy Fishy (from Kitoto).
- 9Rest at the Inn: Head to the inn and speak to Utoto to rest. This allows you to use accumulated bonus experience (gained from quests and discoveries) for leveling up.
- 10Meet New Characters: Head to the Maelstrom and talk to Spraine to board. On the entry deck, speak with Nia and Dromarch. Climb the stairs behind them, turn left, and pass through the doors to speak with Jin. Return to the main deck, climb the stairs, and speak with Malos and Sever.
- 11Prepare for Duty: Explore the ship if desired. When ready, climb the stairs on the main deck to the watchtower and speak with Monell to begin your shift. After this, you are free to explore again. Before heading to the entry deck, collect the treasure chest in the end bedroom (contains gold and a Rush Hour accessory).
- 12Form Your Party: Head down to the main deck. You will have the choice to add Nia, Malos, or Jin to your party. Note that you can only control Rex at this time.
- 13Ancient Ship: This is a unique area. The guide will help you explore it thoroughly to avoid missing anything.
- Equip the Abyss Vest immediately after purchasing it.
- When salvaging, press the button prompt as close to the inner ring as possible. Button prompts and speed may vary at different salvage points.
- If enemies appear during salvaging, you will typically need to defeat them before accessing any chests.
- The answer you give to Rurui after salvaging does not affect the outcome; you will receive Normal Cylinders regardless.
- Bonus experience is optional and can be used at inns when resting.
- The treasure chest in the end bedroom before heading to the entry deck is missable.
Similar guides you might like

100% Human-Written. Community Verified. Learn how Ludo.guide verifies content