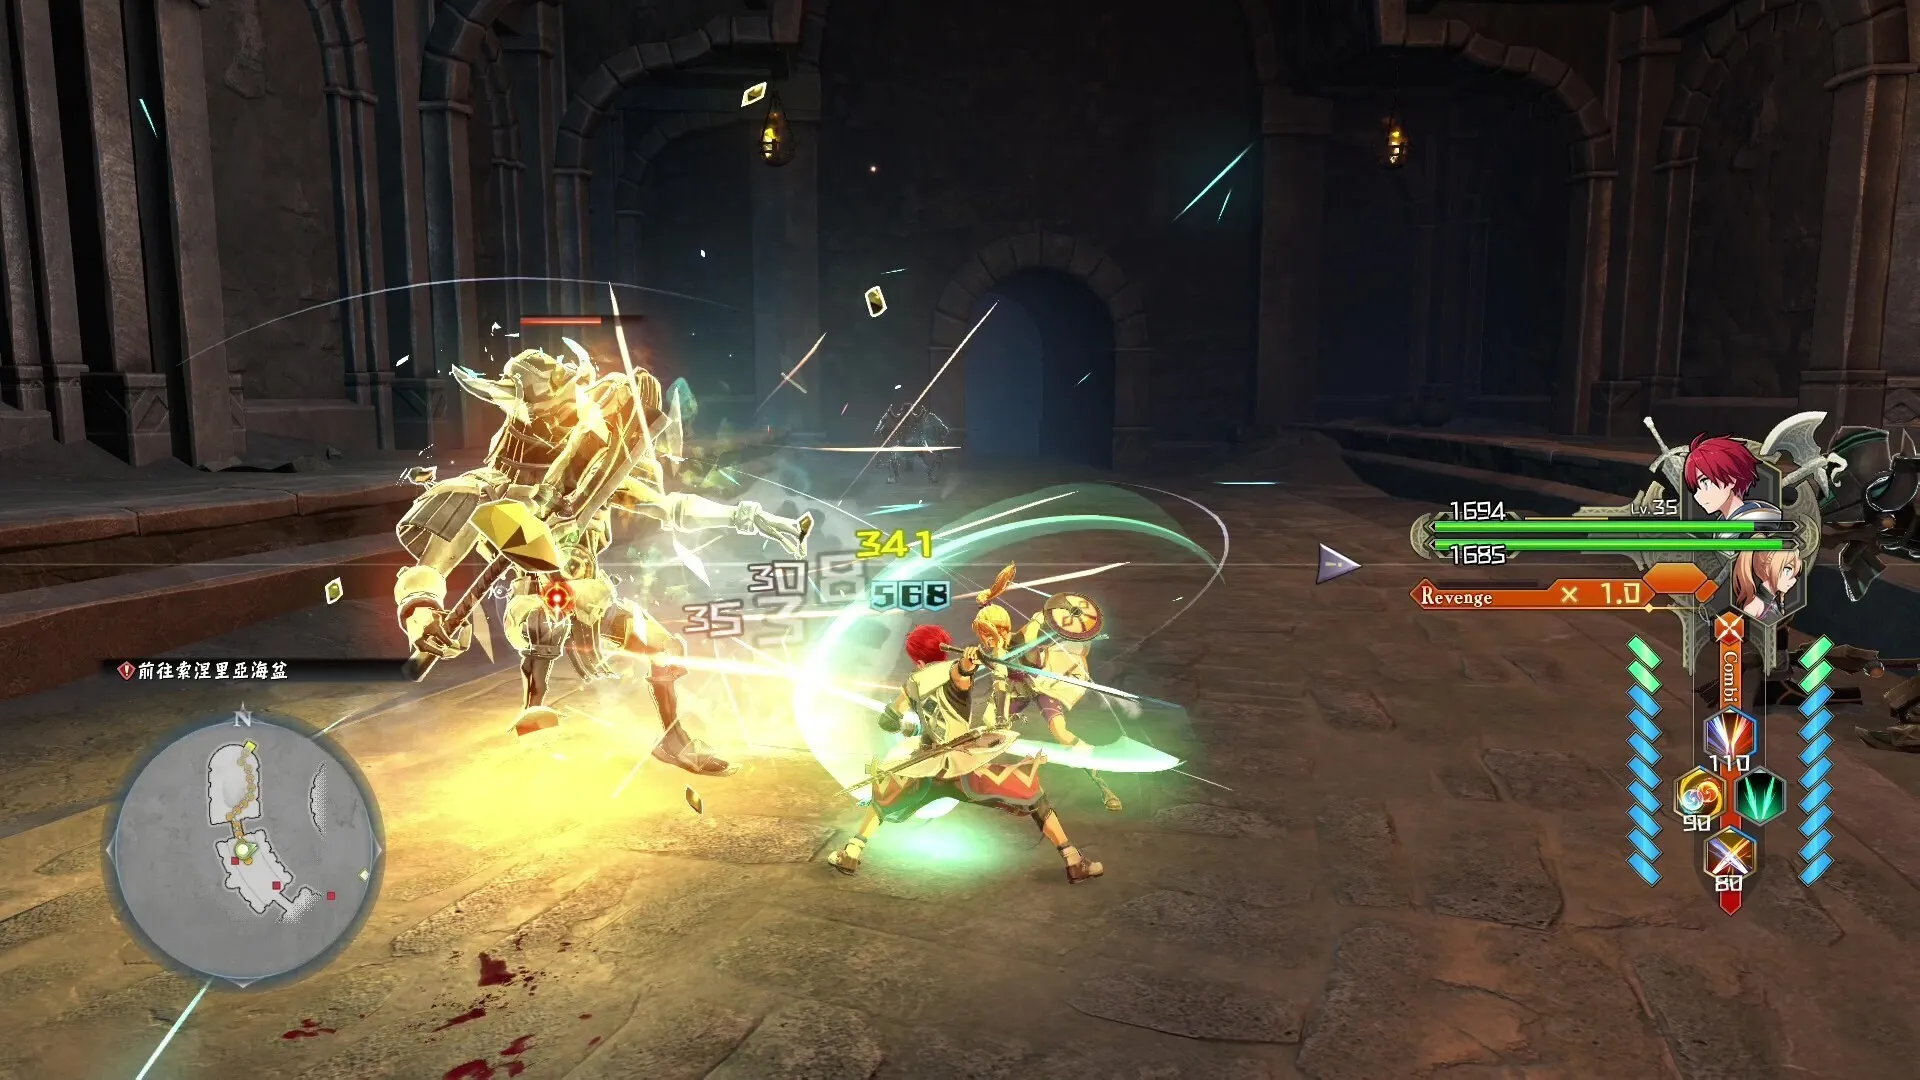
Ys X: Proud Nordics plunges you into a fast-paced action RPG adventure where you'll explore the vast oceans and islands of the Nordics. As Adol Christin, you'll uncover ancient mysteries, battle formidable foes using a dynamic combat system that incorporates skills like Raid Slash, and manage your ship. The game also includes all previously released bonus content, such as unique costumes and ship decorations.
This guide is here to help you conquer every challenge Ys X: Proud Nordics throws your way. We'll cover everything from navigating specific locations like Balta Island and the Cavern of Rite to mastering combat mechanics and understanding how to equip new items like the Rune Bangle. Whether you're aiming to collect everything or just get through the story, we've got your back.
Prologue: The Raid
Walkthrough for Ys X: Proud Nordics Prologue: The Raid. Learn about Additional Footholds, battle tutorials, and interacting with NPCs.
- 1Boot up Ys X: Proud Nordics and access the Settings menu to adjust options like Combat Assist and minimap (map that shows your surroundings) orientation.
- 2Start the game and choose your mode. You will be asked if you want Additional Footholds for hard-to-reach places; select Yes or No.
- 3The game begins with narration from Dogi.
- 4On the Passenger Liner Adamas, you will speak with Adol. Your dialogue choices have no consequences.
- 5A trophy called "A New Adventure" will be awarded.
- 6Familiarize yourself with the sub-menus: Left Direction accesses the Map, Down Direction accesses the Journal, Right Direction accesses the Inventory, Up Direction accesses the Log, and the Option button opens the Camp Menu.
- 7Characters you can interact with are marked by a blue :) icon, which turns gray when they have no further dialogue. Characters with blue/gray circles offer only short chats and cannot be interacted with further.
- 8Talk to Captain LaSalle, indicated by a (!), and choose the first dialogue option to continue.
- 9Engage in battle tutorials: learn Attacking & Targeting by pressing X to attack and R3 to lock on (target an enemy).
- 10Learn Guarding & Evading by pressing R2 to guard and L1 to dodge (evade an attack).
- 11An opening cutscene (a non-interactive cinematic the game plays automatically) will play.
- Dialogue choices with Adol have no consequences.
- The minimap can be set to always face north in the Settings menu.
- Characters with a blue :) icon are available for interaction.
Sea Chart
Navigate the vast seas of Ys X: Proud Nordics! Discover all locations, towns, shops, and fast travel points across Carnac Waters, Ozmid Expanse, and more.
Alright, so you've got the hang of sailing and exploring, and now you're ready to really get a feel for the world map. This section breaks down all the different sea regions you'll be visiting. You'll get the freedom to explore pretty much everything starting around Chapter 4, so this is your go-to reference for where everything is!
Think of this as your ultimate sea chart. We'll go through each major area, listing out all the important spots like towns, shops, and fast travel points. Knowing these will make getting around a breeze!
Carnac Waters
| # | Location | Type |
| 1 | Carnac | Town |
| 2 | Carnac Surrounds | Fast Travel |
| 3 | Seagull Flock | Fast Travel |
| 4 | Balta Island | Town |
| 5 | Inlet Isle | Field |
| 6 | Lecto Island | Field |
| 7 | Fishscale Island | Field |
| 8 | Termina Island | Field |
| 9 | Merchant Ship: Baudin & Co. | Shop |
| 10 | Dieback Isle | Field |
Ozmid Expanse
| # | Location | Type |
| 1 | Ozmid Expanse - Occupied Island | Recapture |
| 2 | Reticent Penguin | Feed fish (S, M, L) for rewards |
| 3 | Hidden Isle | Field |
| 4 | Great Tidal Reef | Field |
| 5 | Ozmid Expanse - Southern Fort | Recapture |
| 6 | Anchor Island | Town + Field |
| 7 | Merchant Ship - Trader Åsa | Shop |
| 8 | Dolphin Pod | Fast Travel |
| 9 | Breezy Isle | Field |
| 10 | Stray Fisherman Gosta | Shop |
| 11 | Krangal Island | Town |
Sonnelia Basin
| # | Location | Type |
| 1 | Falun Island | Town + Field |
| 2 | Odd Rock Isle | Field |
| 3 | Kalon Island | Field |
| 4 | Merchant Ship - Gregorio's Curios | Shop |
| 5 | Sonnelia Basin - Southern Ruins | Recapture |
| 6 | Moonview Isle | Field |
| 7 | Sunning Sunfish | Fast Travel |
| 8 | Raufos Island | Field (Fortress) |
| 9 | Merchant Ship - Thrúd's Barge | Shop |
| 10 | Outcast Isle | Field |
| 11 | Fuling Island | Field |
Specular Bay
| # | Location | Type |
| 1 | Orlen Islands | Field |
| 2 | Specular Bay - Northern Citadal | Recapture |
| 3 | Sprout Atoll | Field |
| 4 | Merchant Ship - Anika's Goods | Shop |
| 5 | Specular Bay - Southern Castle | Recapture |
| 6 | Eversummer Isle | Field |
| 7 | Ruined Capital of Ribe | Field (Fortress) |
Flumen Strait
| # | Location | Type |
| 1 | Seagull Nesting Grounds | Fast Travel |
| 2 | Flumen Strait - Abandoned Mine | Recapture |
| 3 | Merchant Ship - Gregorio's Curios | Shop |
| 4 | Grotto Isle | Field |
| 5 | Grugal Fortress | Field (Fortress) |
| 6 | Dvergr Coast | Field |
Rogue Sea
This map includes the Marine Triangle (#11-14) and Cicatrix (#16 and #17)
| # | Location | Type |
| 1 | Soleil Island | Field |
| 2 | Giant's Hand Isle | Field |
| 3 | Rogue Sea - Southeastern Fortress | Recapture |
| 4 | Merchant Ship - Anika's Goods | Shop |
| 5 | Jötunn Island | Field |
| 6 | Rogue Sea - Ancient Site | Recapture |
| 7 | Stray Fisherman Gosta | Shop |
| 8 | Lucky Belugas | Fast Travel |
| 9 | Crescent Moons Isle | Field |
| 10 | Rogue Sea - Southwestern Citadal | Recapture |
| 11 | Gigantavis Isle | Field |
| 12 | Serenes Island | Field |
| 13 | Haze Island | Field |
| 14 | Marine Triangle - Historic Site | Recapture |
| 15 | Merchant Ship - Trader Åsa | Shop |
| 16 | Viewpoint Isle | Field |
| 17 | Rollo's Ark | Dungeon |
Raoul Darksea
| # | Location | Type |
| 1 | Raoul Darksea - Eastern Fortress | Recapture |
| 2 | Rambunctious Penguin | Feed fish (ancient species) for rewards |
| 3 | Redsand Isle | Field |
| 4 | Thrúd's Barge | Shop |
| 5 | Seabed Temple of Ægir | Field (Dungeon?) |
Keep this handy as you sail around. Knowing where the towns, shops, and fast travel points are will save you a ton of time and make your adventures much smoother!
Sea Chart (2)
Discover all Sea Chart locations in Ys X: Proud Nordics, including towns, fields, shops, and recapture sites across Carnac Waters, Ozmid Expanse, and more.
You'll gain freedom to explore the world map starting in Chapter 4. Below is a breakdown of the game's world map, divided into sections as presented in-game.
Carnac Waters
- 1 Carnac — Town
- 2 Carnac Surrounds — Fast Travel
- 3 Seagull Flock — Fast Travel
- 4 Balta Island — Town
- 5 Inlet Isle — Field
- 6 Lecto Island — Field
- 7 Fishscale Island — Field
- 8 Termina Island — Field
- 9 Merchant Ship: Baudin & Co. — Shop
- 10 Dieback Isle — Field
Ozmid Expanse
- 1 Ozmid Expanse - Occupied Island — Recapture
- 2 Reticent Penguin — Feed fish (S, M, L) for rewards
- 3 Hidden Isle — Field
- 4 Great Tidal Reef — Field
- 5 Ozmid Expanse - Southern Fort — Recapture
- 6 Anchor Island — Town + Field
- 7 Merchant Ship - Trader Åsa — Shop
- 8 Dolphin Pod — Fast Travel
- 9 Breezy Isle — Field
- 10 Stray Fisherman Gosta — Shop
- 11 Krangal Island — Town
Sonnelia Basin
- 1 Falun Island — Town + Field
- 2 Odd Rock Isle — Field
- 3 Kalon Island — Field
- 4 Merchant Ship - Gregorio's Curios — Shop
- 5 Sonnelia Basin - Southern Ruins — Recapture
- 6 Moonview Isle — Field
- 7 Sunning Sunfish — Fast Travel
- 8 Raufos Island — Field (Fortress)
- 9 Merchant Ship - Thrúd's Barge — Shop
- 10 Outcast Isle — Field
- 11 Fuling Island — Field
Specular Bay
- 1 Orlen Islands — Field
- 2 Specular Bay - Northern Citadal — Recapture
- 3 Sprout Atoll — Field
- 4 Merchant Ship - Anika's Goods — Shop
- 5 Specular Bay - Southern Castle — Recapture
- 6 Eversummer Isle — Field
- 7 Ruined Capital of Ribe — Field (Fortress)
Flumen Strait
- 1 Seagull Nesting Grounds — Fast Travel
- 2 Flumen Strait - Abandoned Mine — Recapture
- 3 Merchant Ship - Gregorio's Curios — Shop
- 4 Grotto Isle — Field
- 5 Grugal Fortress — Field (Fortress)
- 6 Dvergr Coast — Field
Rogue Sea
This map includes the Marine Triangle (#11-14) and Cicatrix (#16 and #17).
- 1 Soleil Island — Field
- 2 Giant's Hand Isle — Field
- 3 Rogue Sea - Southeastern Fortress — Recapture
- 4 Merchant Ship - Anika's Goods — Shop
- 5 Jötunn Island — Field
- 6 Rogue Sea - Ancient Site — Recapture
- 7 Stray Fisherman Gosta — Shop
- 8 Lucky Belugas — Fast Travel
- 9 Crescent Moons Isle — Field
- 10 Rogue Sea - Southwestern Citadal — Recapture
- 11 Gigantavis Isle — Field
- 12 Serenes Island — Field
- 13 Haze Island — Field
- 14 Marine Triangle - Historic Site — Recapture
- 15 Merchant Ship - Trader Åsa — Shop
- 16 Viewpoint Isle — Field
- 17 Rollo's Ark — Dungeon
Raoul Darksea
- 1 Raoul Darksea - Eastern Fortress — Recapture
- 2 Rambunctious Penguin — Feed fish (ancient species) for rewards
- 3 Redsand Isle — Field
- 4 Thrúd's Barge — Shop
- 5 Seabed Temple of Ægir — Field (Dungeon?)
Chapter 1: Carnac
Complete Ys X: Proud Nordics Carnac walkthrough, including how to get the Lila Shell, use Duo Guard, and navigate Haagen Highway.
You will learn about the local legend of Sea King's Throne located somewhere in Obelia Gulf. If you sit on it and make a wish, it will come true.
- 1Leave the Rusveri Inn to continue.
- 2You will hear a mysterious voice; respond to Dogi however you want. You can dash with L1.
- 3Trigger some scenes at the red markers. Eventually, you will get the Lila Shell.
- 4Defeat the monster that approaches you, then examine it.
- 5The game will unlock Skills (R1 + any symbol button). Set a skill and then use it to destroy the monster for good.
- 6When you regain control, try to leave Rusveri Inn and Rosalind will hand over a letter.
- 7Leave and go back to the shore where you got the seashell.
- 8You will encounter battle tutorials: Power Attacks cannot be defended against with Guard or Evade. Duo Mode, while holding down R2, pressing X will cause both characters to attack in synchronization. If you're not attacking in Duo Mode, it does Duo Guard.
- 9You are now chained to Karja. Your next destination is the Norman's Headquarters, but you can run around and talk to some NPCs for different dialogue as she is with you.
- 10Blondie will ask if you're Karja's boyfriend; feel free to deny it.
- 11Follow the next set of red markers and Karja will get a change of clothes.
- 12After the next red marker event, you can finally leave the town.
Haagen Highway
Hewnstone (a type of structure) allow for travel shortcuts and healing HP. Harvest Points (flowers) are nearby but do not appear on the (mini)map, so keep an eye out for them on the field. Unlike previous games, there's no need to run around the edges of the field map to get % on Land Discovery Rate.
- 1Approach the red markers:
- 21. Neighbourhood Watch: Gulliver will hand over a Heal Potion. If you use it up, he can supply you another one if you interact with him using the Triangle button.
- 32. Battle tutorial: Duo Guard against Power Attacks.
- 43. Romes and Cruz.
- 54. Rafe and Ashley.
- 65. Milette.
- 7Save your game at the Hewnstone in front of the lighthouse. If you need to refill the Heal Potion, Gulliver is at the first Hewnstone. Warp will also refresh the map with monsters, harvest points and breakables if you want to grind a bit.
- 8Approach the red marker and get a tutorial for the Durability Meter, which is located above the enemy's HP gauge. You cannot inflict damage on to the enemy's HP until you get rid of the Durability Meter.
- 9Defeat the Blumus (Level 7). It uses a Power Attack: a charge that goes further than a regular boar's.
- 10Go through the lighthouse doors and head down and exit.
- 11You will encounter enemies with levels 7-8.
- 12You will get a Field Tutorial: Switch.
- 13Open the chest for Gold x150.
- 14Open the chest for Nornir's Spindle (an Antique that grants Mana Action).
- 15Use Mana String (L2 to latch on) and time your jump off while swinging forward. You'll do this two more times while proceeding.
- 16You'll come across another Hewnstone. You can still fast travel back to the first Hewnstone in Haagen Highway to get a refill of the Heal Potion if needed.
- 17Before you fight the big bad, you'll get a Duo Skill. Open the Skill menu, tab to the Cross one and equip Double Smash.
- 18Defeat the Armed Biter (Base Lvl: 8). It uses a Power Attack: leaping and jumping down on you. It will also swipe at you and swing its tail at you.
- 19After defeating it and some scenes, you'll be back in town.
Carnac Revisited
Walkthrough:
- Leave the clinic to continue, head to the inn for a string of scenes.
- Interact with Grenn, choose the first option to continue. You will get a brief tutorial on Rescuing.
- Head towards the Norman Command Post for an event.
- Head up to the next marker to find Grenn, fight against three more Griegr wolves and a mysterious Griegr lady. You won't have to beat her, just remove her Durability Meter, and hack away at her HP. A scene will take over at around the 2/3 HP mark. Her sword swings do hurt, so try to keep up Duo Guard and attack in between her swings.
- Eventually Adol will find himself alone on a mystery map (Viewpoint Isle).
- There are only some wolves on the map.
- You can use Mana String on the right side, up on the hill.
- After the 3-string swing across, there's a chest with Breath Water.
- Breaking the crystal next to it makes a mana string point in case you fall down.
- There is a Hewnstone.
- Approach the red marker event (don't bother going further as you cannot interact with anything on the other side yet).
- The Revenge Gauge fills up when enemies attack you while you're using Duo Guard. When it's full and you use a Duo Skill, it multiplies the damage.
- Defeat the new Griegrs to continue. Then you'll be tasked with running away before Igi can catch you.
- In the chase sequence, you'll have to dodge and remove debris, avoid barrels, and use Mana String to jump across broken bridges. You will have to fight Igi at the top, but what you want to do is use Duo Guard and let him hit you to build the Revenge Gauge to 2.0 and then use Double Smash to lower his Durability Meter.
- Once you remove it, you'll get a scene and Adol will use a broken plank as a board to slide downhill. You will have to use Mana String one more time towards the end.
- The next time you have control, you'll be on board the Sandras and given a map of Obelia Gulf. You won't be able to explore just yet, so move towards the red marker for now.
- L1 lets you
Similar guides you might like





100% Human-Written. Community Verified. Learn how Ludo.guide verifies content