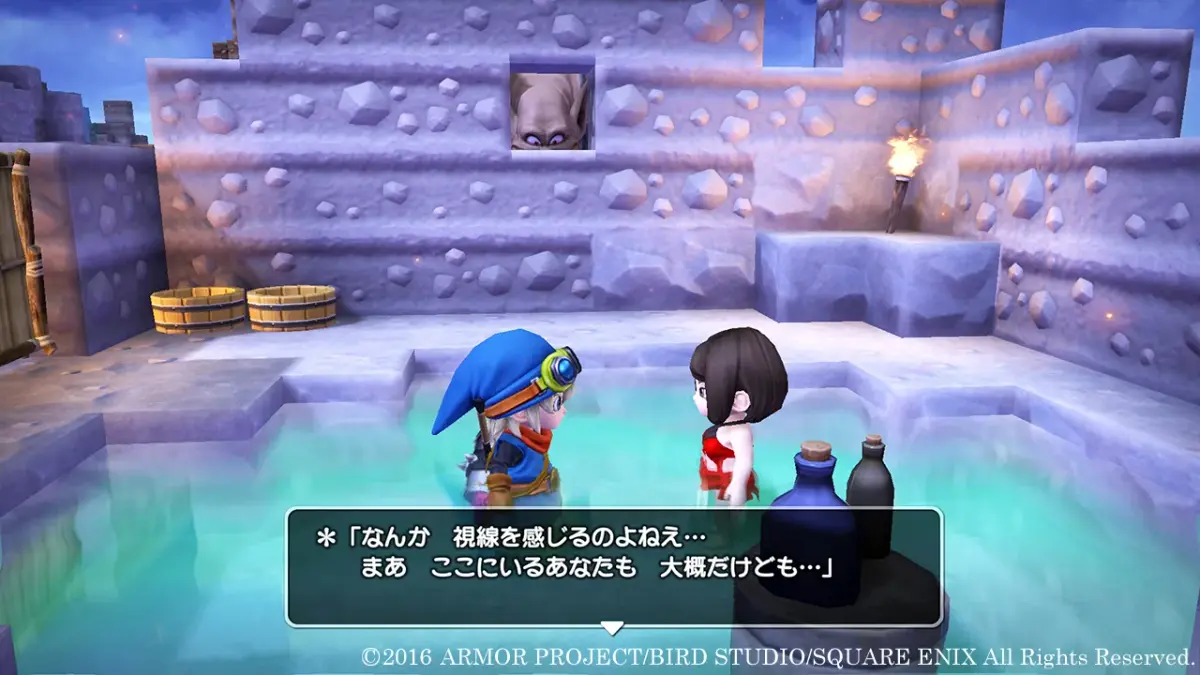
Welcome, Builder! In Dragon Quest Builders, you're the last hope for a world shattered by the malevolent Dragonlord. This is a unique blend of RPG and sandbox, where you'll explore, fight monsters like slimes and badboons, gather materials, and most importantly, rebuild the world block by block. You'll need to manage resources, keep your hunger meter up with food, and construct everything from simple doors to entire towns to bring civilization back.
This guide is here to help you achieve the Platinum trophy, focusing on a speedrun approach. We'll cover the basics of combat, items, and base building, but the real challenge lies in completing the chapter-specific speedrun objectives and other miscellaneous trophies. Whether it's repairing the Hammerhood's graveyard or building a Cantlin Garden, we'll show you how to do it efficiently.
Basic Gameplay
Learn the basics of building rooms, using blueprints, and managing town level in Dragon Quest Builders. Essential for new players.
The game operates under specific rules when it comes to building. The game works with 'rooms', rather than 'buildings'. You can connect many rooms together through connecting walls, that's not a problem as long as it's using the requested material in the case of blueprints. Most rooms do not care for the material used for the walls though, but blueprints will for the sake of completing the request.
The interior of a room is what matters. The rule for making a room is that it requires solid walls 2 blocks high, a door, and a light source. This creates an 'empty room'. Then the game has a priority system to choose which room it will be depending on which decorations are in the room.
In some cases, there are rooms that are named as the one the quest asks for, but it still needs the actual blueprint to be completed for the quest to finish. So even if the room has the same name, make sure you complete the blueprint in those cases. Even if the room has the same name as the blueprint, the quest will not be completed otherwise.
Also blueprints will usually lead to actual room recipes. For example, the Greasy Mallet found in chapter 1 actually becomes a Cookfire Cafe when completed. The Greasy Mallet is just the name of the Blueprint, while the Cookfire Cafe is under the Building list. The blueprints usually vary slightly in the materials used, but still count as the room. For example, again the Greasy Mallet asks for a Crockery and a pot to be placed in, but those items are not in the requirement of the Cookfire Cafe, they are extra items. But since the rest of the items meet the requirements for the Cookfire Cafe, that's what you get.
Extra items will not change the room unless it meets the requirement of another room, as a result. It's very rare that adding items would downgrade a room, but when you're looking for a specific room, sometimes you need to remove items to downgrade the requirements, allowing to meet the requirements of a different room.
For example, you make a room with a Stonemason Workshop, you add a Forge to it, and then you add the items to make a Stonemason's Studio (Shop Sign, fancy light source, and a leather sack). It will become instead a Blacksmith's Studio. But the quest is asking specifically for a Stonemason's Studio, which means you need to remove the Forge to complete the quest. You can put it back in after, you just need it to be noticed to count for progression, or added to your list of completed recipes.
Each room is worth a certain base score of EXP, to then is added the value of the individual items inside. So it's always worthwhile to make rooms that count as a 'named room' to boost your EXP, rather than just put items at random.
The EXP is only tallied with items INSIDE the room, not outside of it. For example, Shop Signs need to be placed inside of the room to count, even though you'd think it's more logical to put it outside of course.
The town's level can never go down. Once you reached level 2, even if you were to destroy the whole town, you would stay at level 2. The maximum level for most chapters is 5, so once you reached it, you cannot go back down, and it's one of the Challenges for each chapters. I suggest making a room that you fill with as much decorations as you have found, then you can remove it to recover that space. Likely a good idea to get your level 4 and 5 at the same time, you should have enough decorations by then.
Rooms can be built outside of town. This is important for certain specific rooms like Cantlin Gardens, as the trees will not grow while outside the town's area. Those rooms will not give any EXP, will not be used by villagers, but will count toward your list of completed rooms for the achievements.
Also villagers never step out of town unless it's for the village defense. If you make a staircase that is even a block outside of town, the NPCs (non-player characters) will not be able to use them to reach the second floor, their pathing is limited to the town area.
Rooms also have function with villagers. In the description of a room, you will often see the note that 'villagers can build things in this room'. In practice, they will craft random objects every so often and put them in the chest of that same room. So you might find some things you never crafted in there, some you never had the recipe for. And in the kitchen, you'll every so often find some cooked meals as well.
Some rooms also confers other bonuses, so sometimes it's worthwhile to give them some upgrades, even if the story doesn't lead you to them.
Vertical buildingYes, you can make rooms on top of other rooms, as long as it follows the conditions : 2 blocks high wall, door, light source. This means it technically doesn't need a floor either, but we all know how functional that would be. In fact, some people made 'stackings' of rooms as a test. Basically, if setup properly, you can have 2 rooms with 3 blocks high walls, placing the doors and the light source at different heights. There's no real advantage or function to it though. But for space saving in your villages, you can put two rooms on top of each other like that. For functionality, I would make a 'floor' between the two of course, so you would plan on 3 blocks height per room (floor + walls). Usually you ignore the floor part since it's always there.
More about floorsWhile on the subject, I think it's important to explain something about the ground, or floor level, in your buildings. While technically not part of the requirements, the floor also counts as part of the room when it comes to EXP for example, so changing the flooring can increase the room's EXP. Similarly, when some rooms require water tiles, it counts what's in the first block below you, not anything lower. In Chapter 2 you get such a case, there is a block that makes a water hole for you, but it makes the water at 'sea level'. Since the water blocks are lower than the ground, you actually need to make the room one block lower, w
Basic Gameplay (2)
Learn the core room building mechanics in Dragon Quest Builders, including requirements, blueprints, and town leveling.
The game operates under specific rules for building, focusing on 'rooms' rather than entire 'buildings'. You can connect multiple rooms using connecting walls, provided you use the requested material for blueprints. Most rooms are flexible with wall materials, but blueprints require specific materials to be completed.
The interior of a room is clutch. To create an 'empty room', you need solid walls 2 blocks high, a door, and a light source. The game then prioritizes room types based on the decorations placed within.
Sometimes, a room might have the correct name for a quest but still requires the actual blueprint to be completed. Ensure you finish the blueprint for quest progression, even if the room appears to be named correctly.
Blueprints often lead to specific room recipes. For example, the Greasy Mallet blueprint in Chapter 1 becomes a Cookfire Cafe upon completion. The Greasy Mallet is the blueprint's name, while Cookfire Cafe is its designation in the Building list. Blueprints may have slight variations in required materials, but they still count as the intended room. The Greasy Mallet, for instance, requires a Crockery and a pot, which are not mandatory for the Cookfire Cafe but are considered extra items.
Extra items will not change a room's designation unless they meet the requirements for a different room. While it's rare for adding items to downgrade a room, you might need to remove items to meet the requirements of a different, specific room for a quest. For example, if you build a Stonemason Workshop, add a Forge, and then add items for a Stonemason's Studio (Shop Sign, fancy light source, leather sack), it might become a Blacksmith's Studio instead. To complete a quest for a Stonemason's Studio, you would need to remove the Forge. You can re-add it later once the quest objective is met and the room is recognized for progression or added to your completed recipes.
Each room provides a base EXP score, augmented by the value of its interior items. Creating 'named rooms' is more efficient for boosting EXP than placing items randomly. EXP is only tallied for items placed INSIDE a room; items like Shop Signs must be placed within the room's boundaries to count.
A town's level cannot decrease. Once you reach level 2, it remains so even if the town is destroyed. Most chapters cap at level 5. To reach higher levels, consider building a room filled with all your collected decorations, then dismantling it to recover space. Achieving level 4 and 5 simultaneously is often feasible with sufficient decorations.
Rooms can be built outside of town, which is necessary for specific rooms like Cantlin Gardens, as trees require an outdoor environment to grow. These external rooms do not provide EXP or take advantage of villagers but do count towards completed room achievements.
Villagers (NPCs) generally stay within the town's boundaries unless defending it. If a staircase extends even one block outside town, NPCs cannot use it to reach upper floors due to pathing limitations.
Rooms also interact with villagers. Some room descriptions indicate that 'villagers can build things in this room.' In practice, they periodically craft random objects and place them in the room's chest. You might find items you haven't crafted or even stumbled across the recipe for. Kitchens may occasionally yield cooked meals.
Certain rooms offer additional bonuses, making upgrades worthwhile even if not directly required by the story.
Vertical Building
You can construct rooms on top of other rooms if they meet the conditions: a 2-block high wall, a door, and a light source. Technically, a floor is not required, but it impacts functionality. Some players have created 'stackings' of rooms, where properly placed doors and light sources at different heights allow for multiple rooms within a limited vertical space. While there's no inherent advantage, this method saves space. For practical purposes, a floor between stacked rooms is recommended, effectively requiring 3 blocks of height per room (floor plus walls). The floor itself is usually implicit.
More about Floors
The ground or floor level counts towards a room's EXP. Changing the flooring can increase a room's EXP value. When some rooms require water tiles, the game checks the block directly below the room's level. In Chapter 2, a block creates a water hole at 'sea level.' Since water blocks are lower than the ground, you may need to build the room one block lower to meet these requirements.
Chapter 1 - Cantlin
Learn how to escape your tomb and repair the first house in Dragon Quest Builders Chapter 1 Cantlin.
You awaken in a tomb, greeted by the Dragonlord who offers you a chance to rule together. This is a famous trope, and accepting it leads to a bad ending. After this encounter, the Goddess Rubiss awakens you. She will guide you through the game's tutorial, teaching you basic movement, building, and breaking mechanics.
- 1Pick up the petals left by Rubiss.
- 2Use the stump as a makeshift workbench to create an ointment, which restores HP and must be used immediately.
- 3Rubiss gives you a branch; use the stump workbench to craft it into a Cypress Stick, your first weapon/tool.
- 4Equip the Cypress Stick and break at least 4 dirt blocks to escape the tomb. You can gather extra flowers for more healing salves.
- 5Once you exit the tomb, you will earn the 'Escape Artist' achievement for escaping.
- 6Rubiss warns you that you are not a hero; unlike heroes, you do not gain Experience (EXP) by defeating monsters, but you still need to fight for materials.
- 7Seeds of Life increase your maximum HP. The village's level is tied to its quality, meaning the number of rooms and decorations.
- 8Rubiss gives you the Banner of Hope and directs you to the remains of Cantlin.
- 9Plant the Banner of Hope. Your first resident, Pippa, will arrive.
- 10Pippa asks you to repair the house in the corner of town. You will receive 5 blocks of dirt to fill the holes in the only building with a door.
- 11Use the LB and LT (or L1/L2) buttons to aim blocks lower and higher. Holding both aims at ground level. Holding LT/L2 and jumping allows you to drop a block beneath you. The RB/R1 button is the running button.
- 12Quest Markers appear above villagers' heads when they have a request. These markers may remain until the quest is completed as a reminder.
- 13Pippa gives you a branch and blue goo. Use the workbench (which has more recipes than a stump workbench) to make a Torch.
- 14Place the Torch in the repaired building. It will transform into an Empty Room and grant you EXP.
- 15Rooms require a closed structure of 2 blocks high, a door, and a light source. Objects inside the room count towards its designation and EXP gain.
- 16Creating your first room, even an empty one, will award you the 'Beginner Builder' achievement.
- 17Pippa will give you a Seed of Life as a reward. Seeds of Life increase your Max HP by 5 points and fully restore your HP.
- 18Time and Hunger mechanics are not active until the next quest is completed. Before proceeding, it is advisable to gather resources and craft items like an Oaken Club (requiring 2 Broken Branches) for extra attack power, especially if playing on PS4 to save in-game days.
- Gathering everything in remote areas you won't revisit is fine, but be mindful of depleting resources near your town, as it will force you to travel further later.
- The stump workbench can only craft basic items like Cypress Sticks and Healing Salves, while the workbench in town has more recipes.
- Seeds of Life can be used immediately for a health boost or saved for critical moments.
- Nighttime brings more aggressive monsters and activates the hunger mechanic.
Final Chapter - Tantegel
Guide to Dragon Quest Builders' final chapter in the Land of Ash. Learn how to survive, gather resources, and progress through Tantegel's corrupted lands.
Here we are, the final area of Alefgard. Tantegel was the biggest settlement, the only castle of this world, and from it across the sea you could see Dragonlord's castle. This was made deliberate in the original, so you could see the final goal, and then try to figure your way to it. Since the two are so close to each other, it makes for a good final chapter.
The rules are quite different though. While we're using a Mason's Workshop like in Cantlin, there is one major difference : everything is tainted and corrupted. You can't even get dirt at the start, the trees are dead so no wood, they break apart not even in branches.
This time, Rubiss is unable to help you at all, you start completely nude, with a cypress stick as only weapon... and Dumb-Bells in your inventory. Of all of the things they could have sent you out with from Chapter 3, they chose... Dumb-Bells. It's sad how accurate that is of the muscleheads really. Completely useless really.
This area, for a lack of a name even in the official publications, we'll go with Land of Ash, just to have something to refer it to.
Rubiss doesn't even have the power to give you a Banner of Hope either. So there isn't much else you can do that move forward there. You will see an old man, Myrlund, the seer. Talk to him and follow. He will stop periodically to rest, and berate about your face. Such a nice old man.
He will lead you to an oasis, the only functional part around from the looks of it. It's not much to work with. Just a few flowers if you need Healing Cream. He will hand you a Green Naviglobe to start with. Talking to him, he will refill your hunger. Something he can do until you figure out how to feed yourself in this place.
You can get a few branches here before leaving. Then head northwest where you can see some Huge Horns sticking out, they look like pointy teeths, big as trees. We need one of those. Make a Horn-rimmed bucket, and then head to the quest marker. Pick up some Water and Pure Water from the fountain, and examine the nearby book. Looks like someone left the secrets to make Holy Water nearby. Sounds handy.
If you see some Skeletons, you can beat them up for some Coarse Clothes, 1 of them for Rags, but 3 of them for Plain Clothes, better than naked, I suppose. Stop by the old man to recover your hunger and head to the next marker. There will be a bonfire and a tent, along with a letter. Read the contents, seems like someone preceeded you. Climb up the east mountain to take a look around. You should find a corpse. But he's laying next to suspiciously discolored rocks. Break it down to find a secret passage.
Inside there's a skeleton guarding another letter. Read it, and check to the right, where you see columns, for a chest that holds 5 Healing Creams. Navigate the caves, getting out of the way of the Evil Idol statues that can breath fire at you. Look at the wall to the left once past the first statue to see a chest through holes in the wall, containing a few Coarse Cloths. A bir further, there's other columns, and a few pots and creates. The pots are useful, so bring them. Another chest behind the second Evil Icon for 20 Broken Branches. Never thought I'd be happy to see those really.
Right after the second Icon, there's two paths, take the left first for another chest, this time with a Seed of Life. And then finally the door... guarded by a dragon. I know what you're thinking, you're clearly not equipped for that. But you should know the tricks by now, the Dragon will take a while to kill, but is no different than the hit and run you did before. It actually doesn't have much HP, must be affected by this world too. It drops another Seed of Life, then you can go through the door.
You will find a message on the floor to know of the fate of the hermit. You can make some Holy Waters right away, you will need a ton of them in this chapter. Then break the table down to bring it with you.
Make your way back to the oasis and talk to the old man to show him the Holy Water you made. He gives you another Seed of Life, and then asks you to use the water on the princess statue, as it seems to be... talking? Looks like it really was the princess!
Talk to Myrlund again, for a... defense fight? There's no town yet, but I suppose this is something worth protecting right now. Three skeletons will appear from the south, and you'll get a Blue Teleportal. Are you confused yet about this chapter? You should be!
Repair the hut with whatever block you have, and spend the night. The next morning, you can place the Teleportal somewhere not on the brick floor, and move to the next area.
Tantegel Moor
This is the main land around Tantegel, but very much depressing right now. You can find the Blue Naviglobe next to you. Tantegel is right in front of you, in dissaray, but we can at least use it as a foothold to get better equipment.
But you're following a guide, so I'll be helping you make it smoother.
You can return to Lands of Ash if you ever need healing or food, but we'll work to get that stabilized soon (hopefully).
In the broken castle, you'll see a Mason's Workbench, and a book next to it. The book will tell you where to find the Banner of Truth. The game's guidance is completely gone at this point, and while it tells you where you should go, you are absolutely not ready it and will get demolished. This is where you'll use everything you learned in previous chapters about gearing yourself.
There's a chest in the castle, that's the world map. The island you started on is to the west of you.
Set down the Divnier's Altar so you can use it, there's a fountain in the castle so you can get more Pure Water, and make more Holy Water from it. While I don't have a specific number, just go by the old saying of 'you can never have enough', and it will be a good estimate here. I'll explain why in just a moment.
There's two chests in the back room, along with a bed, so you can use those t
Similar guides you might like




100% Human-Written. Community Verified. Learn how Ludo.guide verifies content