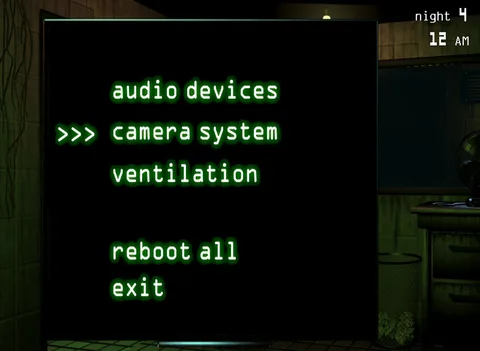
Welcome to Fazbear's Fright, the haunted house attraction where you'll face the terrifying legacy of Freddy Fazbear's Pizza. In Five Nights at Freddy's 3, you're a night guard tasked with surviving five nights against a single, persistent threat: Springtrap. You'll need to master the camera system, manage your limited resources like audio lures and vent closures, and keep an eye out for phantom animatronics that can disrupt your systems. It's a tense, atmospheric horror experience that tests your nerve and strategic thinking.
This guide dives deep into surviving the relentless pursuit of Springtrap and navigating the challenges of Fazbear's Fright. We'll cover how to manage the ventilation system, use audio devices effectively to lure or distract Springtrap, and how to deal with the phantom animatronics that appear. Plus, we'll help you uncover the secrets behind the hidden minigames, which are crucial for achieving the different endings, including the coveted Good Ending and the challenging Nightmare Ending.
Welcome to your New Job
Welcome to Freddy Fazbear's Pizza! Learn the basic premise of Five Nights at Freddy's 3 and what it takes to survive your shift from midnight to 6 AM against murderous animatronics.
So, you're the new night guard at Freddy Fazbear's Pizza, huh? It sounds like a pretty chill gig during the day – think Chuck E. Cheese, but with a killer animatronic band. You've got Bonnie the Bunny on guitar, Chica the Chicken on vocals, and Freddy Fazbear himself leading the show. They're all about entertaining the kids and serving up some tasty pizza.
But when the sun goes down and the last customer leaves? Yeah, that's when things get seriously creepy. Freddy and his pals don't just power down; they start roaming the place, and they've got a nasty habit of going after the night guard. If they catch you, they'll try to stuff you into one of their suits. Trust me, those things are full of sharp metal bits and crossbeams – it's not a pleasant way to go. The official story is they mistake you for an endoskeleton without a costume, but you can't help but wonder if there's something more sinister, maybe even paranormal, going on.
Your main goal is pretty straightforward, though: just survive from midnight until 6:00 AM. Sounds easy enough, right? Just gotta make it through the night without becoming part of the pizza-serving entertainment.
On the Subject of Gameplay Basics
Learn about power management and night length in Five Nights at Freddy's 3. Each night lasts 9 minutes, with power draining faster as nights progress.
Day Length:
Each hour of game time in Five Nights at Freddy's 3 corresponds to 90 seconds of real-world time. Therefore, each night lasts a total of 540 seconds, or 9 minutes. Knowing this can prove helpful when you're in the 5 AM hour and wondering how much time you have left before your power potentially runs out.
Power Consumption:
Your power is represented as a percentage in the lower left corner of your screen, starting at 99% and cutting off shortly after it hits 0%. Power is actually calculated in tenths of a percent, with each night starting at 99.9. The game rounds down to the nearest whole number to display your power. It will show 99% power when your actual power level is between 99.9 and 99.0, but the moment it reaches 98.9, your displayed power will drop to 98%.
The number of bars shown underneath the percentage represents how quickly your power is draining, and increases as you use more devices. There is always a minimum of one usage bar, presumably from things like the fan and the office lights which you cannot disable. The lights and cameras are all tied to a single bar; you cannot have more than one of them running at the same time. Each of the doors contributes another bar. Therefore, you can have up to a maximum of four usage bars if you have both doors closed and either have a light on or are looking at the cameras.
The game deducts 0.1 every second for each usage bar. For example, if you have one of the doors closed and are looking at the cameras, you will be using up 0.3 power per second, thus draining a full percent roughly every 3 seconds. You must hold out for 540 seconds.
Additional Power Penalties:
On Night 1, the drainage mechanic works as described. However, the remaining nights impose an additional power penalty in which it drains an additional 0.1 power every so often:
- Night 2: Every 6 seconds
- Night 3: Every 5 seconds
- Night 4: Every 4 seconds
- Night 5 onward: Every 3 seconds
As a result, your power will drain much faster the further you get in the game. At the late stages of the game, after taking into account base power consumption, you will only have a mere 27.9 power to work with in terms of camera, light, and door usage.
Foxy's Door Drain:
Foxy hitting your door when it's closed is one last way for your power to get drained. The specifics of this will be discussed when discussing Foxy's AI.
- Conserve power by only using the cameras, lights, and doors when absolutely necessary.
- Keep an eye on the usage bars to understand how quickly your power is draining.
- Be aware of the increasing power penalties on later nights.
- If you run out of power, you will only have a few seconds left before Freddy enters your office.
- If 6 AM is close enough when you run out of power, you might still win if you are lucky.
Orientation
Learn about the office equipment and security systems in Five Nights at Freddy's 3, including cameras, lights, doors, and power management.
- 1Understand your limited security equipment due to budget cuts.
- 2Use the Cameras by pulling up your tablet via the double-arrow icon at the bottom of the screen to view 11 different camera feeds.
- 3Familiarize yourself with each camera feed:
- Cam 1A - Show Stage: Starting location for Freddy, Bonnie, and Chica.
- 4Cam 1B - Dining Area: All three main animatronics can be here.
- 5Cam 1C - Pirate Cove: Foxy's location, currently closed to the public.
- 6Cam 2A - West Hall: Connects to the dining area and your office; triggers Foxy's attack.
- 7Cam 2B - West Hall Corner: Next to your office; features a Freddy poster.
- 8Cam 3 - Storage Room: Located off the West Hall, generally ignorable.
- 9Cam 4A - East Hall: Similar to the West Hall, but Foxy does not attack from here.
- 10Cam 4B - East Hall Corner: Chica and Freddy often appear here before attacking.
- 11Cam 5 - Backstage Area: Off the left side of the dining area.
- 12Cam 6 - Kitchen: Camera feed has issues; you primarily hear the kitchen.
- 13Cam 7 - Restrooms: Located off the right side of the dining area, far from threats.
- 14Use the Lights by pressing a button to illuminate the hallways outside your office. Only one light can be on at a time, and they turn off when you view cameras.
- 15Use the Doors as your last line of defense. Closing them prevents animatronics from entering.
- 16Manage your limited Power, represented by the Usage bar at the bottom left. Essential systems like your office light and desk fan drain power constantly. Closing doors, using lights, or viewing cameras drains additional power. The Usage bar can have up to four bars.
- 17Warning: If you run out of power, the building goes on auxiliary power, leaving your doors permanently open. If backup power fails and your shift is not over, you will fail.
- Knowing animatronic locations via the cameras helps you stay ahead.
- Be ready to react quickly if you catch an animatronic in the lights.
- You cannot simply close the doors all night to survive.
Chica the Chicken
Learn Chica the Chicken's movement patterns, attack triggers, and how to prevent her from entering your office in Five Nights at Freddy's 3. Avoid her deadly attack!
Chica the Chicken is the backup vocalist for Freddy Fazbear's band. Her primary motivations include eating pizza and brutally murdering nighttime security guards.
The Basics of Chica the Chicken
Chica's behavior is more straightforward than Freddy's. Her initial movement is always from the Show Stage to the Dining Area. From the Dining Area, Chica's movements are influenced by her current room and a random binary variable that resets every second. This means that from any given room, Chica can move to one of two other locations:
- Dining Area: Restrooms or Kitchen
- Kitchen: Restrooms or East Hall
- Restrooms: Kitchen or East Hall
- East Hall: Dining Area or East Hall Corner
- East Hall Corner: East Hall or Right Door
Once Chica reaches the Right Door, her next action depends on whether the right door is open or closed. If the door is open, Chica enters the office. If the door is closed, she retreats to the Dining Area.
An exploit in Chica's movement patterns is that she can only move into attacking position from the East Hall Corner. This is also where Freddy attacks, so her presence there can provide advance warning of a possible Chica attack, as her feed overrides Freddy's. Other than this, you do not need to monitor Chica's location; you are safe as long as she is not in the East Hall Corner.
If Chica enters the office, your right door and right light will cease to function, producing only a "click" noise. At this point, preventing her entry is a lost cause. However, Chica will never attack while the camera is down. By refraining from looking at the camera, you can avoid her attack indefinitely. If you do lower the camera, your demise is effectively assured as Chica will move in for the kill. If you avoid lowering the camera, she will force it down herself after approximately 30 seconds. Therefore, it is make-or-break to prevent her from entering the office.
Similar guides you might like


100% Human-Written. Community Verified. Learn how Ludo.guide verifies content