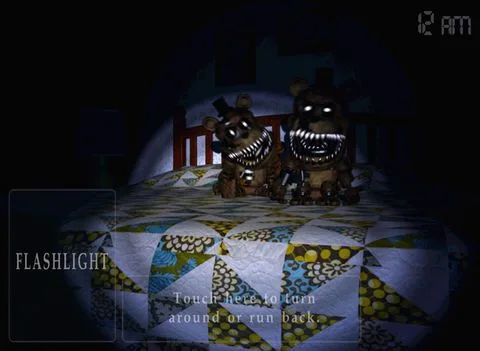
Welcome to Five Nights at Freddy's 4, the terrifying conclusion to Scott Cawthon's original series. This isn't your typical haunted house; you're trapped in a child's bedroom, armed only with a flashlight and your wits. The goal? Survive the night by outsmarting Freddy, Bonnie, Chica, and Foxy as they stalk the halls and closet, their jumpscares more brutal than ever. It's a pure survival horror experience, demanding intense focus and quick reflexes.
This guide is your key to conquering those nightmares. We'll break down the advanced auditory tactics and precise flashlight usage needed to survive each of the grueling nights. Learn the specific strategies for dealing with each animatronic, from Bonnie and Chica at the doors to Foxy in the closet, and finally, the terrifying Freddles on the bed. Master these techniques to conquer all nights and finally escape the terror.
Chica the Chicken
Learn how to track Chica the Chicken in Five Nights at Freddy's 4. Understand her movement patterns, attack triggers, and how to avoid her deadly assaults.
Chica the Chicken is the backup vocalist for Freddy Fazbear's band. Her primary motivation is to murder nighttime security guards, with pizza being her secondary love.
The Basics of Chica the Chicken
Chica's behavior is simpler than Freddy's. She always starts from the Show Stage and moves to the Dining Area. From the Dining Area, her movements are influenced by her current room and a random binary variable that resets every second. This means she can move to one of two locations from any given room:
- Dining Area: Restrooms or Kitchen
- Kitchen: Restrooms or East Hall
- Restrooms: Kitchen or East Hall
- East Hall: Dining Area or East Hall Corner
- East Hall Corner: East Hall or Right Door
Once Chica reaches the Right Door, her next action depends on whether the right door is open or closed. If open, she enters the office. If closed, she retreats to the Dining Area.
An exploit in Chica's movement is that she can only enter an attacking position from the East Hall Corner. This room is also used by Freddy, so if Chica appears there, it can serve as advance warning for a possible Chica attack, as her presence overrides Freddy's on the camera feed. Generally, you don't need to monitor Chica unless she is in the East Hall Corner; otherwise, you are safe from her.
If Chica enters the office, your right door and right light will cease to function, emitting only a "click" noise when activated. At this point, preventing her entry is a lost cause. However, Chica will never attack while the camera is down. By refraining from looking at the camera, you can avoid her attack indefinitely. If you do lower the camera, your demise is effectively assured as she will move in for the kill as soon as you lower it again. If you attempt to avoid lowering the camera, she will force it down herself after approximately 30 seconds. The key takeaway is to prevent her from entering the office at all costs.
Bonnie the Bunny
Bonnie the Bunny is a dangerous foe in FNAF 4. Learn his movement patterns and how to counter him to survive the night. Get the edge you need!
Bonnie the Bunny is the guitarist for Freddy Fazbear's band, and honestly, he's pretty terrifying. He's known for giving his own creator nightmares, so you know you're in for a challenge!
The Basics of Bonnie the Bunny
Bonnie acts a lot like Chica, but he's definitely more dangerous. The biggest difference is where he decides to go. Unlike Chica, Bonnie doesn't always head to the Dining Area from the Show Stage. He's got a couple of options:
| Current Room | Destination A | Destination B |
| Show Stage | Backstage | Dining Area |
| Dining Area | Backstage | West Hall |
| Backstage | Dining Area | West Hall |
| West Hall | Supply Closet | West Hall Corner |
| West Hall Corner | Supply Closet | Left Door |
| Supply Closet | Left Door | West Hall |
See how Bonnie can move into attacking positions from two different rooms (West Hall Corner and Supply Closet)? That makes him trickier than Chica. Once he's in the West Hall, he'll just keep moving between the West Hall, West Hall Corner, and Supply Closet until he reaches the door. He doesn't wander back like Chica can, which means he's always a threat.
The rest of Bonnie's behavior is pretty much the same as Chica's. If you block his attack with the left door, he'll go back to the Dining Hall. If you're watching him on the cameras and he moves, he'll disable them. And if he gets into your room, he'll shut down the left door and light, only attacking when you raise the camera.
Navigation:
- Previous: Chica the Chicken
- Next: Foxy the Pirate Fox
Meet Freddy and the Gang
Learn about the AI levels and movement mechanics of Freddy, Bonnie, Chica, and Foxy in Five Nights at Freddy's 4. Understand how their AI affects their behavior and difficulty.
In the world of Freddy Fazbear's Pizza, you'll face four primary adversaries: Bonnie the Bunny, Chica the Chicken, Foxy the Pirate Fox, and Freddy himself. While each has unique personalities and attack methods, they share a core logic for movement within the restaurant.
Upon completing Night 6, a Custom Night unlocks where you can set each antagonist's AI level from 0 to 20, with higher levels increasing difficulty. These AI levels directly influence enemy movement.
Each enemy has a specific time interval for a "movement chance":
- Freddy: Every 3.02 seconds
- Chica: Every 4.98 seconds
- Bonnie: Every 4.97 seconds
- Foxy: Every 5.01 seconds
Essentially, Freddy gets a movement chance about every 3 seconds, while the others get theirs about every 5 seconds. These intervals, though subtle, add up over the night, making them harder to track.
A "movement chance" occurs when an enemy reaches its time interval. The game generates a random number between 1 and 20. If this number is equal to or greater than the enemy's AI level, the enemy moves. If the number is lower, the enemy stays put. Each AI level increase effectively adds a 5% chance of movement, from 0% at level 0 to 100% at level 20.
The standard nights use pre-set AI levels that are automatically applied:
| Night | Freddy | Bonnie | Chica | Foxy |
| 1 | 0 | 0 | 0 | 0 |
| 2 | 0 | 3 | 1 | 1 |
| 3 | 1 | 0 | 5 | 2 |
| 4 | 1 OR 2* | 4 | 6 | 8 |
| 5 | 3 | 5 | 7 | 5 |
| 6 | 4 | 10 | 12 | 6 |
*On Night 4, Freddy's AI level has a 50% chance of being either 1 or 2.
Enemy AI levels are not static throughout the night; they increase at specific times to ramp up the challenge:
- At 2 AM: Bonnie's AI increases by 1.
- At 3 AM: Bonnie, Chica, and Foxy's AI increase by 1.
- At 4 AM: Bonnie, Chica, and Foxy's AI increase by 1 again.
For example, Night 1 starts at 0-0-0-0, becomes 0-1-0-0 at 2 AM, then 0-2-1-1 at 3 AM, and finally 0-3-2-2 at 4 AM, where it remains for the rest of the night.
This forms the core logic for all enemy movement patterns, with individual character specifics detailed further.
Freddy Fazbear
Learn Freddy Fazbear's Enemy Mode and Blackout Mode mechanics in Five Nights at Freddy's 4, including his movement paths and AI.
Freddy Fazbear is the main animatronic who typically lets others act first, but will personally intervene for difficult targets or those who manage power poorly.
Freddy has two modes: Enemy Mode, where he moves around the restaurant with other animatronics, and Blackout Mode, which activates when you run out of power and he appears at your left door.
On the Subject of Enemy Mode
In Enemy Mode, Freddy has a movement chance approximately every 3 seconds, which is 2 seconds faster than other enemies. His AI level is generally lower, not exceeding 4 during normal gameplay. Freddy follows a fixed path: Show Stage -> Dining Area -> Restrooms -> Kitchen -> East Hall -> East Hall Corner. If he reaches the East Hall Corner and succeeds in another movement chance, he will only move again if you view a camera feed other than 4B. If your right door is open when he moves into the office, you are considered dead. If your right door is closed, he retreats to the East Hall and will move back to the East Hall Corner on his next successful movement chance.
When Freddy is alone in a room, you may see the pinpricks of his eyes on camera feeds. He also utters a deep laugh whenever he moves between rooms.
Unique Mechanics
- Camera Aversion: If you are looking at Freddy's current location when he has a movement chance, that chance will always fail. This can be used to prevent him from moving on lower AI levels, but is less effective at higher levels due to his speed.
- Delayed Movement: When Freddy gets a successful movement chance, there is a delay before he actually moves. This delay is calculated by the formula 1000 - 100x, where x is Freddy's current AI level. At AI level 1, the delay is 900 frames (15 seconds). This delay decreases by 100 frames per AI level, and is eliminated at AI level 10 or higher. Freddy will still refuse to move if you are watching him on camera when the delay countdown reaches 0, but will move the instant you look away.
- Keeping You In Suspense: If Freddy enters your office, he cannot attack while your camera is raised. While your camera is down, there is a 25% chance every second for his jumpscare to trigger. This offers a small window of survival with strategic camera use and luck.
On the Subject of Blackout Mode
Blackout Mode begins the moment you run out of power, ceasing all other enemy activity. It has three phases:
- Phase 1: Commences when the lights dim. There is a 20% chance every 5 seconds for Freddy to appear at your left door, for a maximum of 4 attempts (20 seconds). If the first three attempts fail, the fourth is guaranteed to succeed, proceeding to Phase 2.
- Phase 2: Characterized by Freddy's lit, flickering face at your left door and his music box playing. It functions identically to Phase 1: a 20% chance every 5 seconds to move to Phase 3, with the fourth chance guaranteed if the first three fail.
- Phase 3: Occurs when the lights go completely black.
Similar guides you might like



100% Human-Written. Community Verified. Learn how Ludo.guide verifies content