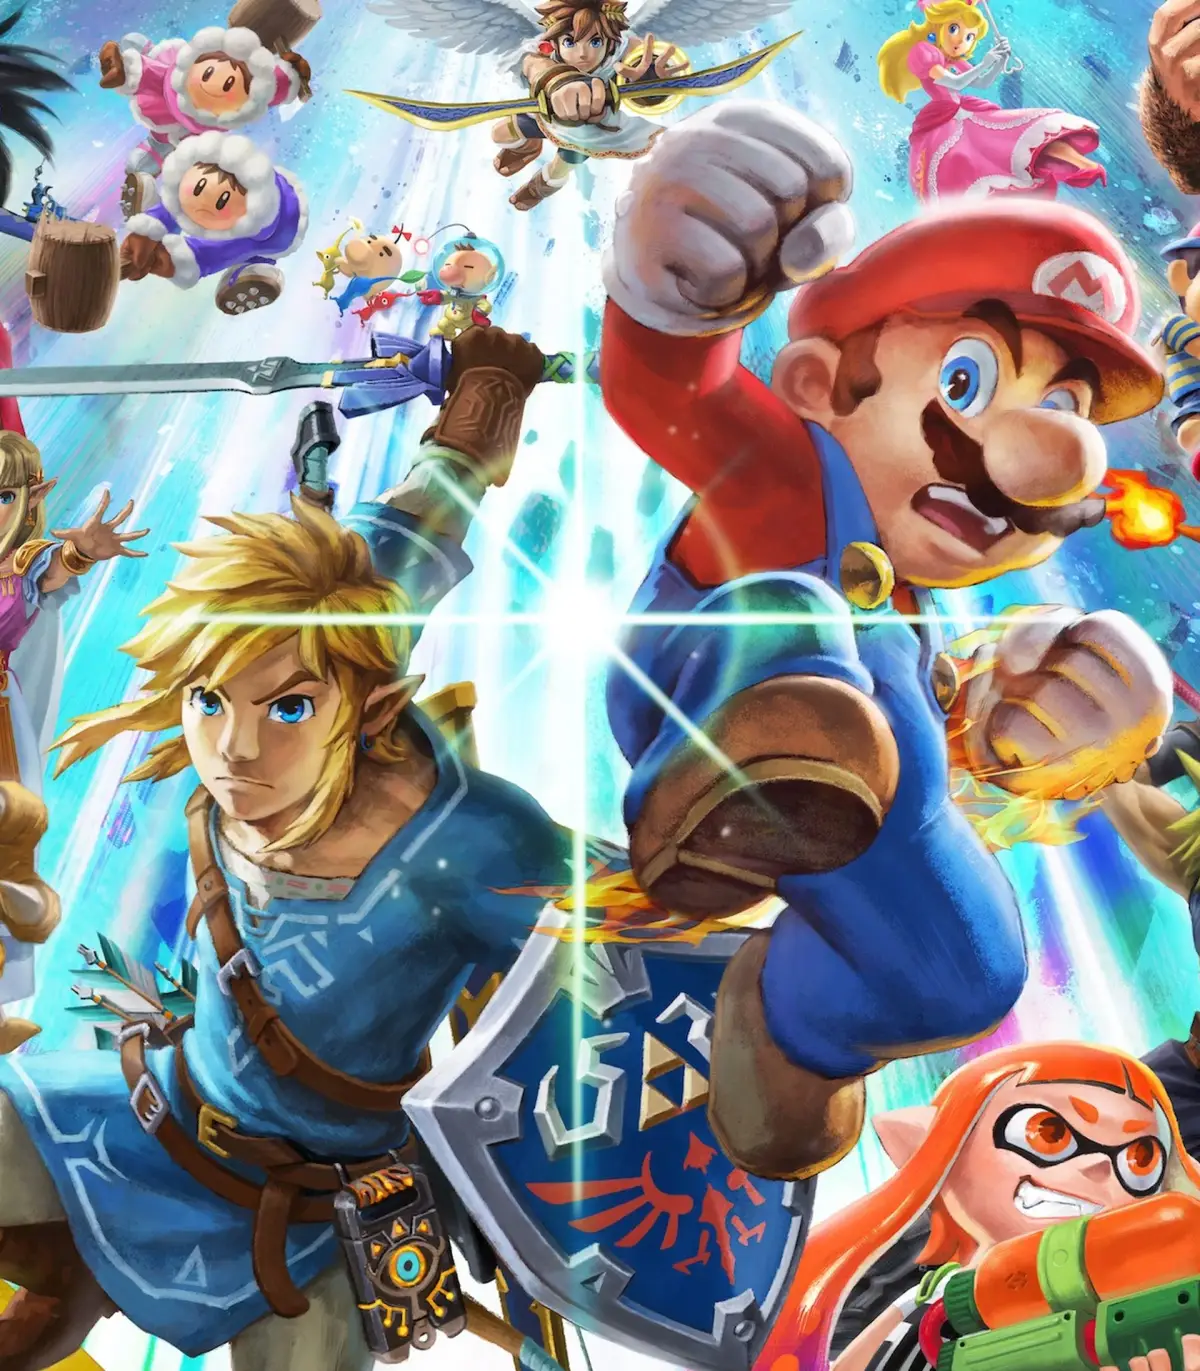
Welcome to Super Smash Bros. Ultimate, the ultimate crossover fighting game where iconic characters from Nintendo and beyond clash in chaotic arena battles. Master the unique playstyles of every fighter, from Mario to Pokémon, and dive into the expansive single-player adventure, the World of Light, where you'll uncover the secrets of Spirit combat.
This guide is your go-to resource for conquering Super Smash Bros. Ultimate. We'll help you navigate the challenges of the World of Light, provide strategies for mastering each character's unique moveset, and offer tips for unlocking every fighter through the fastest methods. Get ready to dominate the competition and achieve victory!
Basic Controls
Learn the essential controls for Super Smash Bros. Ultimate, including movement, shielding, dodging, and attacks on the ground and in the air. Improve your technique!
This guide covers the basic controls and terminology for Super Smash Bros. Ultimate. For practice, use the Training Mode (Games & More → Training) on the 'Training' stage, which features a grid background to help visualize attack reach and launch distance. The Trajectory Guide in the Pause Menu is also beneficial. For fundamental gameplay and character control, watch the 'How to Play' movie (Vault → Movies → How to Play). The Tips section (Vault → Tips → Techniques) offers further insights into techniques and terminology.
Moving and Defending your Fighter
Moving on the ground
Quickly pressing the left stick left or right makes your fighter run. Gently tilting the stick results in a walk, with slower speeds for more gentle tilts. Running in the opposite direction immediately after running will cause a short skid animation; to avoid this, release the stick briefly before pressing the opposite direction.
Moving in the air
Pressing X/Y or Up on the left stick makes your fighter jump. A quick tap results in a small hop. The left stick controls jump direction, and you can move freely left or right while falling. Greater tilt on the stick results in more momentum. Most fighters have a second jump in the air, with exceptions like Kirby and Jigglypuff having more. Direction can be easily changed with the second jump. Falling off the stage edge only allows one jump. You can jump off an opponent's head up to four times, with each jump being shorter. Pressing down in the air makes you fall faster. Since version 2.0.0, pressing two jump inputs (X and Y for GameCube, A and X for Pro Controller) simultaneously results in a short hop; this trick does not work if 'Up' is set to jump on the left stick.
Shielding and Dodging
Shield: Pressing ZR (R for GameCube) on the ground activates your fighter's shield, blocking damage. The shield shrinks with prolonged use or damage. A broken shield leaves you stunned. Opponents can grab you while shielding. Shields regenerate after a break.
Rolling Dodge: While shielding on the ground, tilting the left stick left or right performs a roll dodge in that direction.
Spot Dodge: Shielding and pressing down performs a spot dodge, allowing for a quicker counter-attack than other dodges.
Air Dodge: Pressing ZR (R for GameCube) in the air performs an air dodge, limited to one per aerial state. You can air dodge again after taking damage or landing.
Directional Air Dodge: Holding a direction while air dodging makes you move in that direction, useful for positioning but leaving you more vulnerable post-dodge. Dodging can also be used for recovery. Spamming dodges slows movement and reduces invincibility frames, increasing vulnerability.
Attacks
On the ground
Smash Attacks: Pressing A and a direction on the left stick simultaneously performs a Smash Attack, which has high launching potential. Holding A charges the attack, increasing damage and launch distance. The right stick can also be used for Smash Attacks if configured.
Neutral Attack: Pressing A performs a neutral attack. Many fighters can combo neutral attacks, with the final hit usually having the most launch power. These are good for racking up damage at close range.
Forward Tilt: Tilting the left stick forward and pressing A performs a Forward Tilt, which generally has better reach and more damage than a neutral attack but is slower.
Down Tilt: Pressing the left stick down and then A performs a low-hitting attack. Some fighters have unique effects, like King K. Rool burying opponents or Incineroar launching them for juggling.
Up Tilt: Tilting the left stick up and pressing A normally sends opponents upward, enabling combos with more Up Tilts or aerial attacks.
Tilt attacks can be mapped to the right stick/C-Stick (defaulted to Smash Attack) for easier execution and to prevent accidental Smash Attacks. To change this, go to Smash → Controls → your name → your controller → right stick/C-Stick → Tilt Attack → Save.
Dash Attack: Running and pressing A performs a Dash Attack. The opponent is sent in the direction of the run, but missing can leave you vulnerable.
Grab: Pressing R (Z for GameCube) performs a grab. Tapping the button adds minor damage. Tilting the left stick in a direction throws the opponent that way. If you delay the throw, the opponent can escape. Grabs can be used on shielding opponents. Missing a grab results in significant lag, allowing the opponent to counter.
In the Air
Neutral Aerial: Pressing A in the air performs a Neutral Aerial attack.
Spirit Board
Learn how to unlock more targets and use Board Items on the Super Smash Bros. Ultimate Spirit Board. Includes spirit types and challenges.
- 1Choose a bounty from the Target List. Each bounty is a spirit trapped within a puppet fighter.
- 2Defeat the fighter to have a chance to free and obtain the spirit.
- 3As of Ver. 4.0.0, there are 951 spirits to battle, though some require summoning, specific challenges, or prior discovery in Adventure mode.
- 4The symbol in the top left corner of a spirit's artwork indicates its class: a hexagon for Support Spirits and a larger circle for Primary Spirits. This classification does not affect combat but influences team composition.
- 5The color of the symbol indicates the spirit's type, which determines strengths and weaknesses: Green (Grab Type) beats Blue (Shield Type), Blue (Shield Type) beats Red (Attack Type), and Red (Attack Type) beats Green (Grab Type). Purple indicates the Neutral type, which has no strengths or weaknesses.
- 6Only your primary spirit has a type when forming a spirit team; support spirits do not affect your team's type. Opponent support spirits still have types.
- 7Each spirit on the Target List has a timer; once it expires, the spirit is replaced. Defeating a spirit does not immediately remove it from the list if its timer has not expired.
Unlocking More Targets:
- You begin with 6 targets. Four padlocks on the edges of the Spirit Board can be unlocked to increase the maximum targets to 10.
- Battling spirits (winning or losing) will unlock 3 additional targets: after 5 spirits, after 15 spirits, and after 30 spirits.
- The 'Ice Climbers' challenge reward is unlocking 1 additional target for seeking out a bounty target 30 times. These battles do not need to be against unique spirits.
- Beating the 'Link' challenge (winning against a Legend class spirit) grants one extra target. A Legend class spirit has a 4-star ranking.
- From Ver. 3.0.0, these unlocking conditions can also be met using 'DLC (downloadable content — extra missions or items released after launch) Spirits'.
Board Items:
- Access Board Items from the top right corner of the Target List. 5 items are available, affecting the spirits shown. Faded icons indicate no items or inability to use them.
- Shuffle All: Reshuffles all spirits.
- All Primaries: Reshuffles all spirits to be Primary Spirits.
- All Supports: Reshuffles all spirits to be Support Spirits.
- Filler: Fills all open spaces immediately.
- Rematch: Restores a spirit that disappeared from the Spirit Board. This can be a spirit you've defeated and collected, or one that left due to too many losses. Spirits whose timers have expired and been replaced cannot be rematched.
- Board Items can be acquired from the Vault Shop (Gold), shopping (SP), challenges, Classic Mode rewards, or by defeating spirits on the Spirit Board. Items with an orange icon are Board Items.
- Activities offer a passive way to obtain items. Explore activities, like Charlie in Mushroom Valley, can find Support Items for the Spirit Board. Charlie takes 6 hours to find items.
- Using 10 board items secures the 'Sonic' panel in Challenges, rewarding 3 'All Supports' items.
Fight Screen Conditions:
- The bottom left corner of the fight screen displays battle conditions and the stage, which vary based on the spirit being fought.
- A spirit team's type advantage provides a significant benefit in battle.
- Legend class spirits (4⭐) are the toughest and require careful consideration of your team's type, strength, and skills against the opponent's conditions, hazards, and minions. Battle Items can assist in these difficult fights.
- Obtaining a Legend spirit from the Spirit Board for the first time also unlocks a milestone.
Summon
Learn how to summon spirits in Super Smash Bros. Ultimate by combining spirits, cores, and SP. Details on Gold Mario summon requirements.
The summon option can be found by navigating to Spirits → Collection → Summon. On the summon screen, you will see a list of spirits. To reveal more spirits, you need to possess at least one of the required cores or spirits for their summon. Selecting a spirit displays its required cores or spirits. The 'Owned:' counters show how many of the required spirits and cores you currently possess. The larger circle indicates the quantity of that spirit or core needed. You can choose which specific core or spirit to use by clicking this circle if you have multiple options or if the requirement is general (e.g., 'Any Neutral Type'). The 'Autofill' option automatically selects available cores or spirits, prioritizing cores. The game prevents you from sacrificing a favorite spirit. Required spirits are dismissed as a group during the summon process, and you still receive bonus SP without needing to visit the dismiss menu beforehand.
If a spirit appears as a silhouette, you only have some of the necessary components. Clicking the silhouette reveals the requirements. A '!' next to 'Owned:' signifies that a required spirit has not yet been found; consult the Spirit List for locations. If a spirit has visible artwork with the name '???' you can add it to your collection by summoning. A visible name with a green tick in the top right corner means you already own the spirit but can summon another. A faded artwork with a green tick indicates you own the spirit but lack the requirements to summon another.
You cannot sell a core that is necessary for a spirit you have not yet summoned.
There are two milestones related to summoning: 'Summoned a spirit for the first time!' and 'Summoned a Legend spirit for the first time!'. Completing the Mewtwo [Spirits] challenge (Obtain a Legend class by using Summon) rewards you with Snack (L) x 5. A Legend class spirit has a rank of ⭐⭐⭐⭐.
Most of these spirits are initially obtainable only through summoning, though some can be found in Adventure Mode. Once summoned, a spirit may appear in other locations like the spirit board or the vault shop.
- If a spirit's artwork appears faded with a green tick, you own it but cannot summon another.
- You cannot sell cores required for unsummoned spirits.
- Autofill prioritizes cores over spirits when selecting materials for a summon.
Summonable Spirits List:
There are a total of 133 spirits that can be summoned.
- No. 24: Gold Mario (Rank: ⭐⭐⭐⭐, Series: Super Mario Series, Class: Supports, Type: -, Unlock: Summon (Metal Mario + Super Mushroom + Fire Flower + 2,600 SP), Cost/Slot: ⎔⎔⎔, Skill/Trait: Super Armor (Makes it more difficult to flinch or be launched)).
- No. 28: Cat Princess Peach (Rank: ⭐⭐⭐, Series: Super Mario Series, Class: Primaries, Type: Shield, Unlock: Summon (Rover + Baby Peach + 1,200 SP), Cost/Slot: ⎔⎔⎔, Max Stats (Lv. 99): Power: 9346, Attack: 4853, Defense: 4134, Skill/Trait: Weight ↓ (Become faster, but also easier to launch)).
- No. 45: Birdo (Rank: ⭐⭐⭐, Series: Super Mario Series, Class: Primaries, Type: Grab, Unlock: Summon (T-Rex + Starly + 1,600 SP), Cost/Slot: ⎔⎔, Max Stats (Lv. 99): Power: 8516, Attack: 3917, Defense: 4599, Skill/Trait: None).
- No. 52: Thwomp (Rank: ⭐⭐, Series: Super Mario Series, Class: Supports, Type: -, Unlock: Summon (Rock Pikmin + Rocky + 1,200 SP), Cost/Slot: ⎔⎔, Skill/Trait: Weapon Resist ↑ (Decreases damage taken from melee weapons like swords and whips)).
- No. 64: Nabbit (Rank: ⭐⭐, Series: Super Mario Series, Class: Supports, Type: -, Unlock: Summon (Duster + Any Support + 1,300 SP), Cost/Slot: ⎔, Skill/Trait: Item Gravitation (Draws nearby items closer)).
- No. 66: King Bob-omb (Rank: ⭐⭐, Series: Super Mario Series, Class: Primaries, Type: Attack, Unlock: Summon (Shake King + Bob-omb + 1,000 SP) then Spirit Board, Cost/Slot: ⎔, Max Stats (Lv. 99): Power: 7248, Attack: 3590, Defense: 3248, Skill/Trait: Strong Throw (Slightly increases the power of grabbing and throwing attacks)).
- No. 70: Shadow Mario (Rank: ⭐⭐⭐, Series: Super Mario Series, Class: Primaries, Type: Neutral, Unlock: Summon (Vince + Eddy + Any Neutral Type + 1,700 SP) then Spirit Board, Cost/Slot: ⎔⎔⎔, Max Stats (Lv. 99): Power: 8007, Attack: 4444, Defense: 3563, Skill/Trait: None).
- No. 76: Sprixie Princesses (Rank: ⭐⭐, Series: Super Mario Series, Class: Supports, Type: -, Unlock: Summon (Wanda + Princess Shokora + 1,200 SP), Cost/Slot: ⎔, Skill/Trait: Fairy Bottle Equipped (Start battles with a Fairy Bottle. Heal when at least 100% damage is taken)).
- No. 78: Cappy (Rank: ⭐⭐, Series: Super Mario Series, Class: Supports, Type: -, Unlock: Summon (Ezlo + Boo Mario + 1,000 SP) then Spirit Board, Cost/Slot: ⎔, Skill/Trait: Strong Throw (Slightly increases the power of grabbing and throwing attacks)).
- No. 93: Master Cycle (Rank: ⭐⭐⭐⭐, Series: Mario Kart Series, Class: Primaries, Type: Grab, Unlock: Summon (Mach Rider + City Tripper + Excitebike + Any Attack Type + 2,500 SP), Cost/Slot: ⎔⎔, Max Stats (Lv. 99): Power: 10,440, Attack: 5471, Defense: 4568, Skill/Trait: Speed ↑ (Slightly increases run speed)).
- No. 94: Paper Mario (Rank: ⭐⭐⭐, Series: Paper Mario Series, Class: Primaries, Type: Neutral, Unlock: Summon (Cut Man + Cardboard Box + Any Neutral Type + 1,700 SP), Cost/Slot: ⎔⎔⎔, Max Stats (Lv. 99): Power: 9724, Attack: 5042, Defense: 3962, Skill/Trait: Water Weakness (Increases the damage taken from water attacks)).
- No. 99: Shadow Queen (Rank: ⭐⭐⭐, Series: Paper Mario Series, Class: Primaries, Type: Attack, Unlock: Summon (Vivian + Gengar + 1,600 SP), Cost/Slot: ⎔⎔, Max Stats (Lv. 99): Power: 9359, Attack: 5475, Defense: 3884, Skill/Trait: None).
- No. 103: Mallow (Rank: ⭐⭐, Series: Super Mario RPG: Legend of the Seven Stars, Class: Supports, Type: -, Unlock: Adventure Mode / Summon (Prince Peasley + Kracko + 1,000 SP), Cost/Slot: ⎔, Skill/Trait: Trade-Off Attacks ↑ (Start battles with 30% damage and higher att)).
The Basics
Learn the fundamentals of Super Smash Bros. Ultimate's Adventure Mode, from managing save files and difficulty to understanding Spirits, fight screens, and map navigation.
Adventure mode is a single player story where Kirby is tasked with the job of saving the universe. The other fighters have been captured and being used as tools to mass produce themselves as lifeless puppet fighters. The spirits of other characters are being forced to possess these puppets and then battle you to ruin your plans of restoring the universe. Spirits can be rescued by defeating their puppet fighter while fighters can be awakened by finding the real one and defeating them in battle. Awakened fighters can be used instead of Kirby while rescued spirits can help you in battle or overcome obstacles on the map.
Adventure can be accessed at:
Spirits → Adventure
This section provides an overview on how to navigate this mode. Check out Maps & Guide for a walkthrough.
File Select
Managing Save Files
You can have three Adventure save files. Any spirit you receive will be added and shared in your overall main save file. To delete an Adventure save file just select the file, hold L+ R for three seconds, select 'Yes' and then confirm by selecting 'I'M SURE!'
Difficulty
After selecting a new save file you can choose between Easy, Normal and Hard. This will impact how difficult each opponent is to defeat and the amount of rewards you'll receive.
Spirits
Spirits appear on the map as a glowing burning orb. When you approach the spirit a box will appear above it showing you who the spirit is. The symbol next to the spirit's name is its class (Hexagon = Support Spirit / Triangle = Primary Spirit). The top right corner shows which puppet fighter you will be battling and their type. In the top left corner is the rating of the spirit. These symbols will be discussed further in the Fight Screen section below.
Once you have beaten the puppet fighter the spirit will be added to your collection. You will also receive other rewards such as Gold, SP and Skill Spheres. You cannot replay that space to farm rewards but you can add multiples of the same spirit to your collection by playing through another Adventure save file.
Spirits can also be found in some predetermined treasure chests. Most spirits found in treasure chests can initially only be unlocked this way but will appear on the Spirit Board once found. These spirits will not count towards file completion or spaces cleared however.
Fight Screen (Similar to Spirit Board)
Selecting a space will bring you to the fight screen.
Conditions / Stage
In the bottom left corner are the list of conditions that will take effect during the battle and the stage you'll be fighting on. The conditions depend on the spirit you are fighting and can vary from what item the opponent will be holding to stage hazards like a poisonous cloud engulfing the stage.
Opponents Type & Strength
In the top right corner is a display with your opponents face and their type. Flashing upward arrows means the opponent has a type advantage against you whereas downward arrows indicate you have a type advantage. The numbers show the strength of the opponent. The higher the number, the stronger the opponent. This number correlates to their star rank in the top left corner. A four star rank spirit is much harder to fight then a 1 star rank spirit.
The color indicates which type your opponent is. Types tell you the strength and weakness of your opponent so you can create a spirit team that counters them. Having a team with a type advantage won't automatically give you the win but it will give you a big advantage.
Colors
Green beats Blue, Blue beats Red, and Red beats Green.
Green = Grab Type
Blue = Shield Type
Red = Attack Type
So.. Grab beats Shield, Shield beats Attack, and Attack beats Grab.
Purple indicates the Neutral type. This type has no strengths or weaknesses.
When you make a spirit team only your primary spirit has a type, making your team that type. When you battle fighters with a support spirit, the opponent will still have a type.
Party
Here you can see the fighter you have selected and your teams type and strength. Flashing upward arrows means you have a type advantage whereas downward arrows indicate you are at a disadvantage. After clicking this option, in the bottom left corner you can switch your fighter (you can only select Kirby to begin with). Clicking Spirits (or pressing up) will allow you to individually change your primary spirit and support spirits, select a saved team or save the team you have just made. When choosing a Support Spirit, if the spirit has a skill that counters the stage hazard like Poison Cloud a small tick will appear on the lower left of their artwork in the spirit select screen. You can also filter for these skills by pressing R and then selecting the hazard skill you are after.
Maps / Portals
The map can be accessed by pressing L when on the overworld. Maps cannot be viewed when in a subworld (areas accessed through a portal such as the 'Base'). Portals are the blue circle with a white swirl in it displayed on the map. A star next to a portal signifies that the boss, fighters and spirits in that portal have been saved. When you begin the adventure most of the map is covered in mist. The maps provided in the Maps & Guide section have had the mist removed to help you navigate better and be able to follow along with this guide.
Skill Tree
Exchange Skill Spheres for Adventure Skills to improve you fighting capability and even improve the efficiency of Activities such as the Gym. Skill Spheres are rewarded for clearing spaces and occasionally sold in shops.
Similar guides you might like



100% Human-Written. Community Verified. Learn how Ludo.guide verifies content