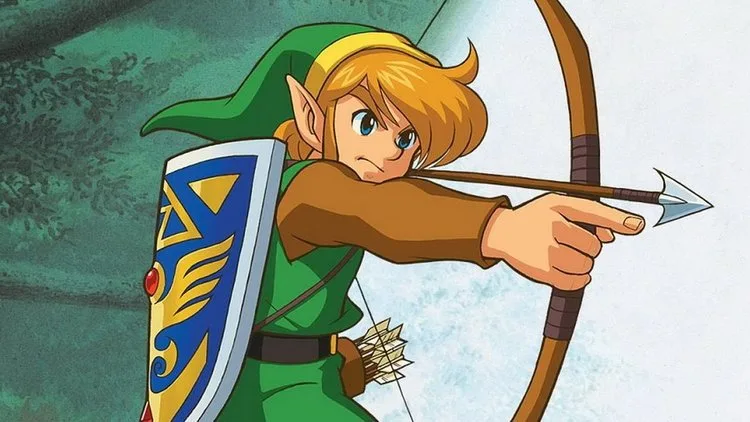
Welcome to Hyrule, my friend! In The Legend of Zelda: A Link to the Past, you'll embark on a dark, heroic journey as Link, tasked with rescuing Princess Zelda and defeating the evil Ganon. This isn't just about swinging a sword; you'll explore a vast world, delve into treacherous dungeons like the Ice Palace and Misery Mire, collect crucial items, and master intricate mechanics to overcome challenging bosses. It's a classic adventure that defined a generation of console gaming.
This guide is your trusty companion through the Light and Dark Worlds. We'll help you conquer every boss, find every secret item, and navigate the trickiest dungeons on your path to saving Hyrule. Whether you're stuck on a particular puzzle or aiming to uncover every last secret before the final confrontation in Turtle Rock, we've got the strategies and walkthroughs you need to succeed.
Prologue
Begin your adventure in The Legend of Zelda: A Link to the Past by following Princess Zelda's telepathic call and navigating the early stages of Hyrule Castle.
Upon starting a new save file, the story begins with Princess Zelda calling out for help telepathically in the night. Once Link's uncle leaves the house, you gain control of Link yourself. Use the D-pad to move him out of bed and then open the chest in this house to obtain the Lamp. You don't have any magic power, so you can't use it just yet. Lifting the pots (press the A button) by Link's bed will give you Hearts, but since Link has max health, it won't do anything for you now. But in general, you should get in the habit of checking what's underneath pots, as it's a good way to pick up consumable items! Now leave the house through the open doorway to the south.
Link will emerge in the pouring rain. You can look around and explore if you'd like, but you can't get far without soldiers telling you to go back home. Work your way north across the bridge to the front gate of Hyrule Castle. Again, guards will prevent you from going inside. If you stay outside long enough, Zelda will speak to you again through telepathy, telling you of a hidden path. Follow the small path that winds its way to the castle's east side until it ends with a conspicuously placed bush. Lift the bush to reveal an opening! A small jingle will play to let you know you've found a secret. Now drop into the hole you've discovered.
You'll land in an underground passage. Move west to find your uncle, slumped against the wall. Go up to him, and he will give you his parting words, as well as the Fighter's Sword and Fighter's Shield. These are both the most basic form of sword and shield you'll find in the game but still better than nothing! As Link's uncle instructed, holding out the sword by holding down the B button will concentrate power in the sword. Once that power (signified by a sparkling glow) reaches the sword's tip, you can release B to execute a spin attack--which has double the attack power of a regular sword slash!
In the next room, you'll face your first enemies in the game: Green Soldiers. Both their swords and shields are small, and they tend to patrol aimlessly. They're unable to block your attacks, so use your sword to cut them down (they take two hits each). To the east you'll find another chest--open it for the Lamp (if you didn't get it at Link's house) or a Blue Rupee (if you already have the Lamp). A Blue Rupee is worth 5 Rupees. Also in the pots are a couple small Magical Decanters, which give you a little bit of magic for your Magic Meter (which will be useful for your Lamp later). Now take the steps south to leave this place.
Back outside, you're now in Hyrule Castle's garden. Feel free to cut down the bushes and tall grass here--the former will sometimes drop items for you. Two more Green Soldiers patrol this garden, as well as a more dangerous Green Sword Soldier. Unlike regular Soldiers, Sword Soldiers will charge straight toward Link when they spot him, and their large swords can deflect your attacks. Fighting Sword Soldiers is all about positioning. Since, if they're charging you from the east or west, their swords are protecting the "south" part of their bodies, you'll want to position yourself a little bit north of them to strike the soldier and not their sword. You'll get the hang of it with practice! Like the ordinary Green Soldier, a Green Sword Soldier also goes down after two hits. Once you're finished here, proceed north into Hyrule Castle proper.
Hyrule Castle
Inside the castle is a plush, spacious place. But it's patrolled by both Soldiers and Sword Soldiers, so remain on guard. You can go either east or west (but don't go straight up the stairs), and it doesn't matter which route you take because both loop around to the same point. You'll want to work your way around to a room to the north with stairs leading down. Note that all the pots on this floor contain Hearts, so don't use them if you already have maximum health.
Here in the first level of the basement (i.e. B1), you'll meet a Blue Sword Soldier--who fights just like a Green Sword Soldier, but the blue variety takes three hits to subdue instead of two. Defeat this one to earn Small Key #1. Then open the chest in this room to obtain the Map. Each dungeon in the game will have its own map. Press X in a dungeon to view that dungeon's map (and for future reference, pressing X in the overworld will bring up the overworld map). I've also included the in-game map of the dungeon at the top of this section, something this guide will do for each dungeon in the game.
Use your newfound key to claim the door leading south. More Blue Sword Soldiers patrol this large room. Not only can you defeat them with the sword, but your sword swing can even push one off the ledge into the bottomless pit below! It's especially fun to throw the two pots in this area at soldiers to knock them into the abyss. Follow the path south and then west, dispatching a pair of Green Sword Soldiers as you go. Take the door north and defeat another Green Sword Soldier to open the east door. Enter it.
The door will close behind you, trapping you in this small room with a Blue Sword Soldier. Defeat the enemy as you have before, and you'll gain Small Key #2. Open the chest for the Boomerang--a most valuable item! Toss it with the Y button, and it will return to you. You can use it to retrieve items or stun enemies--it can even destroy particularly weak enemies. (Press the START button to bring up your inventory, and you can choose whether to equip the Lamp or Boomerang.) This will make fighting Soldiers easier as you can now stun them from a distance before moving in with the sword. Now return west and go north, then down the stairs to B2. Take another set of stairs down to B3.
Defeat the Green Sword Soldier you find here, then brace yourself for a mid-boss of sorts. The Ball and Chain Trooper guards the cell of none other than Princess Zelda. You can stun him with the Boomerang, but he'll recover alm
Eastern Palace
Guide to The Legend of Zelda: A Link to the Past's Eastern Palace, including how to get the Map, Compass, and Big Key.
- 5 hearts in Life Meter (including 4 Pieces of Heart)
- Fighter's Sword (Lv. 1)
- Fighter's Shield (Lv. 1)
- Green Jerkin (Lv. 1)
- Boomerang
- Bombs
- Magic Powder
- Lamp
- Bug Catching Net
- 2 Bottles
- 1From the first room, take the center door. Lift a pot and step on the switch to open the next door.
- 2In the next room, defeat the Popo enemies. Step on the floor switch to open the door ahead.
- 3Traverse the narrow corridor north, dodging iron globes. If a large iron globe rolls down, move to a side area until it passes.
- 4Once at the end, go west, then south to a new set of steps. Take these to an upper level and go east to find a chest with 100 Rupees and pots with more Rupees.
- 5Go back down, then north and through the north door.
- 6In the hub room, go east. Lift the south pot (contains a Heart) and step on the floor switch to open the east door.
- 7Fight the blue Stalfos (weakest variety, takes two hits) and Popo enemies in the next room.
- 8Continue east. Sprinkle Anti-Fairies with Magic Powder to turn them into Fairies. Catch Fairies with the Bug Catching Net if you have an empty Bottle, or let them refill your Life.
- 9Lift the center pot to uncover a switch that opens the south door.
- 10Enter the south room and open the chest to obtain the Map.
- 11Hop down and take the west door twice to return to the hub room.
- 12Take the west door (opened by a floor switch). Defeat the four Blue Stalfos.
- 13Continue west. Three more Blue Stalfos will appear. Throw pots at them to defeat them easily. Defeat all three to open the north door.
- 14Open the chest in the next room to obtain the Compass.
- 15Go down the steps and head east. Check the tile on the wall for a telepathic message from Sahasrahla.
- 16Continue east to reach the hub room on the lower level. The big chest cannot be opened yet.
- 17From the hub room, take the east door. Go south, take the stairs up, then enter the south room.
- 18Immediately go east to avoid advancing Anti-Fairies. Follow the narrow corridor south, defeat the Popo, step on the floor switch, and quickly enter the east door.
- 19In the next dark room, defeat the three Blue Stalfos using the pots. Find Small Key #1 under a pot against the east wall.
- 20Return to the previous room, follow the dark corridor south and west, defeat the Popo, and unlock the west door with Small Key #1.
- 21Advance west to the next room. Defeat the two Popo, two Blue Stalfos, and the Green Eyegore (throw a pot at it when its eye is open).
- 22Once all enemies are vanquished, lift the pot to reveal a switch that makes a chest appear. Open it for the Big Key.
- 23Sprinkle Anti-Fairies with Magic Powder or avoid them. Earn the north door with the Big Key.
- Popo enemies are a good source of Rupees.
- Blue Stalfos are the weakest variety and take two hits to destroy with a sword.
- Throwing pots is an effective way to defeat Stalfos, as they do not dodge thrown pots.
- Anti-Fairies drain Life and Magic Meter, but can be turned into Fairies with Magic Powder.
- The Compass shows the boss's location on the dungeon map as a flashing skull.
- The Green Eyegore is invulnerable until it opens its eye and charges; attack it then, or throw a pot.
- Map
- Compass
- 100 Rupees
- Small Key #1
- Big Key
Search for Sahasrahla
Find Sahasrahla in The Legend of Zelda: A Link to the Past by exploring the Lost Woods and Kakariko Village, and discover how to get Bombs.
- Master Sword (obtained in the Eastern Palace)
- 1After exiting the Sanctuary, press X to view the world map (minimap (the small circular map in the bottom-left corner of your screen)). Your current location is marked by Link's face, and your destination by a flashing red X.
- 2Head west from the Sanctuary, defeating any Sword Soldiers.
- 3Continue west past a pond with a whirlpool to find a house with a crystal ball on the roof. Inside, a fortune teller can reveal your future and heal your Life (health).
- 4North of the fortune teller's house is the entrance to the Lost Woods.
- 5Navigate the Lost Woods, avoiding fake swords and thieves who will try to steal your Rupees (currency). You can knock thieves back with your sword but cannot defeat them.
- 6Continue north, defeating a Crow (takes two hits).
- 7Find an entrance inside a tree stump; ignore it.
- 8Cut the cluster of nine bushes just beyond the tree stump. The center bush hides a hole.
- 9Drop into the hole to find Piece of Heart #1. Collecting four Pieces of Heart grants an extra Heart Container.
- 10Exit the cave and return to the Lost Woods.
- 11Continue north, passing through the right hollow log.
- 12You will find another log that serves as an entrance to a Treasure Chest Game. It costs 100 Rupees to play, with potential prizes of 1 Rupee, 20 Rupees, or 300 Rupees. This is one of three such games in Hyrule.
- 13Northwest of where you found Piece of Heart #1 (go through the west hollow log), find a Mushroom growing. Walk up to it to add it to your inventory.
- 14Return south to leave the Lost Woods and continue south to Kakariko Village.
- 15In Kakariko Village, the first house you see is Sahasrahla's house. His wife will tell you he is not there.
- 16Go west from Sahasrahla's house to the northwest corner of the village, where a well is next to a cave.
- 17Drop into the well from the upper ledge to find a cave with a chest containing Bombs. Each set of Bombs from a chest contains three.
- 18On the north wall of this cave, find three more chests, each containing a Red Rupee (worth 20 Rupees), totaling 60 Rupees. Two Blue Rupees (worth 5 Rupees each) are also under pots, bringing the total to 70 Rupees.
- 19Examine the discolored north wall to the left of the three chests. Use a Bomb to blow up the wall, revealing an opening. Warning: Do not stand too close to a Bomb when it explodes.
- 20Enter the opening to find four pots (containing two Blue Rupees and two Hearts) and another chest.
- 21Open the chest to find Piece of Heart #2.
- 22Exit the cave and return to the village.
- 23Be aware of two women walking in front of houses in the west and east parts of the village. If you bump into them, they will summon a Green Spear Soldier and retreat into their house. This Soldier can be defeated with two sword hits.
- 24If you enter the eastern informant woman's house without her summoning the Soldier (she will lock the door otherwise), pull the Mario-like portrait on the wall to get four Blue Rupees (20 Rupees).
- 25Return to the building next to Sahasrahla's house (with the green thatched roof). The man inside will mention it belonged to a band of thieves led by Blind.
- The world map (minimap) is essential for navigation.
- The Mushroom collected in the Lost Woods will be used later.
- Bombs are high-stakes for opening new paths and damaging enemies.
- Be cautious of informant women in Kakariko Village, as they can alert guards.
- The Treasure Chest Game is generally not worth the cost unless using a save state feature (Virtual Console).
- Piece of Heart #1
- Bombs
- Red Rupees (total 60)
- Blue Rupees (total 30)
- Hearts
- Piece of Heart #2
- Mushroom
Into the Desert
Walkthrough for 'Into the Desert' in The Legend of Zelda: A Link to the Past. Get the Pegasus Boots, find Pieces of Heart, and explore the Great Swamp.
- 1After obtaining the Pendant of Courage from the Eastern Palace, return to Sahasrahla's dwelling. Speak with him to receive the Pegasus Boots. These allow Link to dash by pressing the A button, damaging enemies and breaking certain obstacles.
- 2Leave Sahasrahla's dwelling and head south, then west out of the Eastern Palace complex.
- 3Make your way back to the Sanctuary.
- 4West of the Sanctuary, find a pile of five stones on a high bluff. Dash into the rock pile with the Pegasus Boots to reveal a hidden entrance.
- 5Inside, open the chest to obtain Piece of Heart #5.
- 6Exit the cave and return towards the Eastern Palace grounds.
- 7South of the large stones where Octoroks roam, cross the white stone bridge.
- 8Continue south to reach Lake Hylia, where you'll find an item shop and a fortune teller on this shore.
- 9Instead of proceeding south, head west from the bridge.
- 10You will arrive back at Link's house. Inside, three pots will always contain Hearts.
- 11Northwest of Link's house (one screen over), find another rock pile. Dash into it with the Pegasus Boots to reveal an entrance to a Fairy fountain containing four Fairies.
- 12Just south of this entrance, dash into a lone tree to find a Fairy. Remember that lone trees can yield items when dashed into, but some may release Bees or Bombs.
- 13From Link's house, go south to enter the Great Swamp.
- 14In the Great Swamp, beware of Blue Bow Soldiers, Green Bow Soldiers (who hide in grass), and Toppos (rabbit-like creatures that leap from the grass). Defeating a Toppo by slashing it yields a Heart or Green Rupee. If you cut away its grass patch while it's in midair, it will become stunned on the ground, yielding a Heart, Fairy, Arrows, Bombs, a large Magic Decanter, or a Red Rupee when approached. Other enemies include Octoroks and Crows.
- 15Go to the northeast corner of the swamp and use a Bomb to blow open a loose rock in the cliff wall, revealing a cave with a Great Fairy to heal you.
- 16Head southwest to the Swamp Ruins. Inside, you'll find a chest blocked by three blocks.
- 17To reach the chest, push the two outer blocks north, then push the middle block aside (east or west). Open the chest to obtain Bombs.
- 18Exit and re-enter the Swamp Ruins to reset the block puzzle.
- 19This time, push the center block north against the chest, then push one of the outer blocks aside to access the door on the other side.
- 20In the next room, an Anti-Fairy patrols. Pull the east lever to open the water sluice gate, filling the Swamp Ruins with water and draining the overworld area.
- 21Exit the Swamp Ruins to find Piece of Heart #6.
- 22(Optional: Pick up a Fish from the drained area and carry it to Kakariko Village to sell to the Street Merchant for 100 Rupees.)
- 23Head east from the Swamp Ruins into a semiarid area. Beware of Octoroks and Sand Crabs (which move slowly north/south but speed up east/west, dealing two hearts of damage).
- 24Look along the north wall for a place to set a Bomb, which will open a cave.
- 25Inside the cave, defeat the four Mini-Moldorms. The first is accessible directly. The other three are on ledges across bottomless pits. You can use Arrows or hug the south wall to walk across the ledges and defeat them with your sword.
- 26After defeating all Mini-Moldorms, the door ahead will open.
- 27Enter the next room to find a friendly thief and four chests. Talk to the thief to receive 300 Rupees.
- The Pegasus Boots are essential for breaking rock piles and traversing long distances quickly.
- Lone trees can be a source of helpful items, but be cautious as some may release enemies.
- The Toppo's special drop is dependent on how you defeat it.
- The block puzzle in the Swamp Ruins requires careful manipulation to access both the Bombs and the exit.
- Mini-Moldorms can be challenging to hit with Arrows due to their erratic movement; using the sword from the ledges is a safer alternative.
- Pegasus Boots
- Piece of Heart #5
- Piece of Heart #6
- Bombs
- 300 Rupees
- Fairies (from fountain and lone tree)
Similar guides you might like




100% Human-Written. Community Verified. Learn how Ludo.guide verifies content