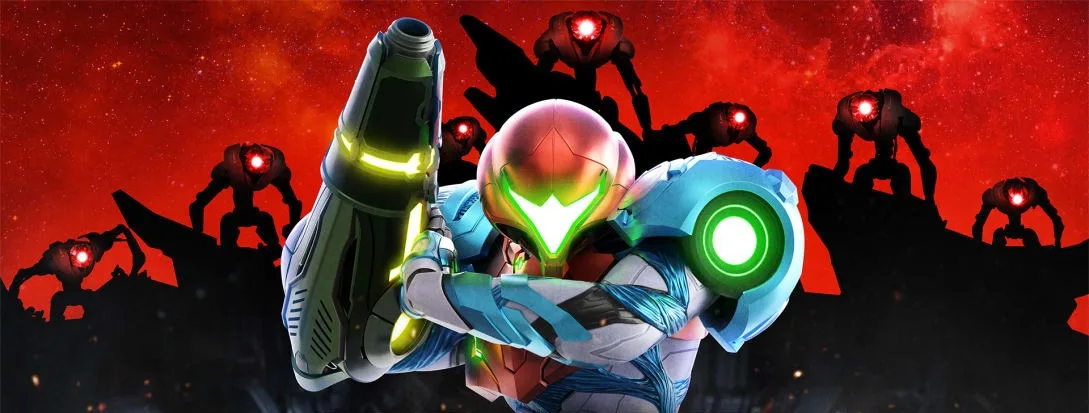
Metroid Dread plunges you into the role of bounty hunter Samus Aran, stranded on the hostile planet ZDR. As you explore its labyrinthine environments, you'll engage in challenging combat, master new abilities, and constantly evade the relentless pursuit of the terrifying E.M.M.I. robots. This installment picks up after the events of Metroid Fusion, tasking you with investigating the potential resurgence of the dangerous X Parasite.
This guide is your essential companion for conquering ZDR. We'll provide a complete walkthrough from your initial awakening to the final confrontation, offering expert strategies for every boss fight, including those E.M.M.I. encounters. You'll also find the precise locations for all Missile Tanks, Energy Tanks, and crucial weapon upgrades, ensuring you don't miss any vital equipment needed to survive.
Map
Navigate Planet ZDR with ease! This guide breaks down all Metroid Dread map icons, from Power Beam Doors and Network Stations to Missile Tanks and Shuttles.
The map feature in Metroid Dread can be confusing due to its many icons and colors. This guide covers key map elements to help players understand their meaning and function.
Here is a breakdown of the various map icons:
| Icon | Object | Description |
|---|---|---|
| Power Beam Doors | Blas these open with a single power beam shot. | |
| Network Stations | Communicate With Adam, Save Game. | |
| Map Stations | Reveals the map for the current area that Samus is located in. | |
| Save Stations | Players can save their game here. | |
| Total Recharge Stations | Refills all health and all ammunition. | |
| Missile Tanks | Increases Missile Capacity x2. | |
| Interactive Devices | Various types of objects that can be interacted with for an effect on the planet ZDR. | |
| Energy Recharge Stations | Refills all of Samus Aran's Health. | |
| Shutter Doors | Use the Phantom Cloak to proceed through the shutters. | |
| Shuttle/Travel Station | Shuttles will take Samus Aran to other locations on Planet ZDR. | |
Power Beam Doors
These are the most basic doors in the game. They are yellow with a large yellow circle in the middle and can be opened with a single power beam shot. On the mini-map, they resemble the icon shown.
Network Stations
At a Network Station, Samus can plug into the network with her Arm Cannon to receive hints, lore, or story information from Adam. Players can also save their game here.
Total Recharge Stations
These Chozo Statues, identified by a golden glow and a gold Chozo representation on the map, fully recharge both ammunition and health when Samus steps on the plate in front of them.
Missile Tank Markers
These markers indicate the location of Missile Tanks, which increase Missile Capacity by two. They appear on the World Map with a red circle outline, similar to the icon shown.
Interactive Devices
These devices, marked by a Hand Icon on the world map, can trigger various effects on Planet ZDR, such as lowering water levels or changing temperatures. They are clutch for main game progression.
Energy Recharge Stations
These stations glow purple and instantly restore all of Samus Aran's health and energy tanks. They rarely offer checkpoints and do not allow for saving the game.
Shutter Doors
To pass through Shutter Doors, Samus must use the Phantom Cloak. Be mindful of Aeion Energy levels, as depleting them will result in losing energy tanks.
Shuttles
Shuttles open up travel between different locations on Planet ZDR. The first encountered shuttle in Cataris transports Samus to Dairon, with more available for other destinations later in the game.
GameFAQs
Metroid Dread GameFAQs section covering Omega Cannon aiming and EMMI strategies. Includes introduction and controls.
- 1Aiming the Omega Cannon can be challenging; practice is key to improving.
- 2For rookie players, defeating an EMMI often requires maintaining a good distance and setting up your attack effectively.
- 3A video demonstrating how to take out EMMI 02 is available, showing the necessary setup.
- Focus on maintaining a good distance from the EMMI.
- Ensure you have a proper setup before engaging the EMMI.
- Practice makes perfect when aiming the Omega Cannon.
Navigation:
- Previous: Introduction
- Next: Controls
Controls
Master Metroid Dread controls, including Melee Counter (X), Slide (ZL), Free Aim (L), and advanced moves like Speed Boost and Shinespark.
Options
The (-) button opens the options menu, where you can reload previous checkpoints (a save point that marks your progress), check amiibo, restart to the main menu, or reload your current saved file.
Map
The (+) button displays the game's map. Initially, only parts of the map are visible; claiming the map for each area reveals more, though many secrets remain hidden until discovered or specific criteria are met.
Expand Minimap (the small circular map in the bottom-left corner of your screen)
Pressing Left on the Directional Pad expands the minimap (a small, real-time map shown on the HUD (heads-up display — the on-screen icons showing health, ammo and the minimap), or Heads-Up Display) in the top right corner, offering a better view of your surroundings. This is particularly useful for finding items or evading the EMMI. Any button press exits this view.
Melee Counter
The Melee Counter, activated by pressing (X), allows you to counter certain enemy attacks and set up a charged shot that typically defeats basic enemies in one blast. This is a good way to regain health and ammunition but can be risky due to precise timing requirements. Samus Aran can also dash into targets by running and pressing (X), which can be combined with the melee counter if timed correctly. Acquiring the Varia Suit increases the Melee Dash attack power.
Slide
The (ZL) button performs a slide, an ability available from the start of the game. The slide is useful for hiding, sliding through floor gaps, and escaping the EMMI.
Free Aim
Holding the (L) shoulder button enables Free Aim, allowing Samus to aim in any direction. While holding (L), move the left joystick to aim using red laser sights. This works with missiles and later with the Grapple Beam. Aiming can be challenging, especially with the Omega Cannon against EMMI, but becomes more manageable during general gameplay.
Missile Mode
Holding the (R) button toggles missile modes. While some players find this control scheme difficult initially, it becomes more appreciated as you lean on the game's various abilities.
Advanced Controls
Wall Jumping
Samus Aran can jump towards a wall and press the (L) Joystick towards it in combination with the jump button to perform a wall jump, gaining additional height. This is available from the start of the game and is easier to execute in Metroid Dread compared to previous installments.
Speed Boosting
Begin a Speed Boost by pressing the (L) button or Left Joystick. Hold (L) to activate the boosters on Samus Aran's back. Mastering Speed Boosting is essential for unlocking 100% of in-game items and is required for using the Shinespark.
Shinespark
Once a Speed Boost is fully charged, Samus Aran will glow and emit a sound. Pressing Down on the Left Joystick triggers a Shine Spark Charge, indicated by a pink glow. You have a limited time to perform a Shine Spark before the charge is lost. This is game-changing for 100% game completion and speed runs. The Shine Spark can be maintained through certain actions, such as entering Morph Ball formation, allowing you to boost or Shine Spark while in Morph Ball mode.
Morph Ball
Press (ZL) or double-tap Down on the Left Joystick to enter Morph Ball formation. In Morph Ball mode, you can access tighter spaces and lean on different abilities. You can jump in Morph Ball mode with the (B) button, and Samus Aran will perform a melee kick if the (X) button is pressed.
Artaria
Complete Metroid Dread Artaria walkthrough covering items like the Charge Beam, Spider Magnet, Phantom Cloak, EMMI encounters, and all collectible locations.
- 1Begin Transmission (Tutorial): After the opening cutscenes, you'll start on planet ZDR with no abilities. Test your Power Beam with the (Y) button and blast open the yellow Power Beam Door. You'll encounter Crystal Shell enemies, which are easily defeated with the Power Beam. This section subtly teaches basic controls: Slide with (ZL), hanging off ledges, and wall-jumping. Collect Missile Tank #1, indicated by blinking on the Mini-Map.
- 2E.M.M.I. (Damaged - Gray): Encounter your first E.M.M.I., which is damaged and moves slower. Avoid it by sliding and maneuvering through the EMMI Zone. Reach the Central Unit to charge the Omega Cannon. Use the Omega Stream (rapid-fire) to slow the E.M.M.I. and damage its head. Once the head breaks, use a charged Omega Cannon shot (aim for the red eyeball) to defeat it.
- 3E.M.M.I. 02 (White - Escape): You'll encounter the fully intact white E.M.M.I. Use your current skills to escape it by sliding under a hole near water where it cannot reach you. Once it leaves, proceed through the E.M.M.I. door.
- 4Post-EMMI Exploration: After escaping the white E.M.M.I., platform through new areas. You'll learn Melee attacks and Melee dashes. Near the Rib Cage of bone in the background, collect Missile Tank #2.
Items & Abilities:
- Charge Beam: Found to the left inside an item sphere shortly after the Energy Recharge Station.
- Spider Magnet: Acquired after defeating E.M.M.I. 02 (White).
- Phantom Cloak: Acquired after defeating Corpius.
- Energy Tank #1: Obtained after the first charge beam door.
E.M.M.I. Encounters:
- E.M.M.I. #1 (Gray): Partly destroyed; finish it off using the Omega Cannon.
- E.M.M.I. #2 (White): First, escape from it; then, destroy it after acquiring the Omega Cannon.
Missile Tanks:
- Missile Tank #1: Game Tutorial, Blinking Screens, Artaria Caves.
- Missile Tank #2: After the 2nd E.M.M.I., above the rib cage of bone.
- Missile Tank #3: After lowering the water level, head up and left from the map room.
- Missile Tank #4: Use the Charge Beam on the top-right door at the Network Station.
- Missile Tank #5: Use the Spider Magnet in the E.M.M.I. zone to get the tank!
Similar guides you might like


100% Human-Written. Community Verified. Learn how Ludo.guide verifies content