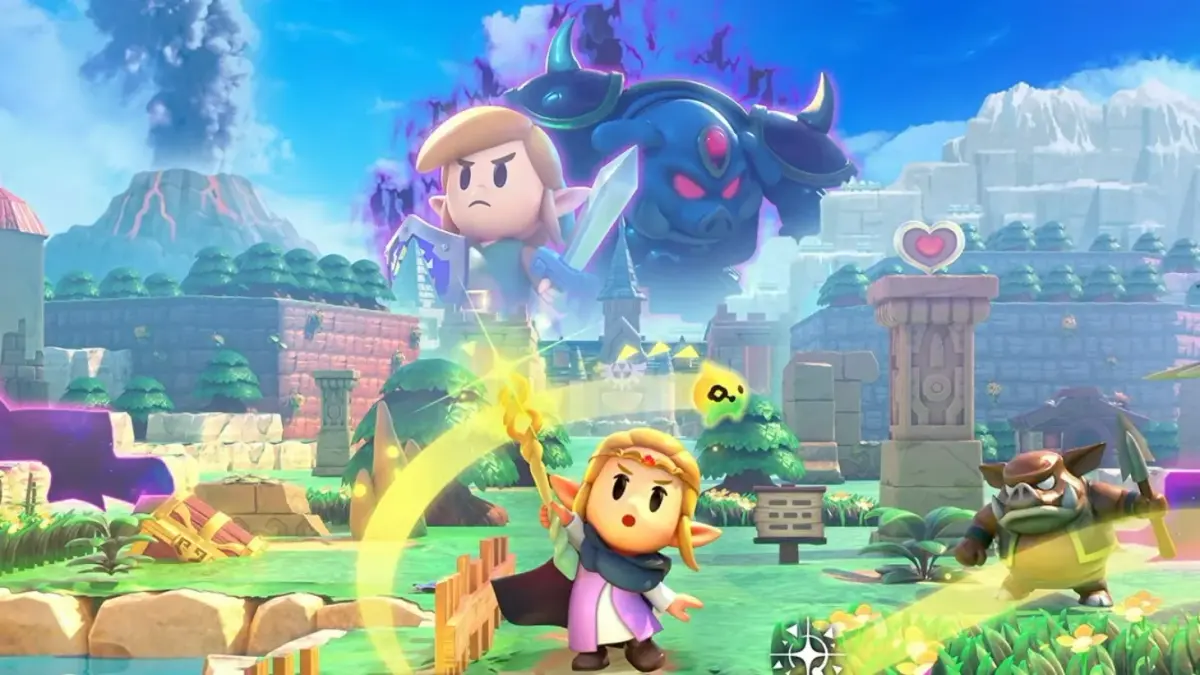
Welcome to The Legend of Zelda: Echoes of Wisdom! In this Nintendo Switch adventure, you'll step into Zelda's shoes to explore desert ruins and unravel the secrets of mysterious rifts. You'll be navigating treacherous landscapes, mastering unique echo abilities to overcome challenges, and conquering every quest Nintendo has laid out for you.
This guide is your companion to mastering the game. We'll provide a step-by-step walkthrough for Zelda's entire quest, offer strategies for every boss encounter, and guide you through the game's tricky dungeons and puzzles. Plus, we'll help you track down every collectible, including Heart Pieces, Echoes, Fairy Bottles, and Stamps, ensuring you don't miss a single secret.
Walkthrough
Embark on Zelda's first solo adventure with our comprehensive walkthrough for The Legend of Zelda: Echoes of Wisdom. Master dungeons, defeat bosses, and find all collectibles.
Hello there! Welcome to our The Legend of Zelda: Echoes of Wisdom (2024) walkthrough guide. The latest game in the long running Legend of Zelda series and the first in which Zelda herself is the main character.
This comprehensive guide aims to cover 100% of the The Legend of Zelda: Echoes of Wisdom experience by providing a step-by-step walkthrough to the main story campaign providing strategies for boss encounters, and give you solutions to all of the game's tricky dungeons and puzzles. The guide will also cover all side content including side quests, and locations of every collectible (Heart Pieces, Echoes, Fairy Bottles and Stamps) both along the way and in a detailed list at the end.
What this guide will offer:
- Complete walkthrough for Zelda's quest from beginning to end.
- Guides for each of the game's tough Boss Encounters.
- Walkthroughs for all side quests.
- Where to find all the Heart Pieces
- Where to find all Stamps.
- Where to find all of the Echoes and what they do.
- And much, much more...
To use this guide you can see the Table of Contents on the right hand side of the guide, or in mobile devices click the "Table of Contents" button at the top of every page.
Walkthrough Table of Contents
- 1Prologue
- 2The Mysterious Rifts
- 3Dungeon - Suthorn Ruins
- 4Searching for Everyone
- 5Searching for Everyone - Gerudo Desert
- 6A Rift in the Gerudo Desert
- 7Southern Oasis Ruins Rift
- 8Southern Gerudo Desert Rift
- 9Ancestor’s Cave of Rest Rift
- 10A Rift in the Gerudo Desert - Part 2
- 11Dungeon - Gerudo Sanctum
- 12Gerudo Desert Exploration (Optional)
- 13Searching for Everyone - Jabul Waters
- 14The Jabul Waters Rift
- 15Chaos at the River Zora Village
- 16Rampage in Zora Cove
- 17The Jabul Waters Rift - Part 2
- 18Dungeon - Jabul Ruins
- 19Jabul Waters Exploration (Optional)
- 20Still Missing
- 21Dungeon - Hyrule Castle
- 22World Exploration (Optional)
- 23Hyrule Field Exploration (Optional)
- 24Lands of the Goddesses
- 25Lands of the Goddesses - Eldin Volcano
- 26The Rift on Eldin Volcano
- 27Lizalfos Burrow
- 28Rock-Roast Quarry
- 29The Rift on Eldin Volcano - Part 2
- 30Dungeon - Eldin Temple
- 31Eldin Volcano Exploration (Optional)
- 32Lands of the Goddesses - Faron Wetlands
- 33A Rift in the Faron Wetlands
- 34Dungeon - Faron Temple
- 35Faron Wetlands Exploration (Optional)
- 36Lands of the Goddesses - Mount Lanayru
- 37Rift on Holy Mount Lanayru
- 38Dungeon - Lanayru Temple
- 39Mount Lanayru Exploration (Optional)
- 40The Prime Energy and Null
- 41Rescuing the Hero Link
- 42Dungeon - Null's Body
Side Quests
World
- Recipes, Please!
Suthorn Prarie
- Finding the Flying Plant
- The Blocked Road
- Up a Wall
- What is Snow... Really?
Gerudo Desert
- Beetle Ballyhoo
- Dohna’s Challenge
- Elusive Tumbleweeds
- Gerudo Tag Training
- The Flying Tile
- Tornado Ghost?
- Wild Sandstorms
Hyrule Field
- Automaton Engineer Dampe
- Explosions Galore!
- Performance Artist!
- Endless Stomach!
- Chop 'Em In Two!
- Get Rich Quick!
Chapter 3: Jabul Waters Rift
Explore Jabul Waters Rift in The Legend of Zelda: Echoes of Wisdom. Learn how to get Sword of Might Lv. 2, defeat Smog, and find Heart Piece #9.
- 1After the cutscene (a non-interactive cinematic the game plays automatically) in Gerudo Town, warp to Suthorn Forest.
- 2Go to Lueburry's house and use the machine to upgrade your equipment: upgrade your sword (10 Might Crystals) to obtain Sword of Might Level 2, and upgrade your energy (5 Might Crystals) to obtain Energy Gauge Level 2.
- 3Leave the house and head northwest to Suthorn Prairie.
- 4Continue north to reach Hyrule Field.
- 5In Western Hyrule Field, open the buried chest near two soldiers to get 5 Floral Nectars.
- 6Lift a rock northwest of the soldiers to uncover a Might Crystal (29/150).
- 7Defeat the Guay to learn the Guay Echo.
- 8Follow the pathway east, defeat the Tangler in the river to learn the Tangler Echo.
- 9Talk to the woman on the high ledge southeast of the bridge; she wants to see the Great Fairy.
- 10Cross the bridge in the north to reach Eastern Hyrule Field.
- 11Bind and push the boulder northwest of the bridge to uncover a Might Crystal (30/150).
- 12Follow the pathway east to a four-way junction.
- 13Head southwest from the junction and use Bind to move the boulder next to a large tree to uncover a Might Crystal (31/150).
- 14Return to the junction, climb to the higher cliff in the northeast, and lift the rock to uncover a Might Crystal (32/150).
- 15Jump west and activate the Waypoint (a marker on your map you've manually placed as a destination) to the north, arriving at the ruins of Eastern Temple.
- 16Check the Stamp Stand to get Stamp #5. You will receive 10 Fresh Milks for completing the First Stamp Card.
- 17Defeat Moblins to learn the Sword Moblin Echo and Spear Moblin Lv. 2 Echo.
- 18Open the chest in the northwest to obtain 7 Radiant Butters.
- 19Head to the northeast of the ruins and talk to Sago the archaeologist to receive the side quest "Let's Play a Game".
- 20Enter Eastern Temple.
- 21Defeat the Spark (with Platboom Echo) to learn the Spark Echo.
- 22Head north. Bind the Sparks and place them into the yellow box to open the locked door, or send 2 Spark Echoes into the box.
- 23Proceed north and repeat the process.
- 24Head east to the next room and send 2 Spark Echoes into the yellow box to reveal a chest containing 50 Rupees.
- 25Head west through 2 rooms, open the chest for 5 Rock Salts, then go down the ladder.
- 26Move right through 2 screens, then go down the ladder at the end.
- 27In the next room, head north and prepare to fight the mini-boss, Smog.
- 28In phase 1, avoid Smog's electrical charges. Use multiple Boomerang Boarblin Echoes to attack from a distance.
- 29In phase 2, Smog separates into 3 parts and shoots green orbs. Use Boulder Echoes to alter its movement path so parts collide and merge. You can also use Bind to stop its movement. Repeat to inflict damage.
- 30In phase 3, Smog separates into 5 parts and becomes faster. Repeat the damage process until defeated.
- 31As a reward for defeating Smog, you'll get 60 Rupees and Heart Piece #9.
- 32Return outside. Sago will give you an Ancient Charm (accessory) as a reward.
- 33Walk south a little, then climb to the higher cliff in the east. Lift the rock to uncover a Might Crystal (33/150).
- 34Head back to the four-way junction, then follow the pathway northeast to the beach.
- 35Defeat the crab to learn the Sand Crab Echo.
- 36Head east to Seesyde Village in the Jabul Waters region.
- 37Activate the Waypoint and approach the nearby couple to learn that Lord Jabu-Jabu has gone mad.
- 38Check the Stamp Stand to get Stamp #6.
- 39The house in the northeast is a Shop.
- 40Talk to the woman in the southeast to receive the side quest "Deliver the Grilled Fish!".
- 41Use the Tri Rod on the grilled fish to learn the Grilled Fish Echo.
- 42Dive under a dock to the south to get a Might Crystal (34/150).
- 43Carry the grilled fish, head northeast, and cross the river using the stone pillar.
- 44Defeat all Moblins and open the chest for 10 Riverhorses.
- 45Climb to the higher ledge and drop the grilled fish near the sleeping boy (Anube).
- 46Return to Anube's mother in the village to receive your reward, 10 Bubble Kelps.
- 47Cross the bridge to the east to reach Crossflows Plaza.
- 48Activate the Waypoint near Crossflows Plaza.
- The Sword of Might Lv. 2 and Energy Gauge Lv. 2 are required for this section.
- The Ancient Charm accessory reduces damage taken.
- The shop in Seesyde Village sells Blue Potion (30 Rupees), Red Potion (30 Rupees), and Purple Potion (50 Rupees).
Chapter 1: Suthorn Forest Rift
Learn how to escape Hyrule Castle Dungeon as Zelda using the Tri Rod in The Legend of Zelda: Echoes of Wisdom. Includes tutorial and Suthorn Region exploration.
- 1During the tutorial, play as Link and defeat Ganon by dodging his trident attacks, reflecting fireballs, and hitting him when stunned.
- 2After a rift swallows Link, gain control of Zelda. Check the cloth on the floor to obtain the Swordman's Cloak.
- 3Run south, following the fairy, and avoid falling rubble to escape outside.
- 4Zelda will be escorted back to Hyrule Castle Town. Head north and enter the castle.
- 5Meet Impa in the room to the north, then talk to the king in the throne room.
- 6A rift appears, swallowing the king, General Wright, and Minister Lefte, who are replaced by shadow imposters. Zelda is locked in the dungeon.
- 7In the dungeon, push the table west and try to jump the gap.
- 8When night falls, the fairy Tri will visit and suggest Zelda escape.
- 9Pick up the Tri Rod. Approach shimmering objects and press ZR to create echoes.
- 10Use the Tri Rod on the nearby table to learn the Table Echo. Push the table west, jump onto the stool, and create a Table Echo to jump over the gap.
- 11Jump down to the next prison and enter the room to the west. SAVE the game.
- 12In the next room, evade guards. Use Table Echoes to jump to higher platforms.
- 13Walk west and use the Tri Rod on the wooden box to learn the Wooden Box Echo.
- 14Head west, avoiding guards, and climb to a higher platform.
- 15Use the Tri Rod on the nearby pot to learn the Hyrule Castle Pot Echo. Pick up and throw the pot to distract a guard.
- 16Hide near the wardrobe to the south, pick up another pot, and throw it north to distract another guard.
- 17Quickly run west and enter the next room.
- 18Impa returns the Swordman's Cloak (Disguise outfit) and gives Zelda a Log to view the map.
- 19Use the Tri Rod on the decorative shrub to learn the Decorative Shrub Echo.
- 20Climb to a higher platform, head west, and use Decorative Shrub Echoes to fill a gap.
- 21Use the Tri Rod on the nearby bed to learn the Old Bed Echo.
- 22Climb to a higher platform, head west, and stack Old Bed Echoes to reach the westmost platform.
- 23Exit the castle.
- 24In the Hyrule Castle Garden, jump into the well to the west.
- 25In the Secret Passage, head west and use the Tri Rod on the boulder to learn the Boulder Echo.
- 26Push the boulder onto the water, then use Wooden Box Echoes on the water surface to proceed.
- 27Place the Boulder Echo on top of the wooden box to the west to make it sink.
- 28Swim upwards to leave the area. Another rift appears; jump into the river to the southeast to avoid it. Zelda will be swept away.
- 29After waking up on Suthorn Beach, use the Tri Rod on the nearby rock to learn the Rock Echo.
- 30Leave through the door to the southeast. Press [ - ] to view the map.
- 31Defeat zols and sea urchins using rocks, then collect their echoes to learn the Zol Echo and Sea Urchin Echo.
- 32Stack Bed Echoes to reach a higher cliff to the north. Open the chest for 20 Rupees.
- 33Head to the south-eastern area, swim, and dive for rupees.
- 34On a small island, stack Old Bed Echoes to reach a platform to the west and collect Heart Piece #1.
- 35Return to the previous island and stack Old Bed Echoes to reach the higher cliff in the northeast. SAVE your game and go down the ladder into the Beach Cave.
- 36Use the Sea Urchin Echo to kill Keese, then collect its echo to learn the Keese Echo. Head east.
- Use the Tri Rod to create echoes of objects like tables, wooden boxes, pots, decorative shrubs, old beds, and boulders to solve puzzles and traverse obstacles.
- Evade guards in Hyrule Castle Dungeon by using echoes to reach higher platforms and hiding.
- Distract guards by throwing pots.
- Collect echoes of enemies like zols and sea urchins to learn how to defeat them.
- Stack echoes of objects to reach higher areas and collect rewards like Rupees and Heart Pieces.
- Press [ - ] to view the map and learn your current location.
- Save your game frequently, especially before challenging sections.
Chapter 2: Gerudo Desert Rift
Explore Gerudo Desert in The Legend of Zelda: Echoes of Wisdom. Find the Golden Fan, Survey Scope, and complete side quests.
- 1After speaking with Minister Lefte outside the ruins, follow her to Impa's marked house and meet Lueburry.
- 2Talk to Lueburry to learn about Link and weapon enhancement. You need 10 Might Crystals to enhance your sword and 5 Might Crystals for your energy gauge.
- 3Read Lueburry's diary downstairs for more information.
- 4Leave the house and activate the Waypoint (a marker on your map you've manually placed as a destination) to the west.
- 5Head southwest to return to Suthorn Village.
- 6Talk to the old man in the southwest to accept the side quest "Finding the Flying Plant."
- 7Show him the Peahat Echo to complete the quest and receive a Might Crystal (6/150).
- 8Leave Suthorn Village and head north to Suthorn Prairie.
- 9Defeat the Octorok and Crawltula to learn the Octorok Echo and Crawltula Echo.
- 10Head north to a pond surrounded by pillars. Climb the eastern pillar using echoes, stack Bed Echoes, and collect Heart Piece #5 from the middle pillar.
- 11Proceed to the ruins in the northeast and meet Verley to accept the side quest "Up a Wall."
- 12Defeat the two nearby Moblins to receive 20 Rupee.
- 13Use echoes to climb the eastern cliff, walk east along the ledge to a cave, and open the buried chest for a Golden Egg.
- 14Return to Suthorn Prairie, enter the northwest cave, and defeat the Crawltula.
- 15Stack Decorative Shrub, Old Bed, and Trampoline Echoes to reach a northern platform. Collect 20 Rupees and open the chest for 50 Rupees.
- 16Dive into the pond, spin to cut grass, and reveal a Might Crystal (7/150).
- 17Head south to meet a man near a blocked path and accept the side quest "The Blocked Path."
- 18Destroy crates and push stones to clear the path, then talk to the man for your reward of 20 Rupees.
- 19Head north a few steps and activate the Waypoint (shortcut to Hyrule Field).
- 20Return to the prairie, head southwest to the ruins near the small pond, stack Old Bed Echoes, and open the chest for 10 Rock Salts.
- 21Head west, kill crows to learn the Crow Echo.
- 22Lift the rock on the dead tree nearby to collect a Might Crystal (8/150).
- 23Use echoes to climb the highest northern cliff, walk east and south along the ledge, and lift another rock to uncover a Might Crystal (9/150).
- 24Jump west, use echoes to reach the chest on the southern dead tree, and open it for 50 Rupees.
- 25Head west to reach Gerudo Desert.
- 26Activate the Waypoint near the desert entrance.
- 27Defeat Aruroda to learn the Aruroda Echo.
- 28Head south to three Gerudo soldiers near palm trees.
- 29Head north to find a chest buried under sand. Pull it to obtain 20 Rupee.
- 30Use echoes to climb the northern cliff and enter the cave.
- 31Head north to the next room and defeat two Caromadillos to learn the Caromadillo Lv. 2 Echo.
- 32Open the appearing chest for 10 Chilly Cactus.
- 33Return outside and head to the oasis in the middle of the desert.
- 34Activate the Waypoint at the oasis.
- 35Talk to the Business Scrub to the west to accept the side quest "Recipe, Please!" Making 10 smoothies rewards you with a Survey Scope (accessory). Making 20 more recipes will be addressed later.
- 36Open the nearby chest for 5 Chilly Cactus.
- 37Talk to Tormali (Gerudo) to accept the side quest "The Flying Tile."
- 38Enter the tent to the north to reach the Tough Mango Plant Lab.
- 39Use the Tri Rod on the bed to learn the Soft Bed Echo.
- 40Talk to the Gerudo researcher to play the Mango Rush mini-game (entry fee: 10 Rupees).
- 41Complete the Standard Seeds Challenge: Harvest 40-49 mangoes for 3 Tough Mangoes, or 50 mangoes for 5 Tough Mangoes.
- 42Play again at a higher difficulty (Dynamic Seeds Challenge): Harvest 50-59 mangoes for 5 Tough Mangoes, or 60 mangoes for 3 Might Crystals (first time only) and 8 Tough Mangoes. The Golden Fan is also a reward for 50-59 mangoes on this challenge (first time only).
Tips:
- The
Similar guides you might like




100% Human-Written. Community Verified. Learn how Ludo.guide verifies content