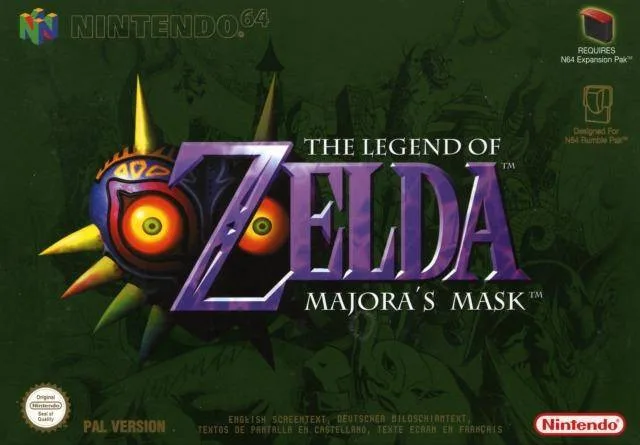
Welcome to Termina! In The Legend of Zelda: Majora's Mask, you're on a race against time – literally. With only three days until the moon crashes, you'll be reliving the same cycle, mastering the Ocarina of Time to rewind and repeat. This single-player adventure blends classic Zelda exploration with a unique, ticking clock that forces you to prioritize and strategize your every move. It’s a challenging, intricate world perfect for players who love a deep, engaging story and complex puzzles.
This guide is your essential companion to navigating the chaos. We’ll walk you through every dungeon, provide strategies for tough boss fights like the ones in Woodfall Temple and Stone Tower Temple, and help you track down every collectible, from Pieces of Heart to all the crucial masks. Whether you're aiming for a 100% completion or just need help overcoming a specific obstacle, we've got you covered.
Part 1
Embark on your journey through Termina! This guide covers the essential first steps in Majora's Mask, from the opening hours to your first major challenges.
Alright, so you've booted up Majora's Mask and are probably wondering what's going on. Don't worry, we've all been there! This guide is going to walk you through the very beginning of your adventure in Termina, making sure you don't get too lost or overwhelmed. We'll cover the initial setup, the unique three-day cycle, and how to get your bearings in Clock Town.
Think of this first part as getting your feet wet. You'll be introduced to the core mechanics, the urgent time limit, and the first few steps you need to take to start unraveling the mystery of the falling moon. It might seem a bit daunting at first, but stick with me, and we'll get through it together.
We'll break down:
- The initial sequence and how to get started.
- Understanding and leaning on the Three-Day Cycle.
- Navigating Clock Town as both Link and a Deku Scrub.
- Some early side activities to get you warmed up.
Ready to dive in? Let's get Link moving and try to stop that moon!
Part 2
Navigate Part 2 of The Legend of Zelda: Majora's Mask, covering sidequests, dungeons like Woodfall and Snowhead, and the Great Bay Coast.
- 1Explore the areas detailed in Part 2, which includes sections like Northern Peak, Great Bay Coast, and Ikana Canyon.
- 2Within these areas, you will encounter specific locations such as Woodfall Temple, Snowhead Temple, the Great Bay Temple, and the Stone Temple.
- 3Engage in sidequesting activities as outlined in section 3.2.4, 'Sidequesting part 2'.
- 4Progress through the narrative and explore locations like the Romani Ranch and Ikana Graveyard.
- 5The final area covered is The Moon, with a spoiler warning provided in section 3.6.1.
- Pay attention to the different dungeon layouts and Stray Fairy locations, as they may differ from the N64 version.
- Some items obtained through sidequests might be different, such as a bottle instead of a Piece of Heart.
- The guide is co-written by vinheim and KB.
Part 4
Learn the controls for The Legend of Zelda: Majora's Mask 3D, including button functions for movement, combat, and Ocarina.
- 1The control diagram is based on the New Nintendo 3DS XL, but this hardware is not required to play The Legend of Zelda: Majora's Mask 3D.
- 2The C Stick, ZR, and ZL buttons on the New Nintendo 3DS XL offer extra functions that are delegated to other buttons if needed, similar to the Circle Pad Pro.
- 3D-Pad: Used to move Link around and move cursors.
- 4Circle Pad: Move RIGHT when prompted to talk to Tatl.
- 5C Stick: Move the camera.
- 6A Button: Confirm selections, play notes on the Ocarina, put away items and your sword, and reel in your line when fishing.
- 7B Button: Unsheathe and swing your sword, cast your fishing line, and wiggle the lure when fishing.
- 8Y Button: Equip and use the selected item.
- 9Start Button: Access menus.
- 10Select Button: Access menus.
- 11Home Button: Access system menus.
- 12L/ZL Buttons: Located on the back of the console.
- 13R/ZR Buttons: Located on the back of the console.
- 14Volume Slider: Adjusts game volume.
- 153D Slider: Adjusts the 3D effect.
- 16Game Card Slot: Insert the game card here.
- 17Microphone: Used for certain game functions.
- 18Power Button: Turns the console on and off.
- 19Infrared LED: Located on the top of the console.
- 20Notifier LED: Located on the front of the console.
- 21Internal, 2D camera: Located on the top of the console.
- 22Top, 3D-compatible screen: The main display for the game.
- 23Touch Screen: The lower screen used for various interactions.
- 24Speaker: Outputs game audio.
- The Circle Pad Pro is not required for The Legend of Zelda: Majora's Mask 3D.
- Functions of the C Stick, ZR, and ZL are delegated to other buttons if you are not using a New Nintendo 3DS XL or Circle Pad Pro.
Part 5
Master The Legend of Zelda: Majora's Mask controls with this comprehensive guide detailing button mappings for the N64 version, including item usage, targeting, and shield.
This section provides a detailed breakdown of the controls for The Legend of Zelda: Majora's Mask. Understanding these button mappings is make-or-break for navigating the game effectively.
Controls:
| Button | Action |
|---|---|
| X Button | Equip and use selected item. Play note on Ocarina. |
| L Button | Target enemy, person, point of interest, etc. Play note on Ocarina. |
| ZL Button | Target enemy, person, point of interest, etc. Play note on Ocarina. |
| R Button | Raise your shield. Play note on Ocarina. Use with A to reel in your line faster when fishing. |
| ZR Button | Raise your shield. Play note on Ocarina. Use with A to reel in your line faster when fishing. |
| Start | Check the Bomber's Notebook (when obtained). |
| Select | Nothing. |
| Microphone | Nothing. |
| Touch Screen | Tap to zoom in and out on the map. Access and drag around items to appropriate slots. Use the I & II items as well as the Ocarina when gotten. |
Walkthrough Notes:
- Heart Pieces: Details the amount and location of Heart Pieces found in a section, with a running total. Note that this counter may become inaccurate later in the game.
- Heart Containers: Indicates where a Full Heart Container is obtained.
- Masks: Lists any Masks acquired within a section.
- Songs: Lists any new Songs learned in a section.
- Inventory: Records all items obtained, such as Rupees and bottles.
- Equipment: Lists offensive items like Swords and Bows.
- Upgrades: Details upgrades, primarily from Great Fairies.
- Quests & Quest Items: Lists quest items obtained, with references to other sections for detailed acquisition methods.
Section One: The Three Days
The game begins with an introductory scene mirroring the original version. After starting a new file and naming Link, the story commences.
Overture
Inventory: • Deku Nut
The opening sequence shows Skull Kid taking Epona. The player must chase after him. Bushes can be destroyed to find Rupees and hearts.
Similar guides you might like




100% Human-Written. Community Verified. Learn how Ludo.guide verifies content